How to Choose and Replace Windshield Wiper Blades Yourself
Streaking, squeaking, or skipping windshield wipers can make driving in rain dangerous. Learn how to inspect worn blades, find the correct replacements for your vehicle, install them safely, and test for a clear windshield.

What you’ll need
Tap to tick things off before you start.
Recognize When Your Wipers Reduce Visibility
Watch how the wiper blades move across the wet windshield, paying attention to water streaks and areas that remain uncleared in your direct line of sight. Even during steady rain, properly functioning blades should provide a clear view of the road. If each sweep leaves uneven patches of water, the blades may be dirty, worn, or damaged. Check their performance while safely parked, and correct visibility problems before driving.

Inspect the Wiper Rubber for Dirt and Damage
With your vehicle parked on level ground and the ignition off, examine each windshield wiper blade where its rubber edge contacts the glass. Look closely for accumulated dust, road grime, residue, cracks, or uneven wear. As shown, dirt can collect along the wiping edge and interfere with water removal. Also inspect the windshield for contamination. Avoid lifting the wiper arms unnecessarily, and never let an exposed metal arm snap against the glass.

Identify Cracked, Torn, or Separated Wiper Rubber
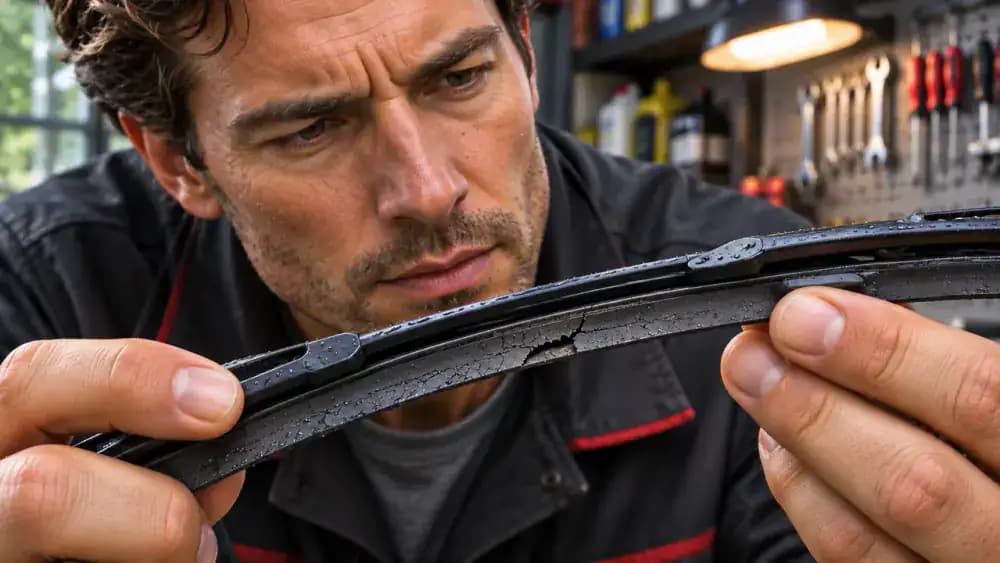
Examine the rubber wiping edge closely for hairline cracks, small tears, missing sections, or areas pulling away from the blade's supporting structure. The damaged blade shown on the workbench illustrates several signs of deterioration. Gently inspect the rubber without stretching or tearing it further. Even minor splits can prevent consistent contact with the windshield, causing streaks and uneven wiping. If you find structural damage, replace the blade rather than cleaning it.
Spot Skipping, Chattering, and Uneven Wiping Patterns
Watch the wiper blades move across a windshield wetted with washer fluid while the vehicle remains safely parked. Notice whether the rubber skips, chatters, or leaves curved water bands and partially uncleared areas, as illustrated. These symptoms can result from hardened rubber, accumulated contamination, or inconsistent blade contact. Check whether the problem occurs in one section or across the glass. Keep fingers clear of moving mechanisms and never operate wipers on ice.

Remove Dirt and Grime From the Wiper Blades
With the vehicle turned off, dampen a soft microfiber cloth with water or mild car wash solution. Following your vehicle's service-position instructions, securely hold the wiper arm and gently wipe along the rubber edge to remove accumulated grime. Place a folded towel beneath the arm to protect the windshield. Clean oily residue from the glass using a separate cloth. Avoid harsh chemicals, excessive pressure, or stretching the rubber during cleaning.

Test the Cleaned Wipers and Check for Remaining Streaks
Carefully lower each fully attached wiper blade onto the windshield, maintaining control of the arm until the rubber touches the glass. With the vehicle safely parked, wet the unobstructed windshield using washer fluid and briefly operate the wipers. Watch for smooth movement, clear glass, and remaining streaks like the one illustrated. If wiping remains uneven or the rubber is damaged, replace the blades. Keep fingers clear of moving mechanisms and never test on ice.

Check Your Vehicle's Required Wiper Blade Lengths
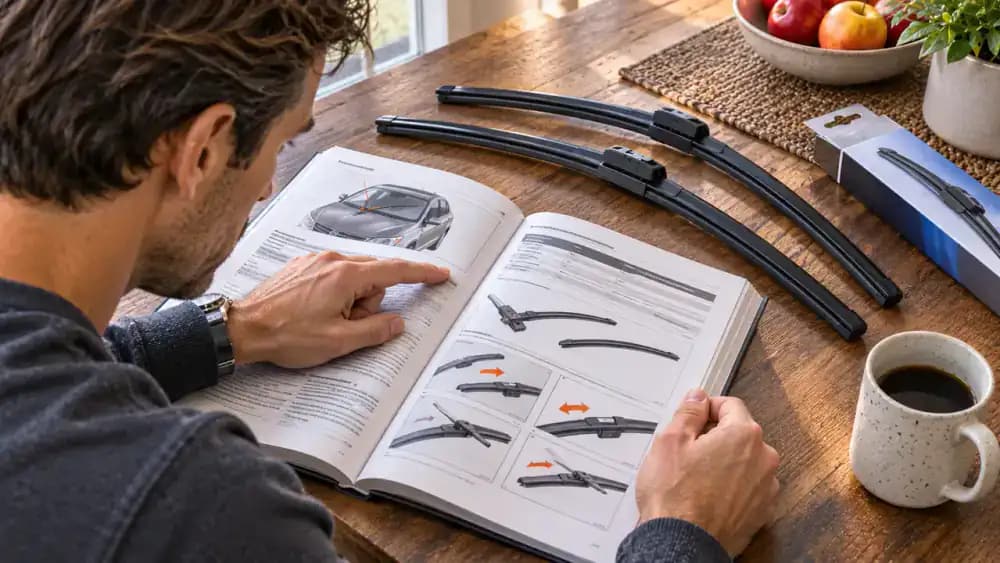
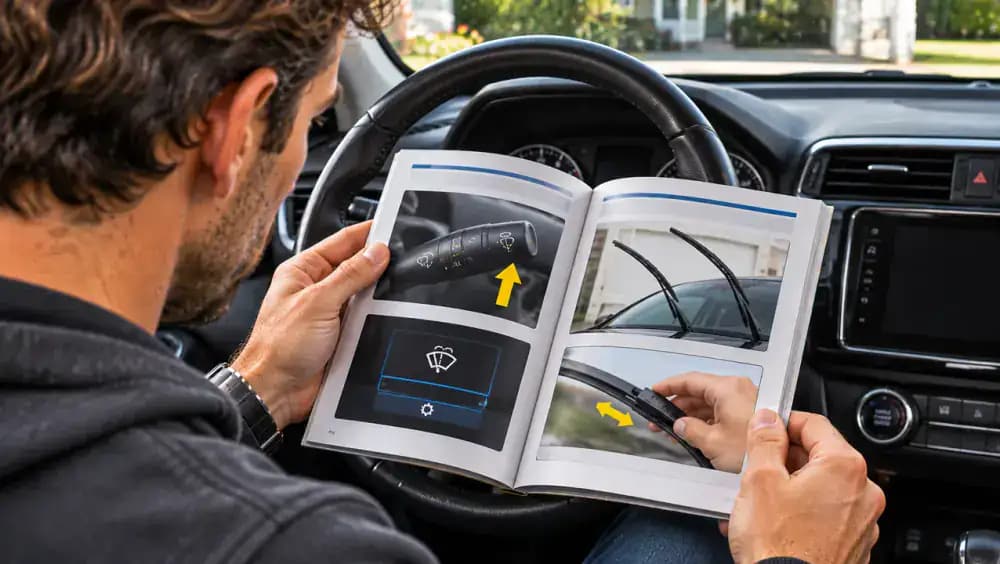
Open your vehicle owner's manual to the windshield wiper maintenance section and look for the specified blade lengths in inches. As illustrated, record the driver-side and passenger-side measurements separately because they may differ. If the manual does not provide sizes, consult a reputable vehicle-specific fitment guide using your car's year, make, and model. Check the rear wiper size if applicable, and confirm compatibility before purchasing replacement blades.
Verify Wiper Blade Compatibility Before Buying
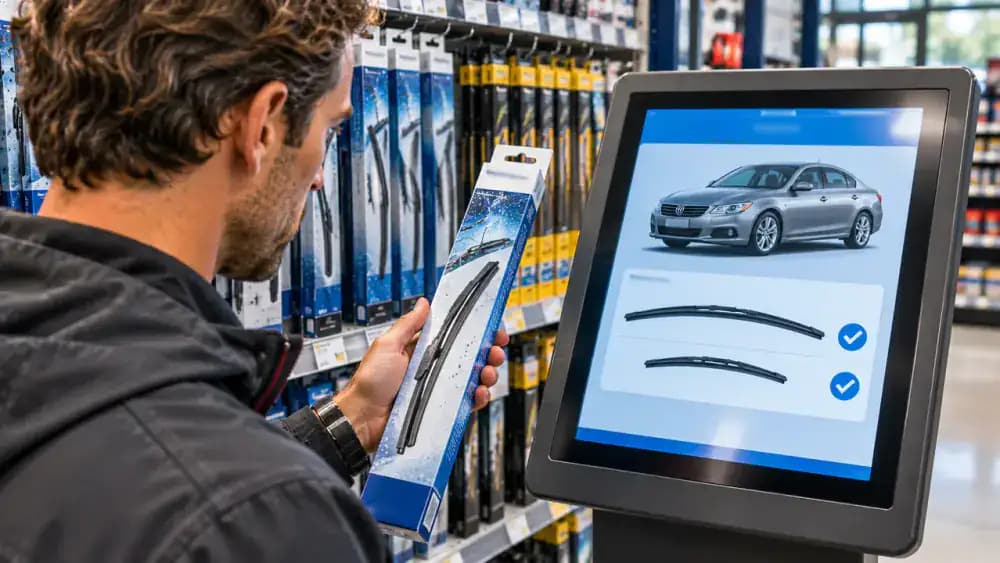
At an auto parts store, use a vehicle-specific fitment guide to enter your car's exact year, make, model, and trim when requested. Check the recommended driver-side and passenger-side blade lengths in inches, as shown on the lookup screen. Compare those recommendations with the sizes and compatibility information printed on each replacement package. Similar vehicles may use different wiper configurations, so verify both blade position and fitment before purchasing.
Confirm the Rear Wiper Blade Size and Connector Type
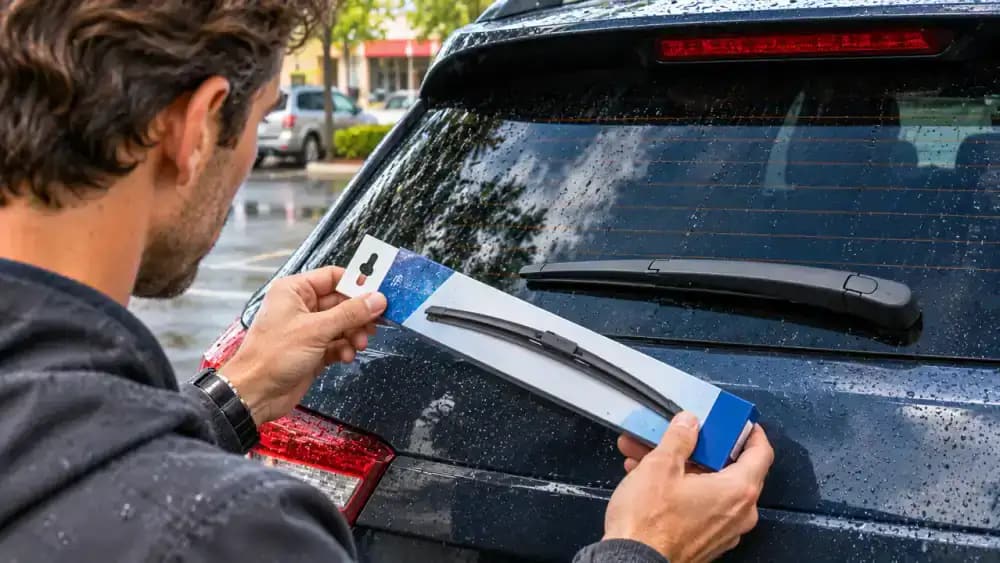
If your vehicle has a rear windshield wiper, check its specifications separately from the front blades. As shown, compare the existing rear blade with the replacement packaging while the vehicle is parked and turned off. Rear wipers are often shorter and may use different attachment mechanisms. Consult your owner's manual or a vehicle-specific fitment guide to verify both blade length and connector compatibility before purchasing.
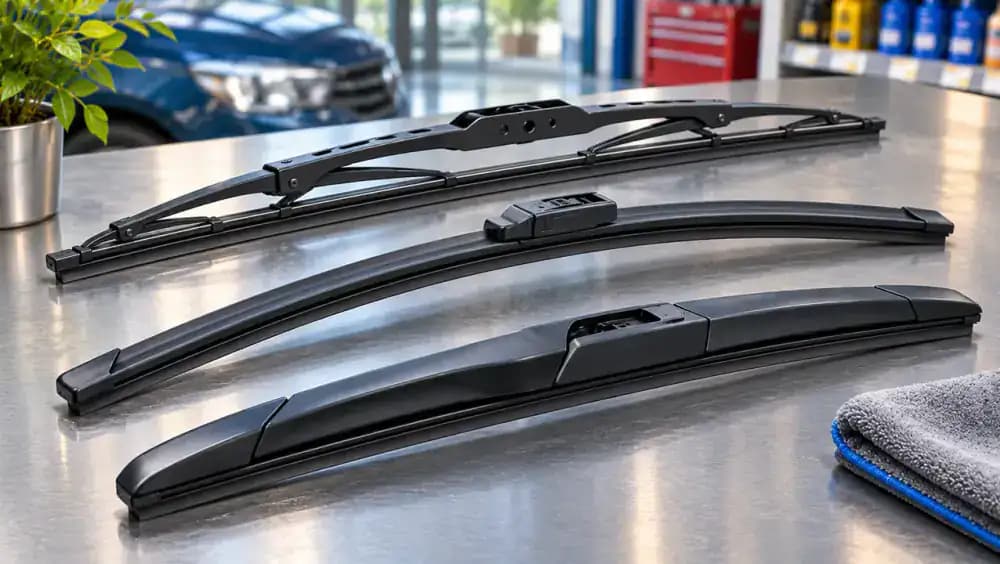
Choose Between Conventional, Beam, and Hybrid Wiper Blades
Compare the three common wiper blade designs before making your purchase. Conventional blades have an exposed metal frame with multiple pressure points, while beam blades use a flexible, low-profile structure. Hybrid blades combine internal support with a streamlined protective cover. As shown, each design has distinct construction features. Consider your vehicle's compatibility requirements, local weather conditions, durability, and budget. A properly fitting blade matters more than appearance alone.
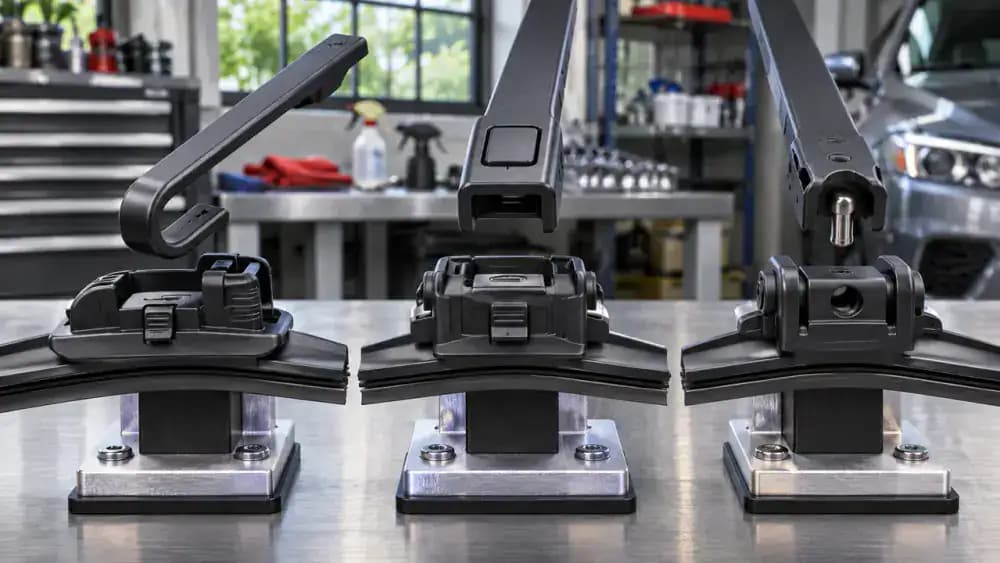
Match the Wiper Blade Connector to Your Vehicle
Examine the connection between your vehicle's wiper arm and blade before purchasing replacements. As illustrated, common attachment types include curved J-hook connectors, push-button locking mechanisms, and pin-style fittings. Each requires a compatible mounting system or the correct adapter. Compare your existing connector with the replacement blade's specifications and included hardware. Never force incompatible parts together, and confirm the connector can lock securely before proceeding with installation.
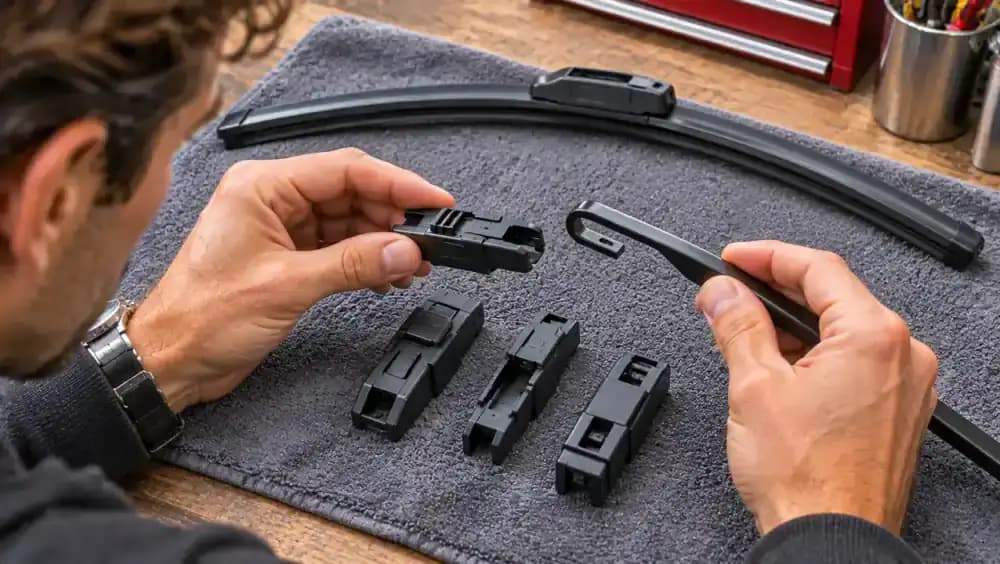
Select the Correct Adapter From the Replacement Package
Open the replacement wiper blade package and lay out the included adapters, blade, and installation instructions on a clean surface. As shown, compare the adapter shapes with your vehicle's connector type, paying attention to mounting channels and locking features. Some blades include multiple adapters, while others have one preinstalled. Follow the manufacturer's instructions to select the correct fitting. Never force mismatched components together, and verify that the adapter locks securely.
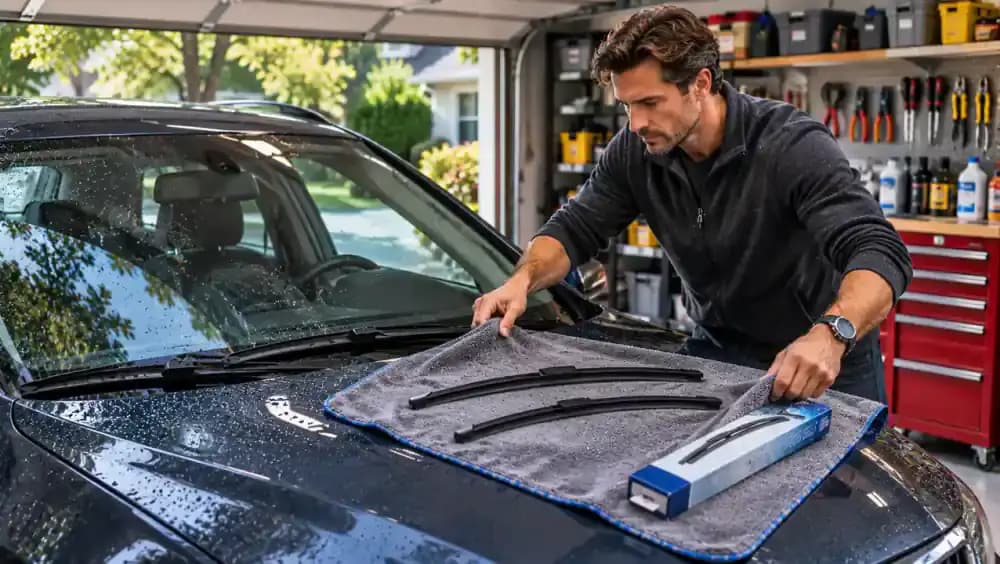
Park Safely and Gather Your Wiper Replacement Supplies
Park your vehicle on level ground in a safe location, engage the parking brake, and turn off the ignition. As shown, keep both original wiper blades resting against the windshield while preparing your supplies. Place the correctly sized replacement blades, compatible adapters, installation instructions, and a folded towel within easy reach. Check that the windshield is free of ice, leaves, and debris. Do not operate the wipers on an obstructed windshield.
Move the Wipers Into the Manufacturer's Service Position
Before lifting either wiper arm, consult your owner's manual to determine whether your vehicle requires a special service position. As illustrated, some vehicles use a built-in procedure to move the blades away from the hood, providing clearance for removal. Follow your manufacturer's exact instructions rather than forcing the arms upward. Keep your hands clear while the wipers move, then confirm they are stationary and the ignition is off before proceeding.
Place a Protective Towel Beneath the Wiper Arm
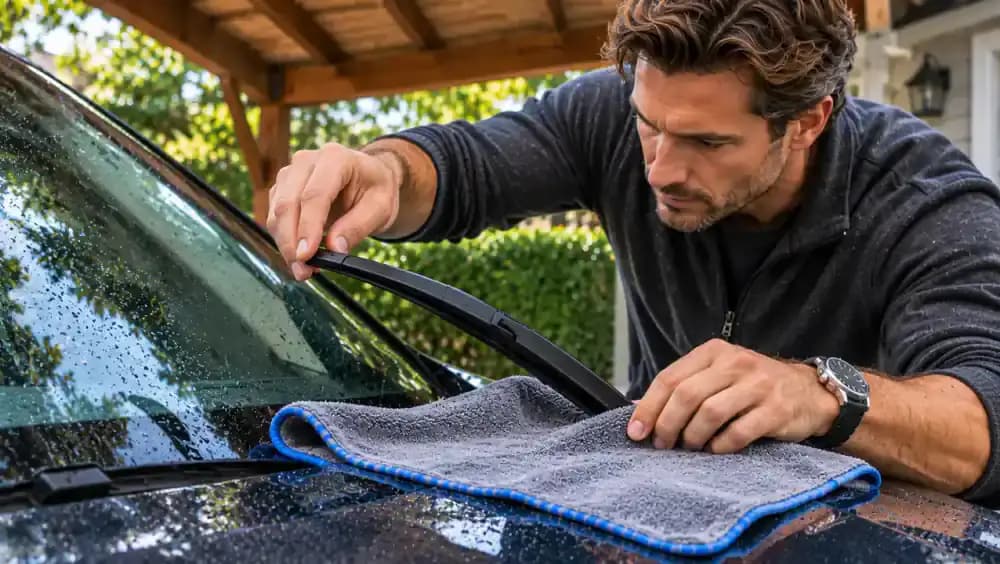
Place a thick folded microfiber towel on the windshield directly beneath the wiper arm, as shown. With the ignition off and the wipers in their manufacturer-approved position, firmly hold the arm while gently lifting it only as far as permitted. The spring-loaded metal arm can crack the windshield if released suddenly. Replace one blade at a time, maintain control throughout removal, and never leave a raised wiper arm unattended.
Release and Remove the Old J-Hook Wiper Blade
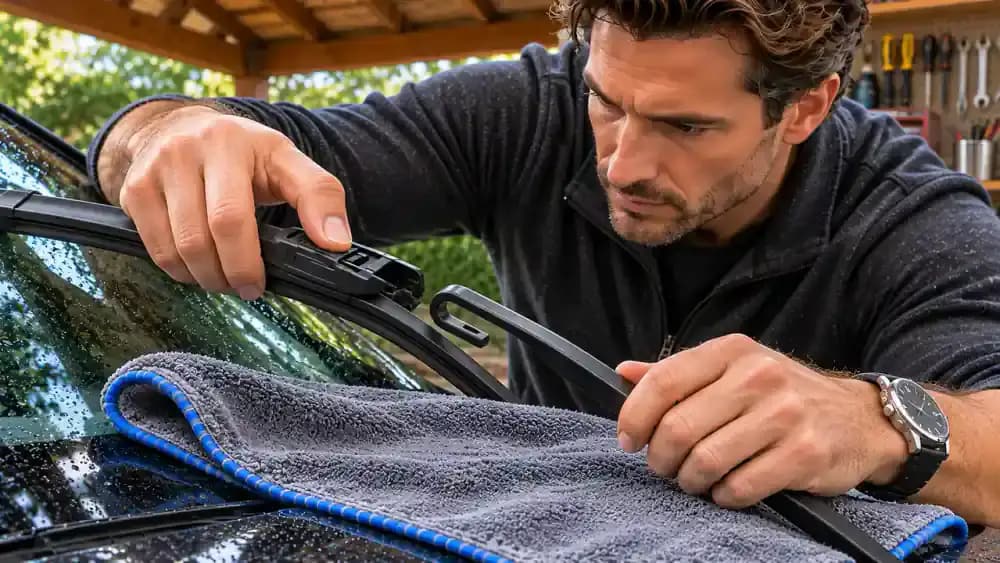
Locate the release tab on the J-hook connector while keeping a firm grip on the spring-loaded wiper arm. As shown, press the tab and carefully slide the old blade along the curved hook in the direction specified by the manufacturer. Once the connector disengages, lift the blade away without twisting or forcing it. Keep the exposed metal arm securely controlled, even with a folded towel protecting the windshield beneath it.
Attach the New Wiper Blade to the J-Hook Arm
Hold the spring-loaded wiper arm securely while positioning the new blade's compatible adapter beneath the curved J-hook. As shown, guide the hook into the adapter channel and slide the blade into place following the manufacturer's instructions. Continue until the locking latch engages without forcing the connection. Check that the blade sits straight and the connector is fully secured. Keep the protective towel beneath the arm until installation is complete.
Check the Blade Lock and Carefully Lower the Wiper Arm
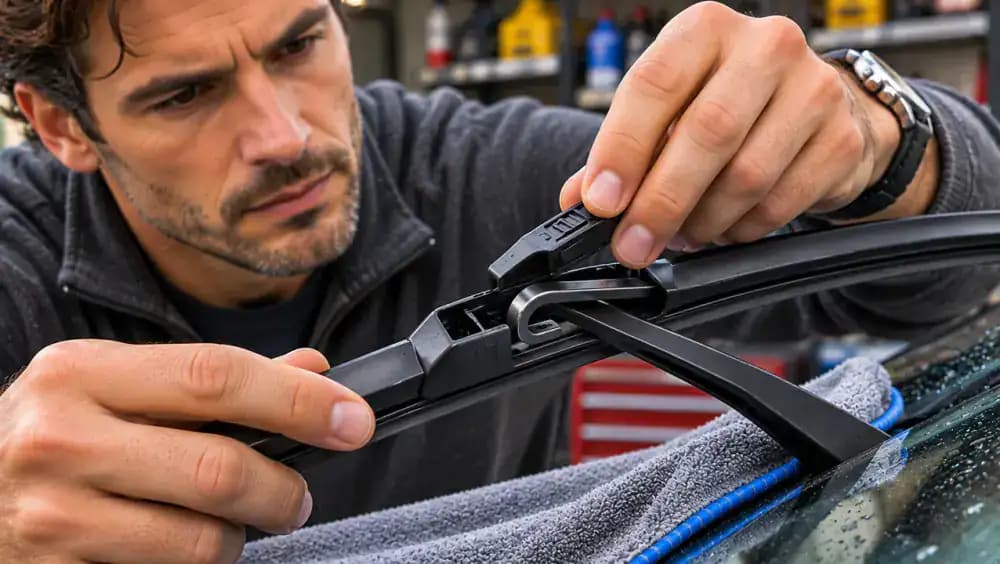
Keep one hand firmly controlling the spring-loaded wiper arm while gently checking the new blade near its connector. As shown, confirm the locking tab is fully engaged and the blade does not slide loose or twist out of position. Avoid excessive pulling or force. Once the connection is secure, slowly lower the complete assembly until the rubber rests evenly against the windshield. Remove the protective towel only after the blade is safely seated.
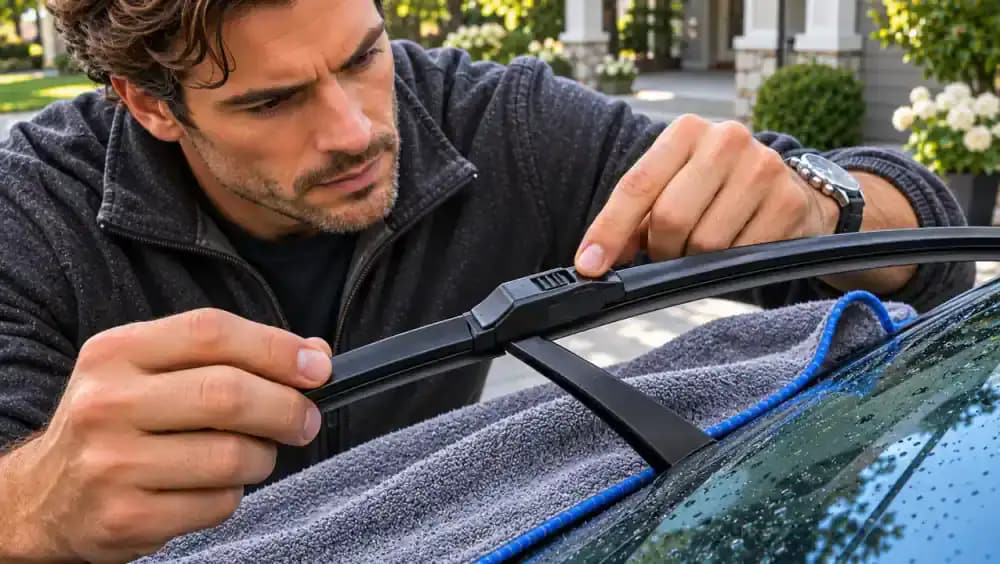
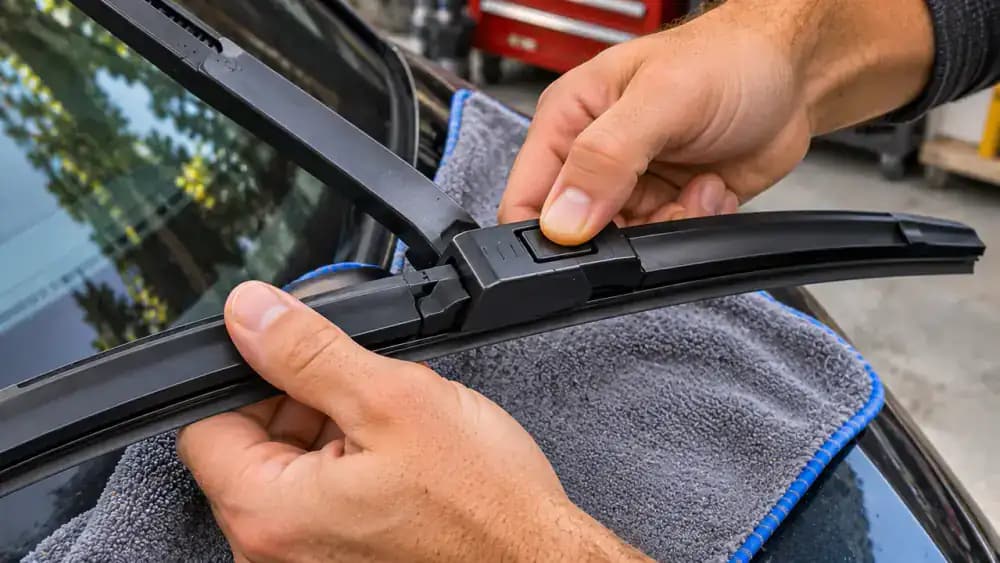
Remove and Install a Push-Button Wiper Blade
If your vehicle uses a push-button connector, locate the release button on the blade's attachment housing. Keep the spring-loaded arm securely controlled and the windshield protected with a folded towel. As shown, press the button and slide the old blade free according to the manufacturer's instructions. Align the compatible replacement, slide it into position until it locks, and gently check the connection before carefully lowering the fully attached blade onto the glass.
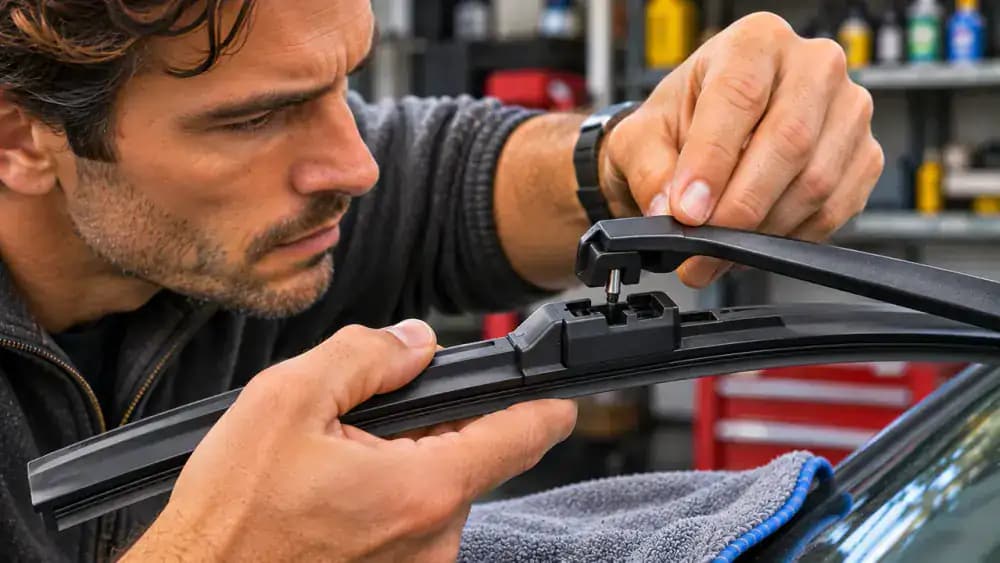
Remove and Install a Pin-Style Wiper Blade
Locate the small cylindrical metal pin securing the wiper blade and identify its retaining clip or locking mechanism. With the ignition off, firmly control the spring-loaded arm and protect the windshield with a folded towel. As shown, release the clip according to the manufacturer's instructions and carefully remove the old blade. Align the compatible replacement with the pin, engage its lock, verify the connection, and gently lower the fully attached blade.
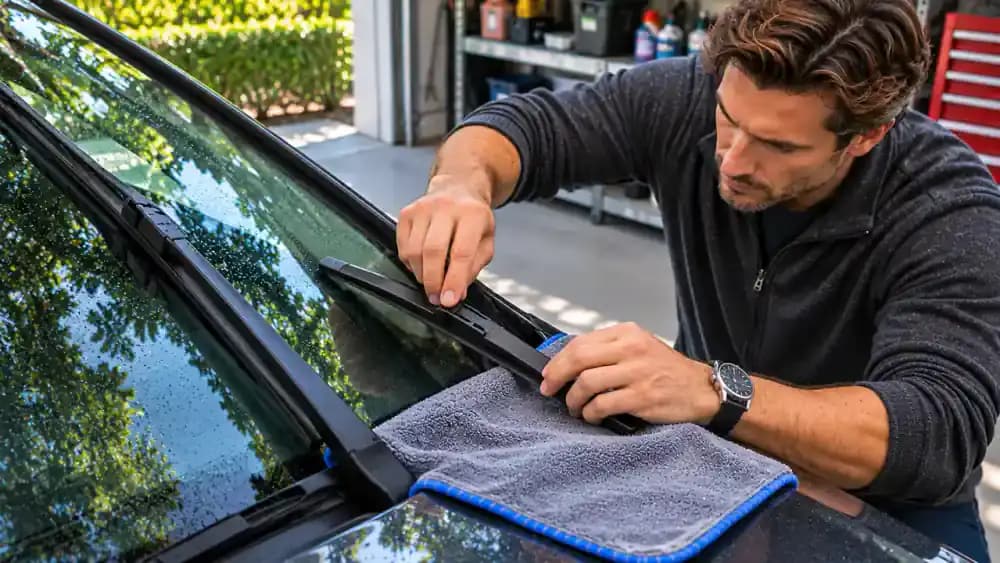
Install the Second Front Wiper Blade Safely
Confirm the remaining front wiper's blade length and connector type before starting. With the vehicle turned off, place a folded towel beneath the arm and maintain a firm grip while removing the old blade. Attach the compatible replacement according to the manufacturer's instructions, then gently check that its locking mechanism is secure. Carefully lower the fully attached blade onto the glass. Never leave an exposed metal arm unattended or allow it to snap downward.
Check Both Wiper Blades Before the First Test
With both replacement blades installed and the ignition off, inspect their resting positions on the windshield. As shown, confirm that each rubber edge contacts the glass evenly, both connectors are securely locked, and neither blade overlaps the other or touches surrounding trim. Remove the protective towel, packaging, and tools from the windshield area. If your vehicle uses a special wiper service position, follow the owner's manual to restore normal operation safely.
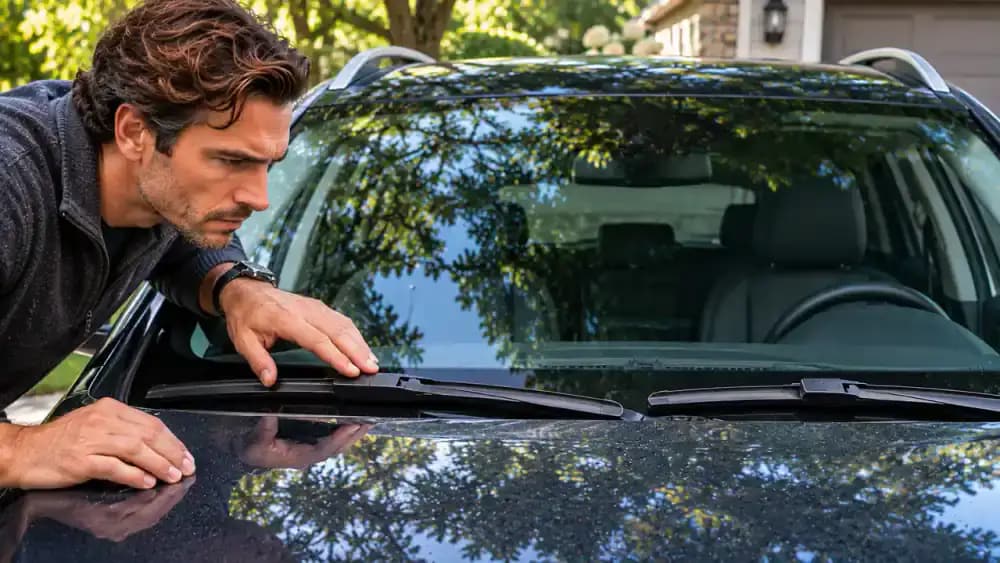
Test Your New Windshield Wipers With Washer Fluid
With both blades securely installed and returned to their normal operating positions, keep the vehicle parked with the parking brake engaged. Confirm the windshield is free of ice, debris, and other obstructions. As shown, activate the washer fluid and briefly run the wipers across the wet glass. Watch for smooth movement, complete wiping coverage, and consistent water removal. Keep your hands and tools clear of moving mechanisms throughout the test.
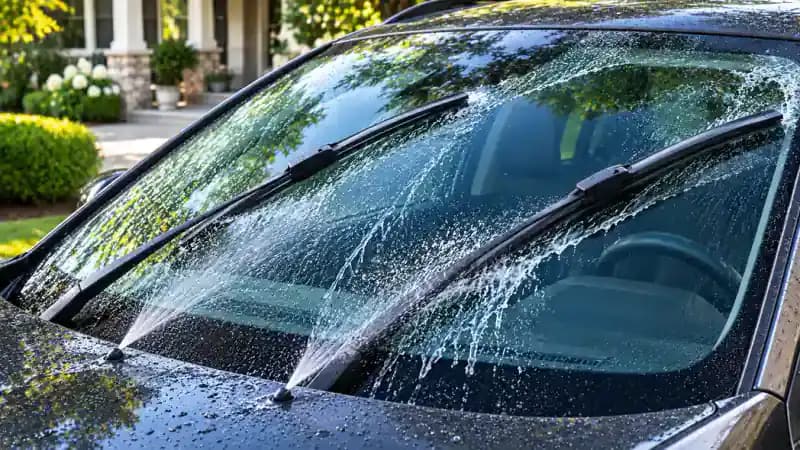
Identify and Fix Streaks Left by New Wiper Blades
Examine where streaks remain after testing the new blades. As illustrated, a narrow water line may indicate debris along the rubber edge, while a wider uncleared patch can suggest poor contact or incorrect fitment. Turn off the ignition before inspecting. Gently clean the windshield and blade edges, keeping the arm controlled and the glass protected. Check connector seating and alignment. If streaking persists, resolve the visibility problem before driving in rain.
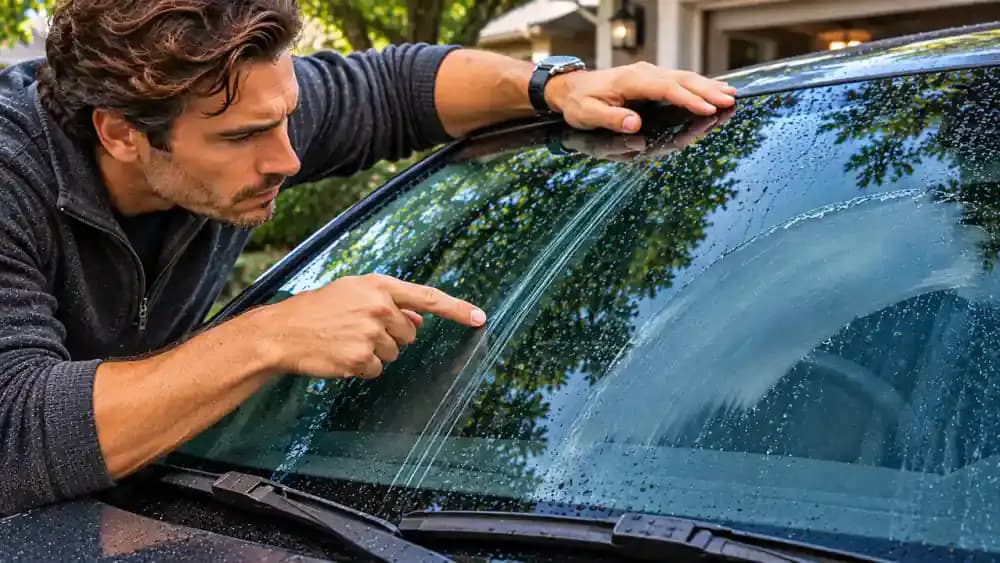
Have a Professional Inspect Persistent Wiper Problems
If new blades still leave large uncleared areas after cleaning and checking their installation, the wiper arm or windshield may be causing the problem. As shown, a qualified technician can inspect the arm's alignment, spring housing, and pivot for visible damage. A bent arm or weakened spring may prevent consistent blade contact. Never bend the arm or adjust its spring yourself. Have persistent visibility problems corrected before driving.
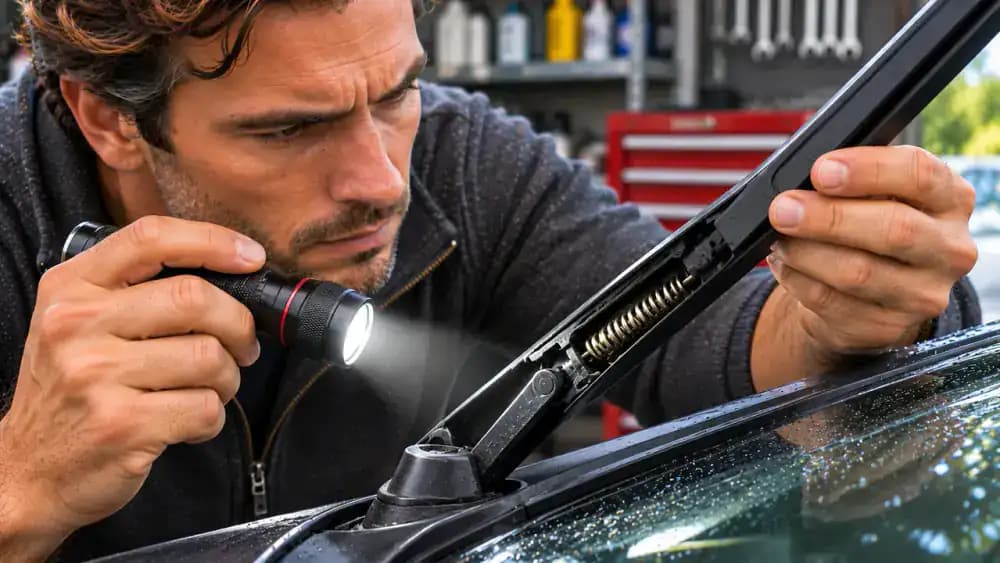
Protect Your Wiper Blades From Dirt, Snow, and Ice
Keep your windshield clean and periodically inspect the wiper rubber for cracks, splits, or trapped debris. In freezing weather, clear frost and snow from the glass using a plastic ice scraper and soft snow brush, as shown. Work carefully around the blades without pulling or bending them. Never operate windshield wipers on icy or obstructed glass or use them as ice scrapers. Clean the rubber gently with a damp cloth when parked.

Save Your Wiper Blade Sizes and Replacement Details
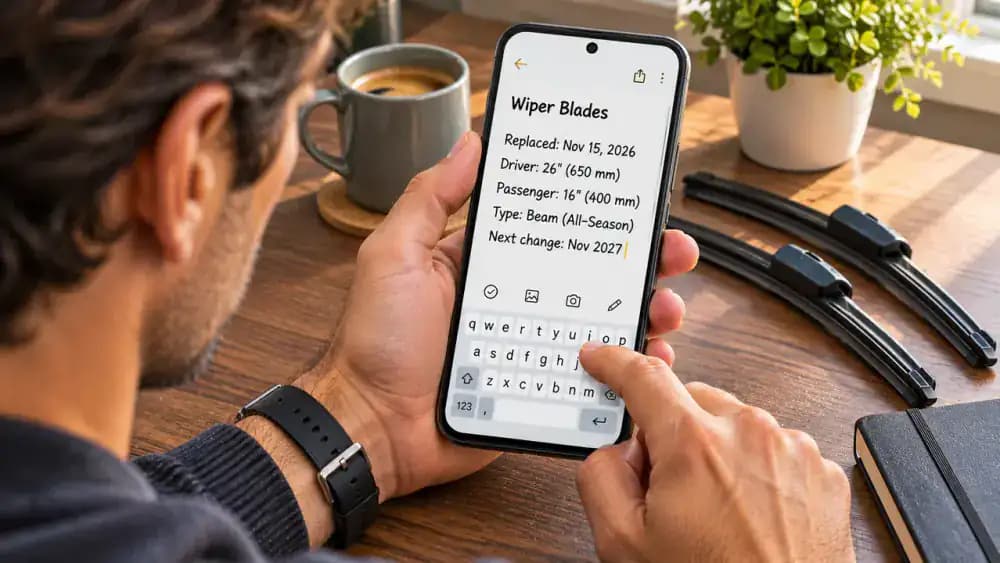
After installing your new wipers, open a vehicle maintenance log on your phone and record the replacement date, blade brand, and individual lengths in inches. As shown, include the driver-side, passenger-side, and rear blade sizes when applicable, along with connector types and adapter details. Keep the purchase receipt for reference. These records make future shopping easier and help track blade lifespan. Continue inspecting the rubber regularly for wear or damage.
Confirm Clear Windshield Visibility Before Driving
While safely parked, check your forward view from the driver's seat after testing the windshield wipers with washer fluid. As illustrated, the glass should be clear without significant streaks or missed patches. Confirm both blades remain securely attached, rest in their normal positions, and move smoothly during operation. If the wipers skip, loosen, or leave large areas uncleared, do not drive in rain. Correct the problem or seek professional inspection first.

Review Your Windshield Wiper Replacement Checklist
Use this six-point checklist whenever you replace windshield wiper blades: inspect the rubber, confirm blade sizes and connectors, prepare the parked vehicle, replace each blade safely, verify the locking mechanisms, and test visibility with washer fluid. As illustrated, every step contributes to a secure installation. Always control spring-loaded arms, protect the windshield, and follow manufacturer instructions. Never operate wipers on ice, and resolve poor visibility before driving in rain.
Keep Your Windshield Clear and Your Wipers Maintained
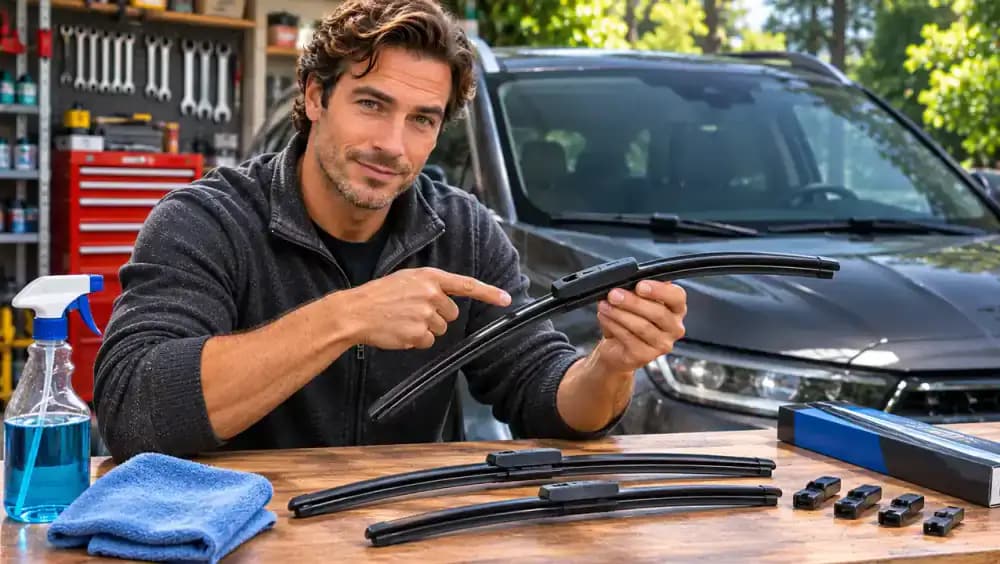
With both replacement blades securely installed, keep your windshield clean and inspect the rubber regularly for wear or damage. As shown, record the completed maintenance in your vehicle log and check that both blades rest properly against the glass. Clear visibility should always take priority over saving money on repairs. Address any wiping problems before driving, and explore the Car and Commute Fixes playlist for more practical vehicle maintenance guidance.

You're driving through a heavy rainstorm when your windshield wipers start leaving streaks across the glass. Instead of clearing your view, they squeak, skip, or leave patches of water directly in your line of sight. Worn windshield wiper blades can quickly turn a routine drive into a dangerous situation, but replacing them is one of the simplest car maintenance jobs you can handle yourself. Before buying new blades, however, it's worth checking whether dirt or buildup is causing the problem. Sometimes a quick cleaning is all you need.
In this guide, you'll learn how to recognize worn wiper blades, find the correct sizes and connector types for your vehicle, and choose between conventional, beam, and hybrid designs. You'll also learn how to remove and install replacement blades without damaging your windshield, then test them for proper operation. With a few basic supplies and about 10 to 20 minutes, you can restore clear visibility without paying for unnecessary service. Just remember that safe installation and reliable wiping performance matter more than speed.
Where people go wrong
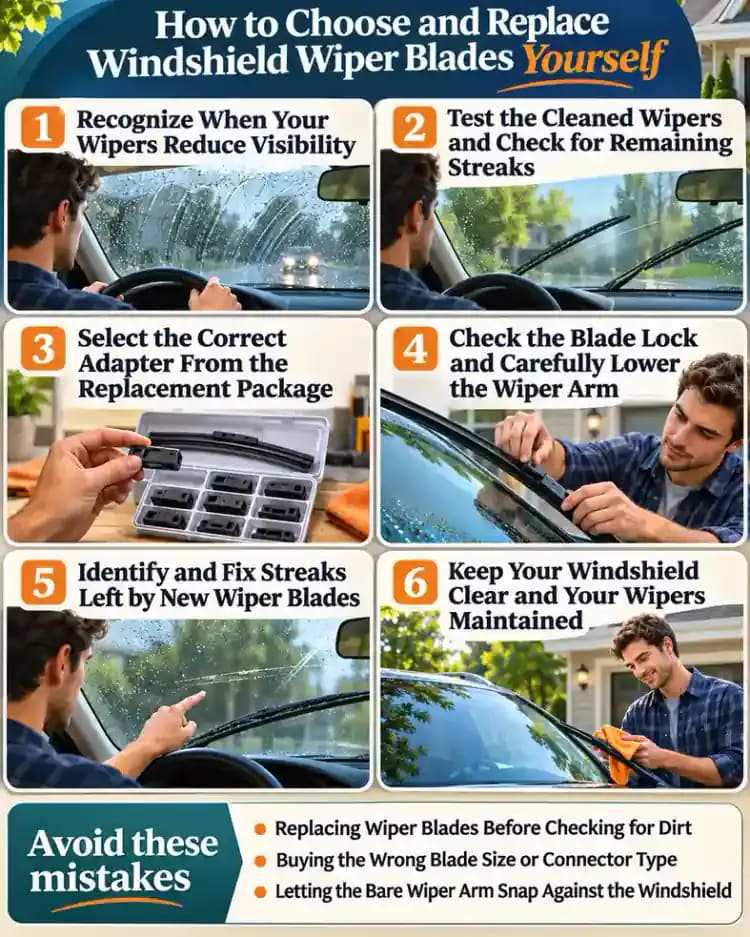
Replacing Wiper Blades Before Checking for Dirt. Streaking, squeaking, and uneven wiping do not always mean your blades are worn out. Dirt on the rubber or contamination on the windshield can cause similar problems. Before purchasing replacements, inspect the rubber for cracks or damage and gently clean the blades with a damp cloth.
Buying the Wrong Blade Size or Connector Type. Not every windshield wiper blade fits every vehicle, and driver-side and passenger-side blades may require different lengths. Check your owner's manual and a vehicle-specific fitment guide before buying. Verify whether your vehicle uses a J-hook, push-button, or pin-style connector rather than choosing blades based on appearance or price.
Letting the Bare Wiper Arm Snap Against the Windshield. Once the old blade is removed, the exposed metal arm can crack or chip your windshield if released accidentally. Park safely, turn off the vehicle, follow any required service-position procedure, and place a folded towel over the glass. Keep a firm grip on the arm until the replacement locks securely.
Skipping the Wet Windshield Test After Installation. A replacement blade may appear correctly installed without being fully locked into its connector. After installing both blades, gently lower the arms, wet the unobstructed windshield with washer fluid, and check for streaks or skipping. Keep fingers away from moving parts, never operate wipers on ice, and correct poor visibility before driving.
Questions people ask
Look for streaking, skipping, squeaking, cracked rubber, or sections of the windshield that remain wet after wiping. However, dirt on the blades or windshield can cause similar symptoms. Gently clean the rubber and glass first. If the problems continue or the rubber is visibly damaged, replacement is the better option.
Fixed it?
Get one guide like this every Thursday.