How to Remove Greasy Film From Your Kitchen Sink Without Damaging It
Does your kitchen sink look clean but still feel slippery? Learn how to remove stubborn grease and oily residue with gentle cleaning methods that protect your sink's finish.

What you’ll need
Tap to tick things off before you start.
Check for the Slippery Film Before Cleaning
Run two clean fingertips gently across the bottom of your sink, especially where water and food residue tend to collect. Even if the stainless steel looks spotless, a slippery feeling or faint oily sheen may indicate leftover cooking grease. Look closely under good lighting for shiny patches around water droplets. Avoid adding more water immediately, since rinsing alone can spread the oil rather than lift it from the surface.

Understand Why Rinsing Leaves Grease Behind
Notice how the gentle stream of warm water forms droplets and flows around oily patches on the stainless steel surface. Cooking grease does not dissolve in water, so rinsing alone can spread residue across the basin instead of removing it. Before continuing, wipe away any visible oil with a paper towel and discard it in the trash. Mild dish soap will help loosen the remaining film for easier removal.
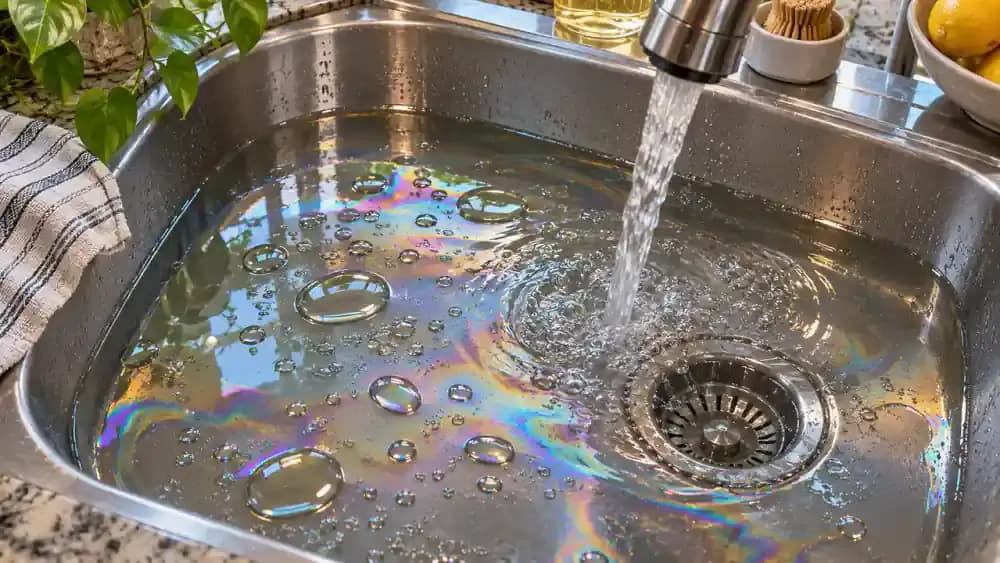
Identify Your Sink Material Before Choosing a Cleaner
Look at your sink and check the manufacturer's care instructions, as shown in the open booklet beside the stainless steel basin. Different materials, including porcelain, enamel, composite, and natural stone, may require different cleaning products. If you are unsure what your sink is made of, check its product documentation before proceeding. Choose only cleaners approved for that surface, and avoid abrasive scrubbers or harsh chemicals that could damage the finish.

Set Out Gentle Cleaning Supplies Beside the Sink
Arrange your supplies on the countertop within easy reach: paper towels, a soft non-scratch sponge, two clean microfiber cloths, mild dish soap, and a bowl of warm water. Keep a sink-safe degreaser nearby only if your sink manufacturer approves it. Use one microfiber cloth to remove loosened grease and reserve the other for drying. Leave steel wool, abrasive powders, and rough scouring pads out of your cleaning routine.

Read the Cleaner Label Before Opening the Bottle
Hold the cleaning bottle upright and turn it to read the back label before removing the cap. Check that the product is compatible with your sink material, then review any dilution, ventilation, and contact-time requirements. Follow the manufacturer's directions rather than guessing how much cleaner to use. Choose one suitable product for the job, and never combine different cleaners, especially bleach with ammonia or acidic products.

Remove Dishes and Food Scraps Before Cleaning
Take any plates, utensils, and other items out of the sink and place them on the nearby countertop. With the faucet turned off, use a dry paper towel to gather vegetable scraps, crumbs, and other loose debris from the basin. Transfer everything directly into the trash instead of washing it down the drain. Pay special attention to particles near the drain opening so they cannot get pushed into the plumbing.

Blot Up Excess Cooking Oil With Paper Towels
Fold a fresh paper towel and gently press it against the outer edge of any visible oil puddles or greasy streaks. Work toward the center, allowing the towel to absorb the oil without spreading it across the sink. Replace the paper towel whenever it becomes saturated, and place used towels directly into a lined trash can. Removing concentrated grease before washing helps prevent oily buildup inside your drainpipes.
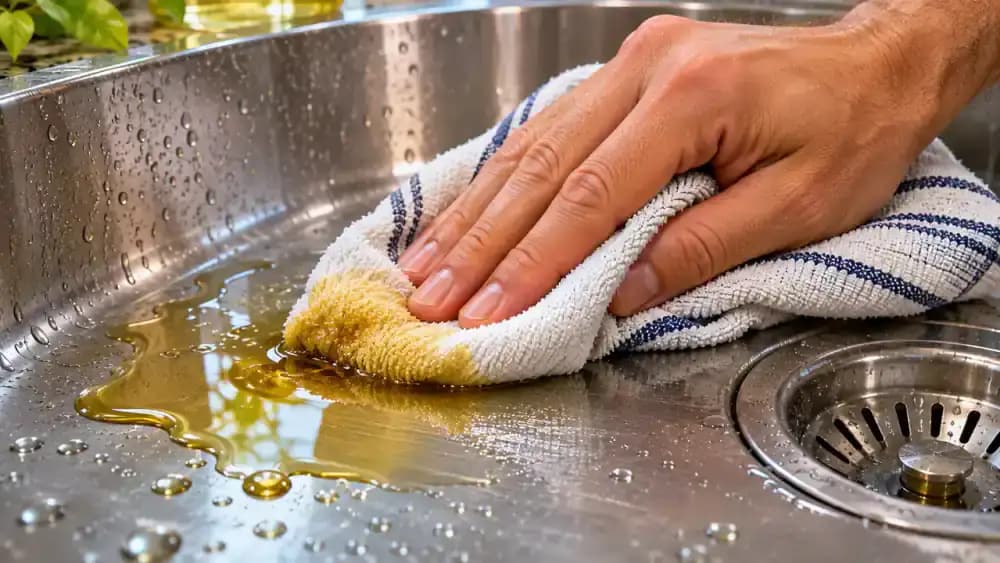
Wipe Away Thin Grease Streaks With a Dry Paper Towel
Use a fresh, dry paper towel to wipe the thin greasy streaks remaining along the sink's lower sidewalls and curved bottom edges. Work in short, controlled strokes rather than rubbing the residue across the basin. As the towel collects oil, refold it to expose a clean section before continuing. Check corners and curved surfaces carefully, since grease can collect there even after visible pools of oil have been removed.

Mix Mild Dish Soap With Warm Water
Fill a small bowl with approximately 2 cups of comfortably warm water, then add three drops of mild liquid dish soap. Stir gently with a clean spoon until the soap is evenly distributed and a few bubbles appear. The soap helps loosen oily residue so it can be wiped away more easily. Avoid boiling water, and never add bleach, ammonia, vinegar, or other cleaning chemicals to the mixture.

Apply the Soapy Solution With a Soft Sponge
Dip a clean, non-scratch sponge into the prepared dish soap solution, then gently squeeze out excess liquid over the bowl. The sponge should be damp, not dripping. Start with a small section of the sink basin, using light pressure and smooth, overlapping strokes to spread a thin layer of soapy moisture. Work methodically across the surface, rinsing the sponge when it becomes greasy to avoid spreading residue.

Clean the Entire Sink Basin With Overlapping Strokes
Move the soft, soapy sponge across the sink basin in steady, overlapping strokes, starting at the back wall and working toward the front edge. Slightly overlap each pass to avoid leaving narrow strips of greasy residue behind. Apply gentle, consistent pressure without scrubbing aggressively, especially on stainless steel. Follow a systematic pattern across the entire basin, and rinse the sponge whenever it becomes greasy to prevent redistributing loosened oil.

Rinse Your Sponge to Avoid Spreading Grease
Pause occasionally to inspect the sponge for oily buildup. If it looks greasy or feels slippery, dip it into a separate bowl of clean warm water and gently squeeze it several times to release trapped residue. Lift the sponge and squeeze out excess water before continuing. Replace cloudy rinse water as needed, disposing of concentrated grease without pouring it down the drain. This prevents loosened oil from spreading across cleaned areas.

Clean Greasy Splash Marks From the Sink Sidewalls
Hold your clean, soapy sponge flat against the vertical sink walls and move it upward in gentle, controlled strokes. Focus on greasy splash marks and dull streaks above the usual waterline, especially beneath and behind the faucet. Work in small, overlapping sections to cover the entire surface without excessive pressure. Keep the sponge lightly damp, and rinse it whenever grease accumulates to avoid transferring residue between sections.

Lift Trapped Grease From the Sink's Rounded Corners
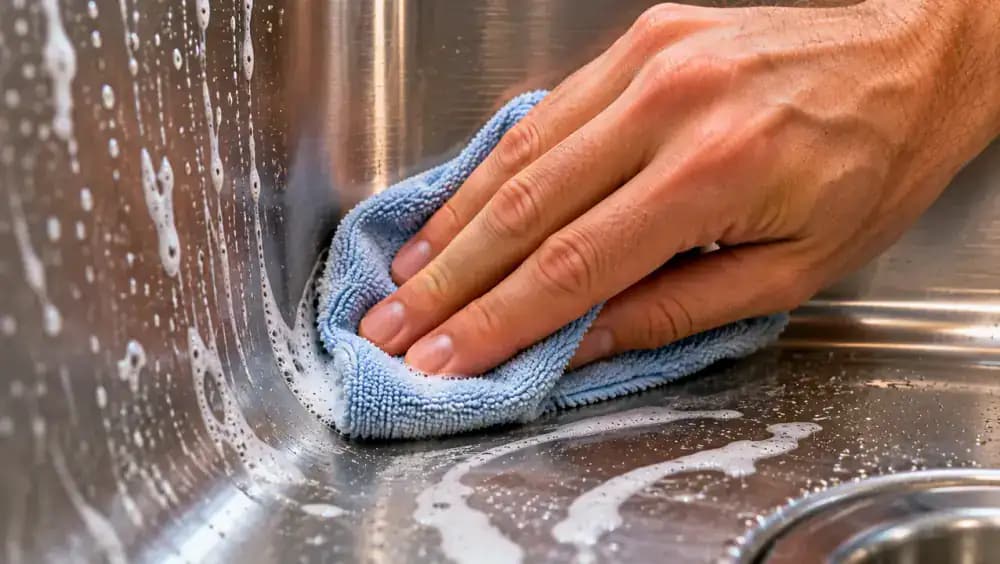
Fold a clean microfiber cloth around your fingertip and lightly dampen it with the prepared dish soap solution. Guide your covered finger gently along the curved junctions where the sink walls meet the basin floor. Follow each corner's shape to reach greasy residue that a flat sponge might miss. Refold the cloth to expose a clean section as needed, and avoid using sharp objects or abrasive tools to scrape stubborn buildup.
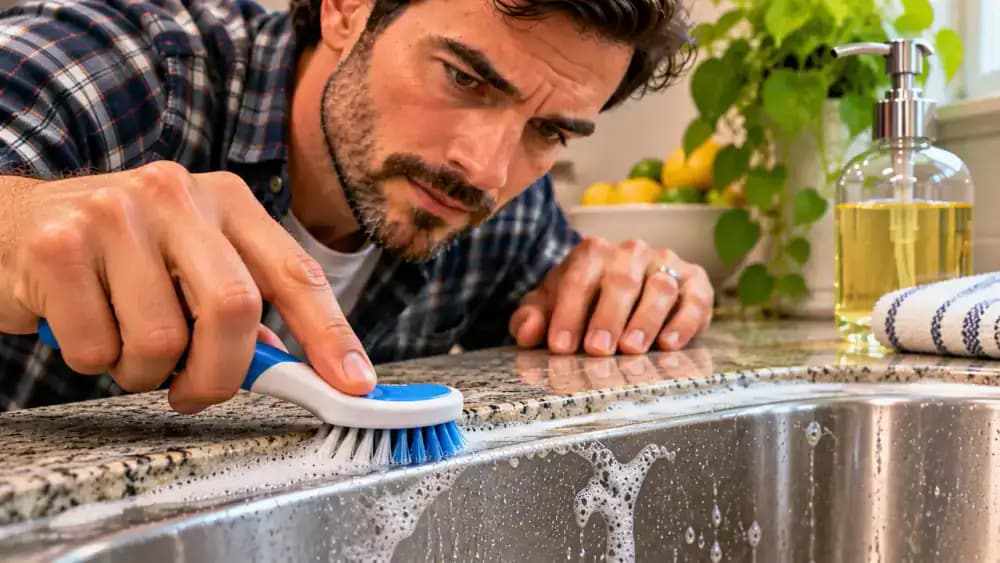
Brush Grease From Narrow Seams Around the Sink Rim
Lightly dampen a small, soft-bristled cleaning brush with the prepared dish soap solution. Guide the bristles along narrow seams where the sink rim meets the countertop, using short, gentle strokes to loosen trapped grease. Keep the brush nearly parallel to the seam and avoid pressing directly into protective seals. Work slowly around accessible edges, wiping away loosened residue with a clean microfiber cloth before it spreads onto surrounding surfaces.
Wipe Away Grease Around the Faucet Base
Wrap a clean microfiber cloth around your fingertip and lightly dampen it with the prepared dish soap solution. Gently trace the circular edge where the faucet base meets the stainless steel sink, removing greasy fingerprints and accumulated residue. Keep the cloth slightly damp rather than soaking wet to prevent moisture from entering mounting gaps. Work carefully around the entire fixture without lifting hardware, applying excessive pressure, or disturbing protective seals.
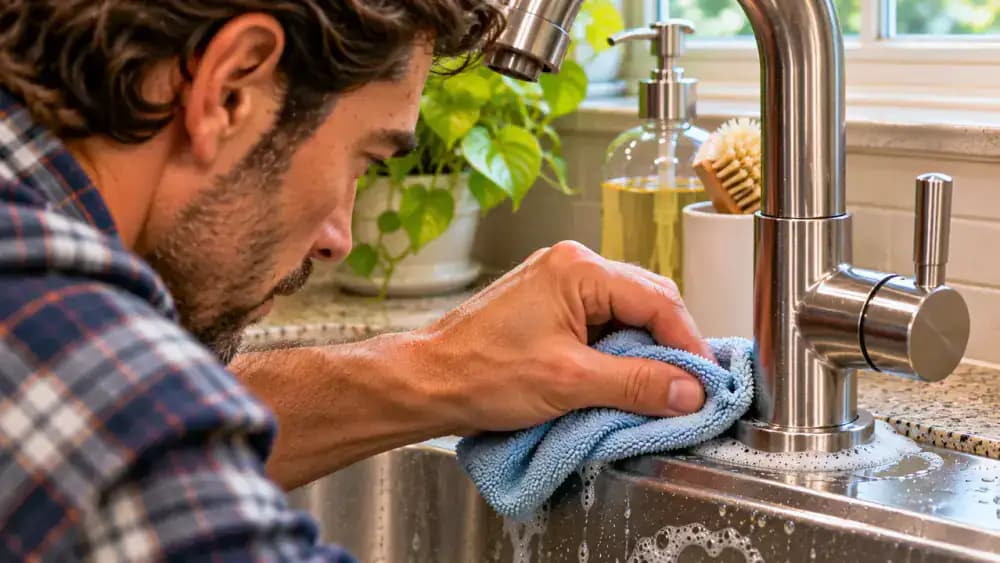
Clean the Greasy Ring Around the Sink Drain
Fold a fresh microfiber cloth into a small pad and lightly dampen it with the prepared dish soap solution. Gently wipe the exposed metal rim surrounding the drain opening using small, controlled circular motions. Focus on the greasy ring where residue tends to accumulate, allowing the cloth to collect loosened oil. Refold the cloth as needed, and avoid pushing food particles, concentrated grease, or cleaning tools into the drain.
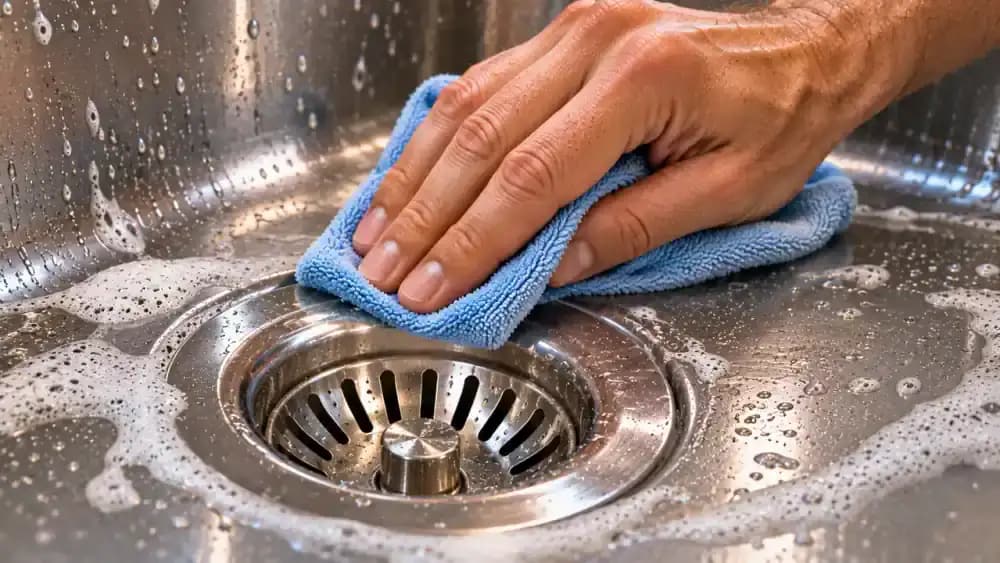
Remove and Clean the Sink's Drain Strainer
If your sink has a removable drain strainer, gently lift it straight out without using tools or disturbing fixed plumbing parts. Hold it over a lined trash container and use a paper towel to remove trapped food particles and oily debris. Place the strainer on a protective mat, then wipe its accessible mesh and rim with a soft cloth dampened with mild dish soap solution. Avoid bending the mesh or forcing anything loose.

Wipe Up Loosened Grease Before Rinsing the Sink
Take a fresh microfiber cloth and fold it into a rectangular pad. Starting at the upper sink walls, wipe downward toward the basin using controlled, overlapping strokes to collect the cloudy, grease-containing soap residue. Refold the cloth frequently to expose a clean section and prevent spreading oil onto cleaned surfaces. Lift away visible greasy buildup rather than pushing it toward the drain, and replace the cloth if it becomes heavily saturated.

Rinse Remaining Soap Residue With Gentle Warm Water
Turn on the faucet and use a gentle stream of comfortably warm water to rinse the sink. If you have a pull-down sprayer, select its low-pressure setting and begin along the upper sidewalls, gradually moving toward the basin. Allow the water to carry diluted soap residue toward the drain. Check corners, seams, and the sink rim for lingering suds, and avoid forceful spraying that could splash residue onto surrounding surfaces.
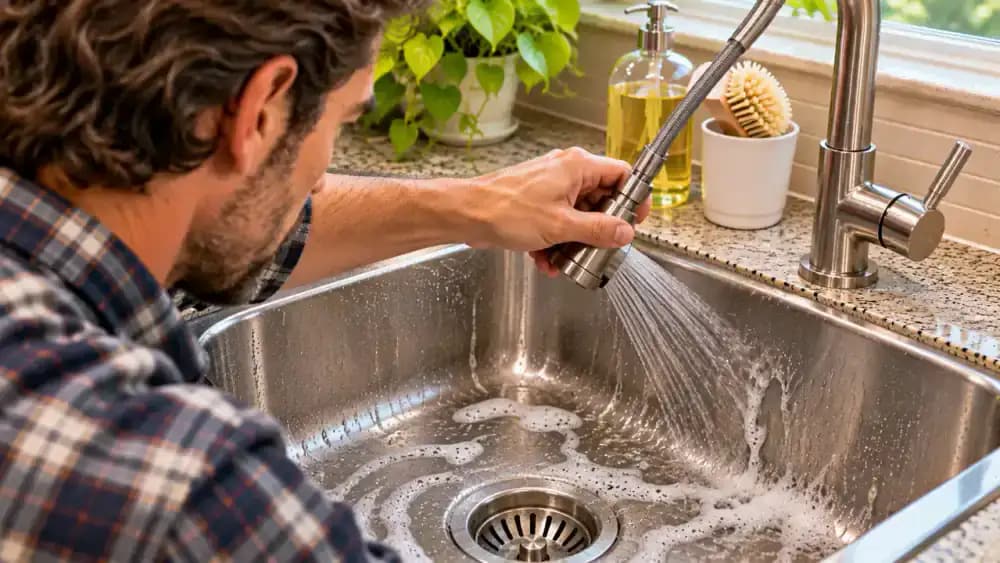
Remove Hidden Soap Residue From Sink Edges and Corners
Inspect the underside of the sink rim, rear corners, and exposed metal around the drain flange for leftover soap bubbles or cloudy streaks. Dampen a clean white microfiber cloth with fresh water and gently wipe these areas, following narrow edges without scraping the surface. Refold the cloth as it collects suds, and rinse it when necessary. Removing trapped cleaner helps prevent the sink from feeling slippery again after drying.

Dry the Sink Thoroughly to Reveal Remaining Grease
Fold a fresh, dry microfiber cloth into a broad pad and begin wiping along the upper inside edges of the sink. Work downward across the sidewalls and basin, absorbing water droplets rather than spreading them around. On stainless steel, follow the direction of the visible grain to protect the finish. Refold the cloth when it becomes damp, and pay attention to corners where moisture can collect and leave water spots.
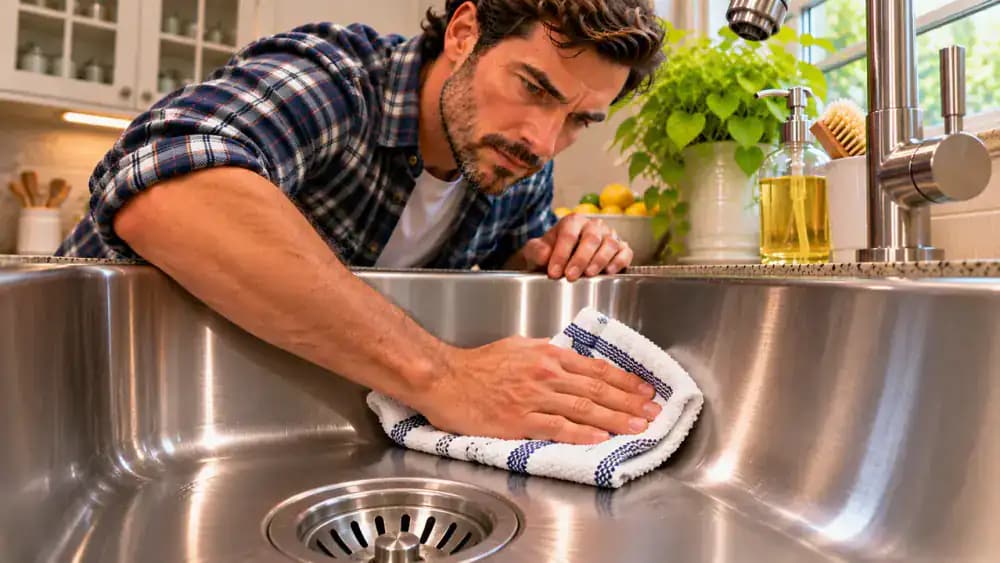
Use a Flashlight to Spot Lingering Greasy Streaks
Hold a compact flashlight about 6 inches above the dry sink and aim its beam across the stainless steel at a shallow angle. Slowly sweep the light over the basin, sidewalls, and corners, watching for cloudy streaks, uneven reflections, or suspicious shiny patches. Angled lighting can reveal residue that overhead lights may miss, although reflections alone cannot confirm grease. Make a mental note of any areas that need another gentle cleaning.

Spot-Clean Stubborn Grease Without Scrubbing the Entire Sink
Dampen a clean, non-scratch sponge with the mild dish soap solution and gently work over the remaining cloudy or greasy patch using short, controlled strokes. Keep the cleaning focused on the affected area rather than washing the entire basin again. Lift loosened residue with a fresh microfiber cloth, rinse the spot with a gentle stream of warm water, and dry thoroughly. Inspect the surface again before considering a stronger, sink-compatible cleaner.

Check the Dry Sink for Any Remaining Slippery Residue
With clean, dry hands, gently slide two fingertips across a dry section of the stainless steel basin. Pay attention to any lingering slippery or oily sensation that could indicate remaining grease. Compare several areas, including sections you recently spot-cleaned, using only light pressure. Touch alone cannot confirm that the surface is completely clean, so also check for visible streaks or uneven reflections. Repeat gentle cleaning if suspicious patches remain.

Wipe Excess Grease From Cookware Before Washing
Allow your frying pan to cool completely, then place it securely on a heat-resistant mat beside the sink. Use a folded paper towel to gently wipe leftover cooking oil and food residue from the pan's interior, avoiding pressure that could damage nonstick coatings. Place the greasy towel in the trash according to local disposal guidance. Removing excess oil before washing helps prevent greasy film from returning and reduces buildup inside your drainpipes.

Wipe Greasy Splashes From the Backsplash and Countertop
Use a clean teal microfiber cloth lightly dampened with a cleaner approved for your backsplash and countertop materials. Wipe greasy splash marks from the backsplash using gentle horizontal strokes, then clean the countertop edges and accessible area behind the faucet. Avoid forcing moisture into seams, electrical outlets, or faucet fittings. Remove any remaining cleaner residue and dry the surfaces with a separate cloth. Repeat regularly to prevent grease from accumulating.

Keep Your Kitchen Sink Grease-Free With a Daily Cleaning Routine
After washing dishes, collect leftover food crumbs with a paper towel and wipe away any visible grease before turning on the faucet. Use a soft sponge and mild dish soap to gently clean the basin, paying attention to corners and areas around the drain. Rinse thoroughly with warm water, then dry the sink using a fresh microfiber cloth. Making this a daily habit helps prevent stubborn oily film from returning.

Store Sink Cleaners Safely and Never Mix Chemicals
After cleaning, tightly close each product bottle and place it upright on a designated storage shelf, away from food and out of children's reach. Check that labels remain readable and containers are securely closed before shutting the cabinet. Always use products compatible with your sink material and follow their safety instructions. Never mix bleach with ammonia, vinegar, or other cleaners, as dangerous chemical reactions can occur.

Replace the Drain Strainer and Keep Your Sink Grease-Free
Place the cleaned, removable drain strainer back into its proper position, making sure it sits securely without forcing it. Hang your clean, dry microfiber cloth on a nearby towel rail and check that the basin, sidewalls, and faucet area are free of visible residue. To maintain the sink, remove excess cooking oil before washing dishes, clean regularly with compatible products, and dry thoroughly. Never pour concentrated grease down the drain or mix cleaning chemicals.

Your kitchen sink might look perfectly clean, but run your fingers across the surface and you may notice a slippery, greasy film that refuses to disappear. This stubborn residue builds up from cooking oils, food particles, and everyday dishwashing. Simply rinsing the sink with water often makes matters worse by spreading the grease instead of removing it. Over time, that thin layer can leave your sink feeling unpleasantly slick, even after you've given it a thorough rinse. Fortunately, removing greasy buildup doesn't require harsh chemicals, aggressive scrubbing, or expensive specialty cleaners.
With a little mild dish soap, warm water, and the right cleaning technique, you can break down oily residue and restore a fresh, clean feel without damaging your sink's finish. The key is removing excess grease first, cleaning systematically, and paying attention to easily overlooked areas like corners, sidewalls, and the drain rim. Before starting, check which cleaning products are safe for your sink material. This simple approach also helps prevent grease from returning as quickly.
Where people go wrong
Rinsing Grease Away With Water Alone. Running water over a greasy sink might make it look cleaner, but water alone often spreads the oily film instead of removing it. Wipe away visible grease with paper towels first, dispose of it in the trash, and use mild dish soap to break down the remaining residue.
Scrubbing With Abrasive Pads or Harsh Chemicals. Steel wool, rough scouring pads, and incompatible cleaning chemicals can scratch, dull, or damage your sink's finish. Check the manufacturer's care instructions before cleaning. Choose a soft sponge and a sink-safe cleaning product, and never mix household cleaning chemicals in an attempt to remove stubborn grease.
Spreading Grease Around With a Dirty Sponge. Using the same grease-soaked sponge across the entire sink can redistribute oily residue instead of lifting it away. Clean the basin in small sections with gentle, overlapping strokes. Rinse or replace the sponge frequently, and use a fresh microfiber cloth to remove loosened grease before the final rinse.
Ignoring Corners, Drain Edges, and Final Drying. Greasy residue frequently remains along sink corners, sidewalls, and the visible drain rim, even when the basin looks spotless. Gently clean these areas without pushing debris into the plumbing. Rinse thoroughly, dry with a clean microfiber cloth, and check for slippery patches that need another pass.

Questions people ask
Cooking oils and food residue can leave a thin, slippery film that water alone cannot effectively remove. Rinsing may simply spread the grease across the sink. Wipe away visible oil first, then use mild dish soap and a soft sponge to break down the remaining residue before rinsing and drying thoroughly.
Fixed it?
Get one guide like this every Thursday.