How to Safely Remove Hard Water Buildup From Your Dishwasher
Chalky deposits, cloudy interior walls, and clogged spray arm openings can signal hard water buildup in your dishwasher. Learn how to identify mineral scale, clean accessible parts safely, run an approved cleaning cycle, and help prevent deposits from returning.
What you’ll need
Tap to tick things off before you start.
Inspect Your Dishwasher for White Film and Mineral Deposits
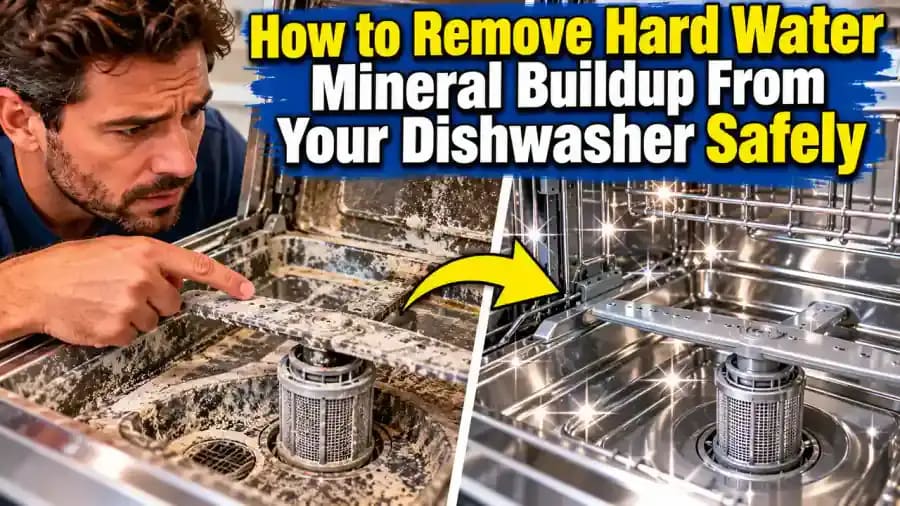
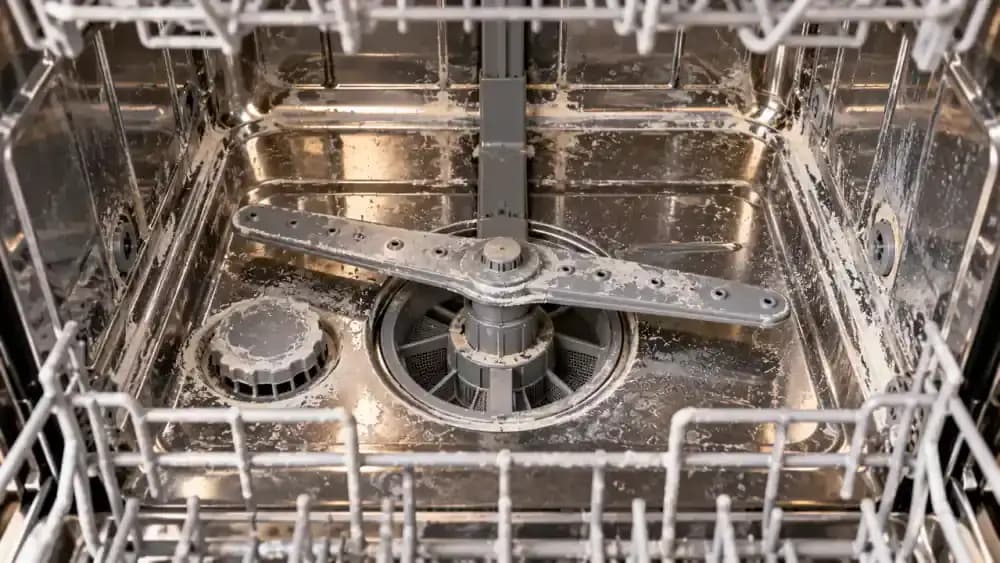
Open the dishwasher door and gently pull out the lower rack to inspect the interior. Look for cloudy white film on the stainless steel walls, chalky deposits along rack edges, and residue around the lower spray arm openings. Point out any areas with noticeable buildup without scraping or touching the deposits. Hard water minerals may be responsible, but detergent residue can look similar. Check several locations before deciding which cleaning method to use.

Understand How Hard Water Leaves Mineral Deposits
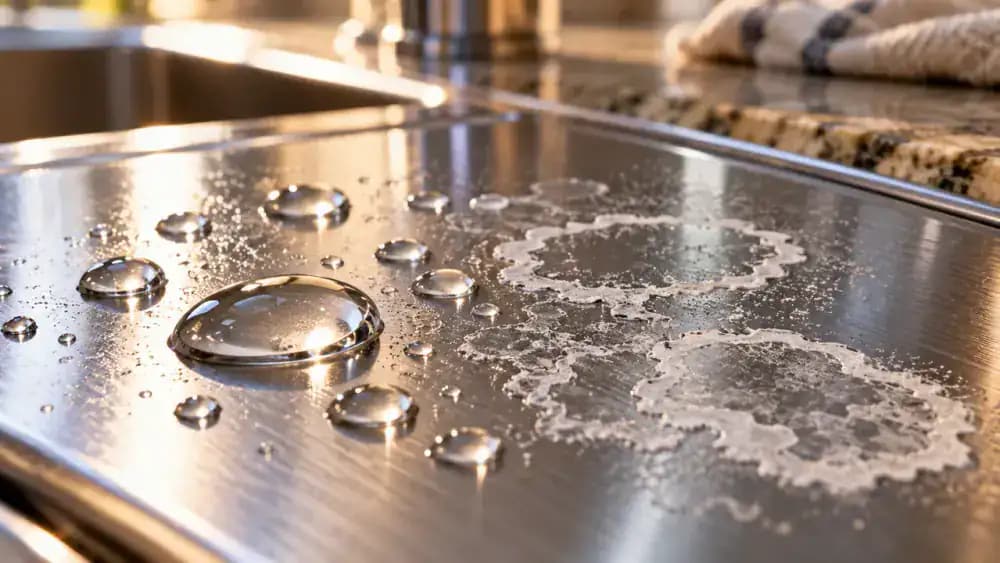
Look closely at the water droplets resting on the stainless steel surface. As the droplets evaporate, they leave behind faint white rings that illustrate how dissolved calcium and magnesium can accumulate over repeated dishwasher cycles. Gradually, these deposits form a thin, chalky film that becomes more noticeable over time. This explains why ordinary washing may not remove stubborn buildup. Check your local water hardness to assess your dishwasher's exposure to minerals.
Check Dishwasher Corners, Racks, and Spray Arm Openings
With the dishwasher empty and the lower rack pulled forward, use a small LED flashlight to inspect the rear corners and interior walls for chalky white patches. Shine the light along rack edges to spot crusty deposits without damaging their protective coating. Next, examine the lower spray arm openings for white mineral rings. Pay particular attention to these openings because excessive buildup can restrict water flow and affect cleaning performance.
Tell Mineral Scale Apart From Detergent Film and Grease
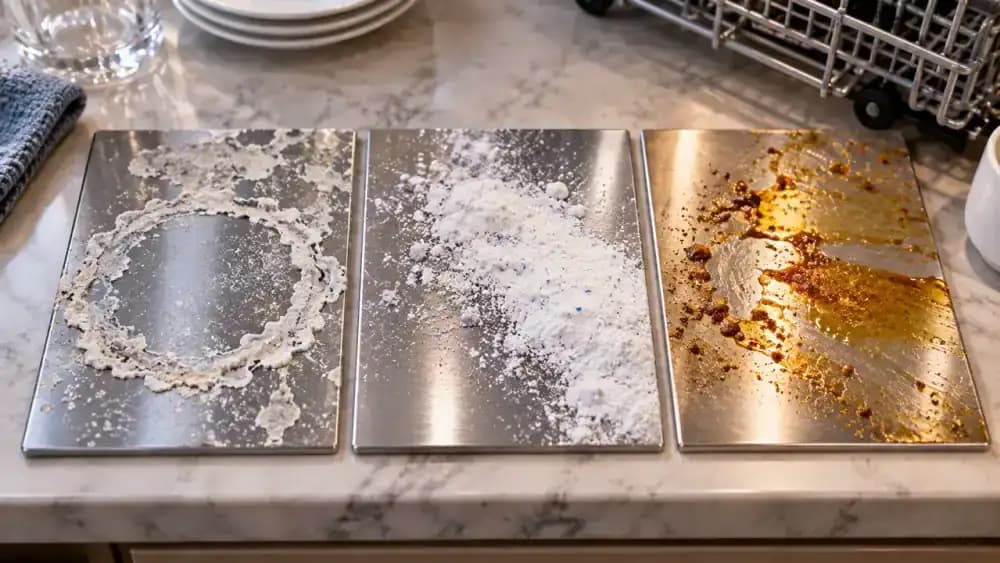
Compare the three residue samples on separate panels before selecting a cleaning method. Mineral scale typically looks chalky or crusty, detergent residue may appear powdery or feel slippery when wet, and grease often leaves a slick film with trapped food particles. Wearing gloves, gently touch each sample with a separate damp microfiber cloth to observe differences. These characteristics provide useful clues, but they cannot reliably confirm the residue's exact composition.
Track Recurring White Spots on Glasses and Utensils
Place a clear drinking glass beside one with cloudy white spots, then examine a stainless steel spoon for similar marks. Rotate the spotted glass under natural light to see the residue more clearly. Review your maintenance notes to determine whether these deposits return after regular dishwasher cycles. Recurring spots on multiple items may indicate hard water, but detergent problems can produce similar symptoms. Record when the buildup appears before choosing a treatment.

Locate Your Dishwasher Manual and Approved Cleaning Methods
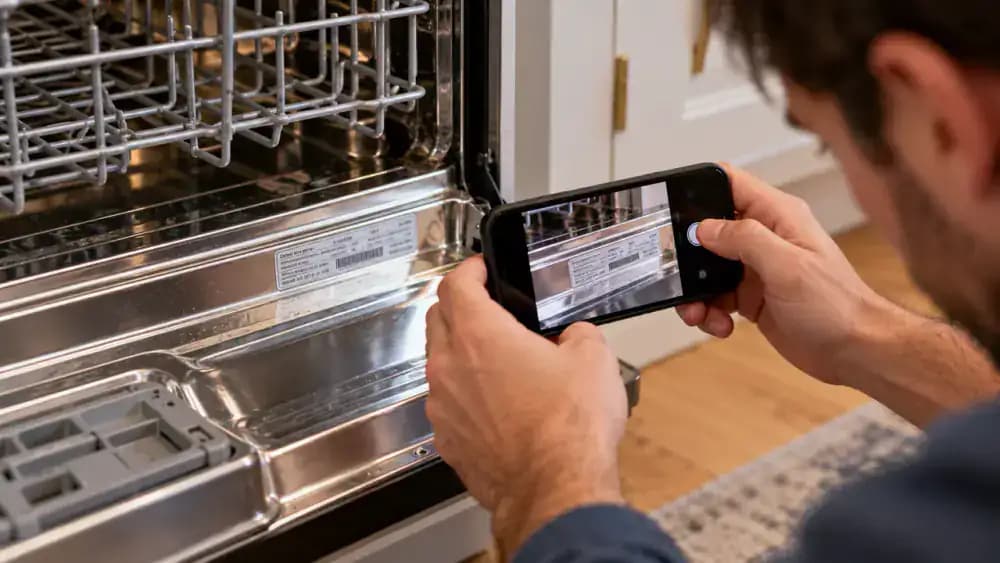
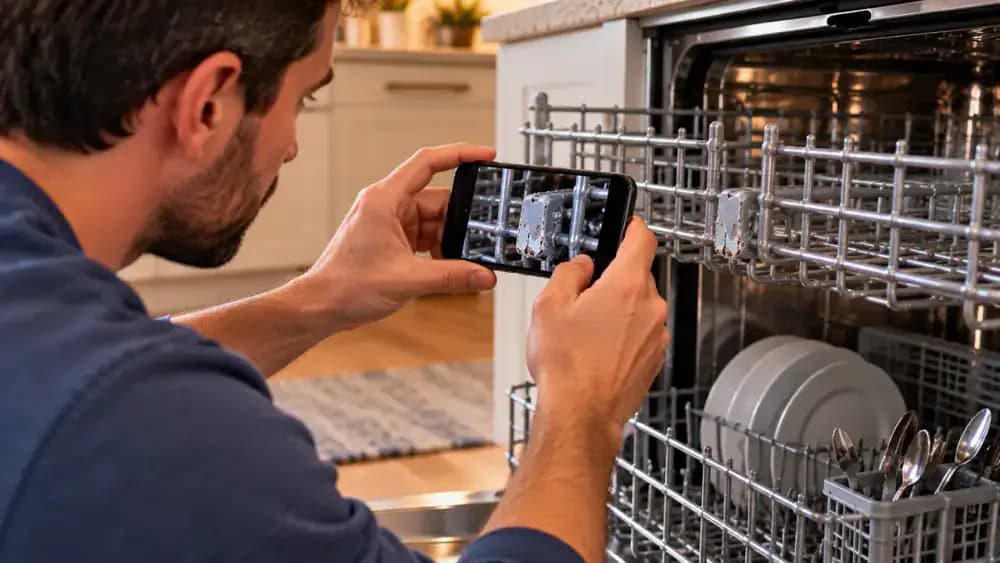
Open the dishwasher door and find the identification label, usually located along the door frame. Photograph the model number with your smartphone, then use it to locate the official manual on the manufacturer's website. Review the sections covering approved descaling products, safe interior cleaning methods, and recommended maintenance cycles. Check whether removable components require special handling. Following model-specific instructions helps prevent damage from incompatible cleaners or improper cleaning techniques.
Select a Manufacturer-Approved Dishwasher Descaler
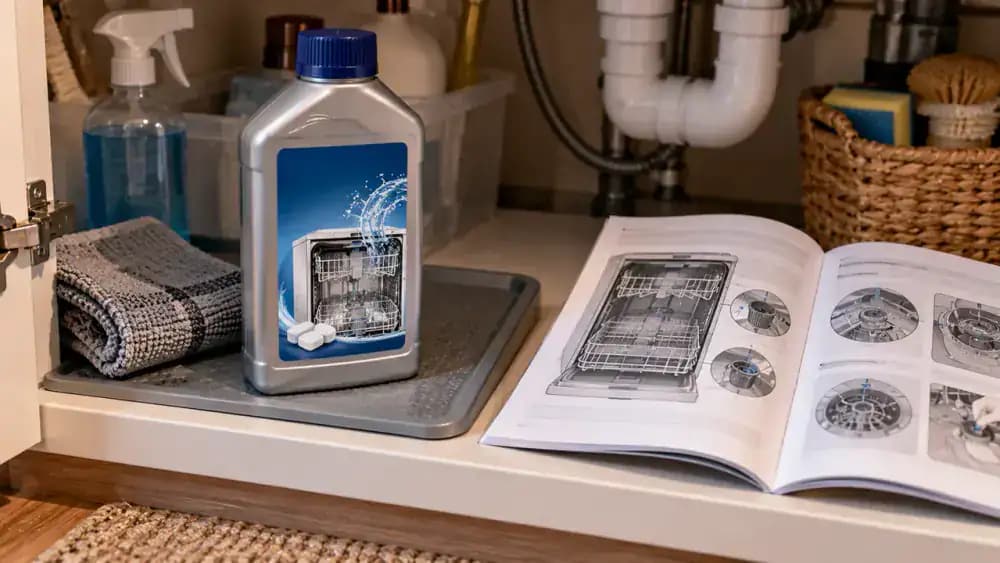
Remove a dishwasher descaler from storage and place it on a protective tray to shield nearby natural stone surfaces. Read the label carefully, checking appliance compatibility, material restrictions, recommended dosage, and application instructions. Compare these details with your dishwasher's official maintenance guide before selecting the product. Do not assume vinegar or other household acids are safe for every dishwasher. Keep bleach, detergent, and other cleaning chemicals separate during descaling.
Empty the Dishwasher and Prepare a Protected Cleaning Area
Remove all plates, glasses, utensils, and loose items from both dishwasher racks, placing them safely away from the work area. Confirm the appliance is switched off and its interior has cooled completely. Cover nearby natural stone countertops with a waterproof protective mat, then arrange a clean microfiber cloth and soft brush within reach. Keep the approved descaler closed and upright on a separate tray, away from exposed stone and sensitive metal trim.

Check for Loose Debris and Damaged Dishwasher Components
Examine the empty dishwasher floor, filter cover, and lower rack supports for loose food particles or visible damage. Wearing protective gloves, carefully pick up accessible debris and place it in a waste container. Look for cracked plastic, damaged rack coatings, and corrosion around metal components without scraping or disturbing them. Record any damaged areas in a maintenance notebook and consult your dishwasher manual before attempting further cleaning or repairs.

Gently Wipe Dishwasher Walls and Interior Corners
Dampen a clean microfiber cloth with plain water and squeeze out excess moisture. Gently wipe manufacturer-approved, undamaged interior walls using slow, overlapping strokes and light pressure. Fold the cloth around your fingers to reach accessible corners without disturbing seals or sensitive components. Loose surface residue may transfer onto the cloth, while stubborn mineral deposits remain. Avoid abrasive pads and aggressive scrubbing, leaving difficult buildup for the approved descaling treatment.

Remove Loose Mineral Deposits From Dishwasher Rack Edges
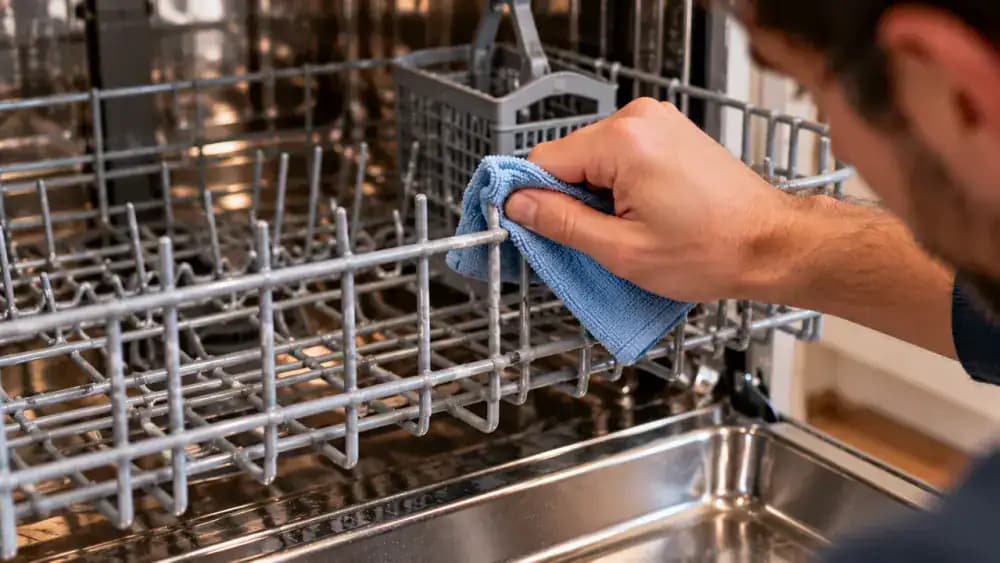
Pull the upper dishwasher rack fully forward and inspect coated wire intersections, joints, and curved corners for chalky deposits. Steady the rack with one hand while gently wiping undamaged areas with a slightly damp microfiber cloth. Follow the wire contours without bending them or applying excessive pressure. If you notice chipped protective coating or exposed metal, stop cleaning that section and consult the manufacturer. Leave stubborn deposits for approved treatment.
Gently Clean Mineral Deposits Around Spray Arm Openings
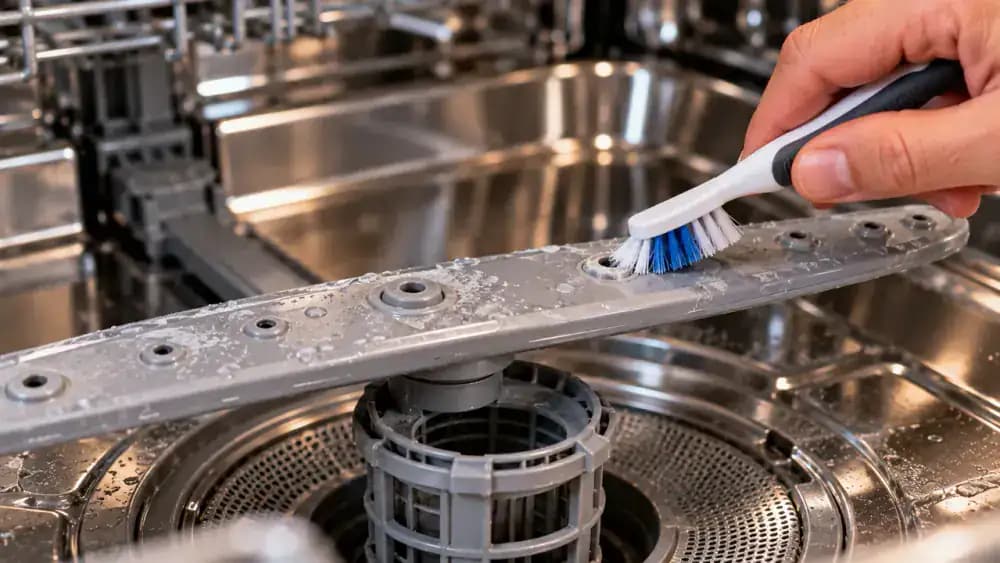
With the dishwasher switched off and cool, inspect the lower spray arm for chalky white deposits around its water outlets. If your appliance manual permits, steady the spray arm and gently brush loose residue from the exterior edges using a soft, water-dampened brush. Keep the bristles outside the openings to avoid damage. Never insert sharp objects or force stubborn blockages. Leave the spray arm installed unless manufacturer instructions specify otherwise.
Check Manufacturer Instructions Before Removing Dishwasher Parts
Place your dishwasher manual on a dry surface beside the open, switched-off appliance. Compare the illustrated spray arm release mechanism with the actual mounting connection without pulling or twisting it. Check the manual's separate instructions for accessing and cleaning the filter assembly. Release mechanisms vary between models, so never force a component loose. If removal is permitted, follow the exact procedure and organize small parts. Otherwise, leave everything installed.
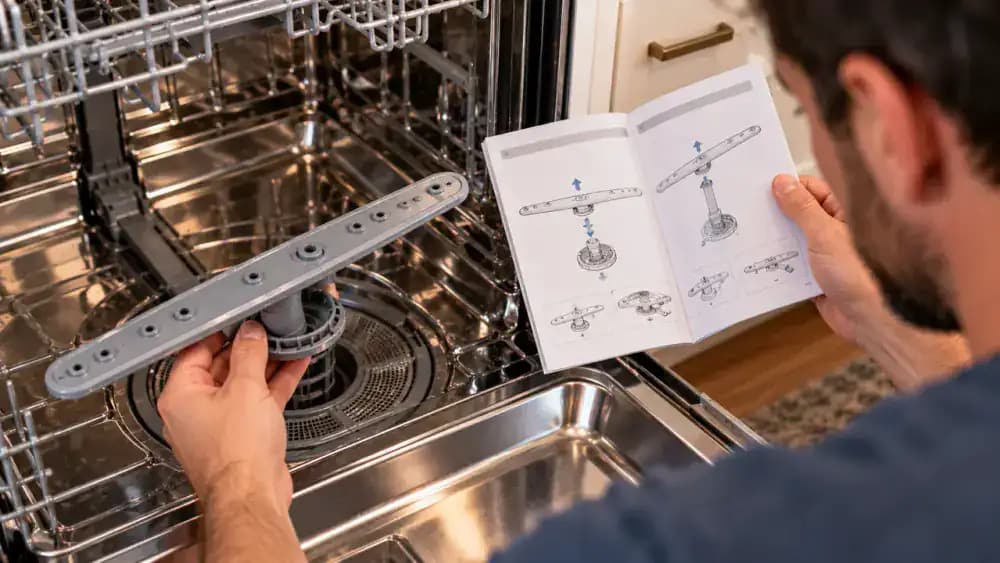
Rinse and Reinstall Approved Removable Dishwasher Parts
Place the manufacturer-approved removable filter on a clean towel beside the sink. Rinse it under a gentle stream of lukewarm water, rotating the assembly to reach accessible surfaces. If permitted, use a soft, damp brush on the plastic housing without damaging the fine mesh. Inspect seals and locking tabs for damage before reinstalling the filter. Follow your model's instructions to secure it properly, and never force the locking mechanism into place.
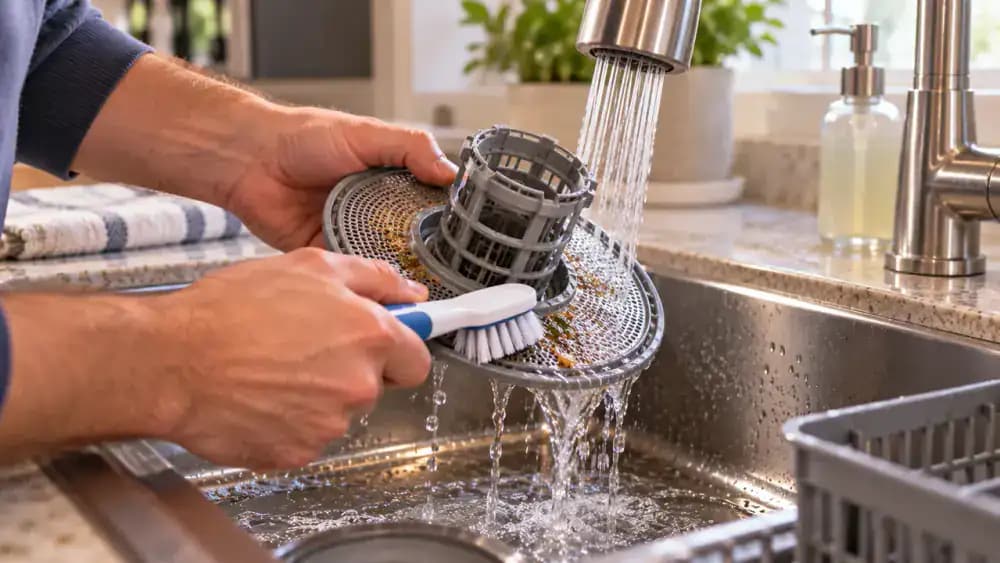
Verify Descaler Compatibility, Dosage, and Placement
Place the sealed dishwasher descaler beside your appliance maintenance guide and compare their instructions carefully. Check the product label for compatibility with your dishwasher, the correct dosage, and where the cleaner should be placed. Mark each requirement on a short checklist before proceeding. Different products have different application methods, so never substitute household acids or combine cleaners. Keep the container upright on a protective tray, away from natural stone and sensitive metal trim.
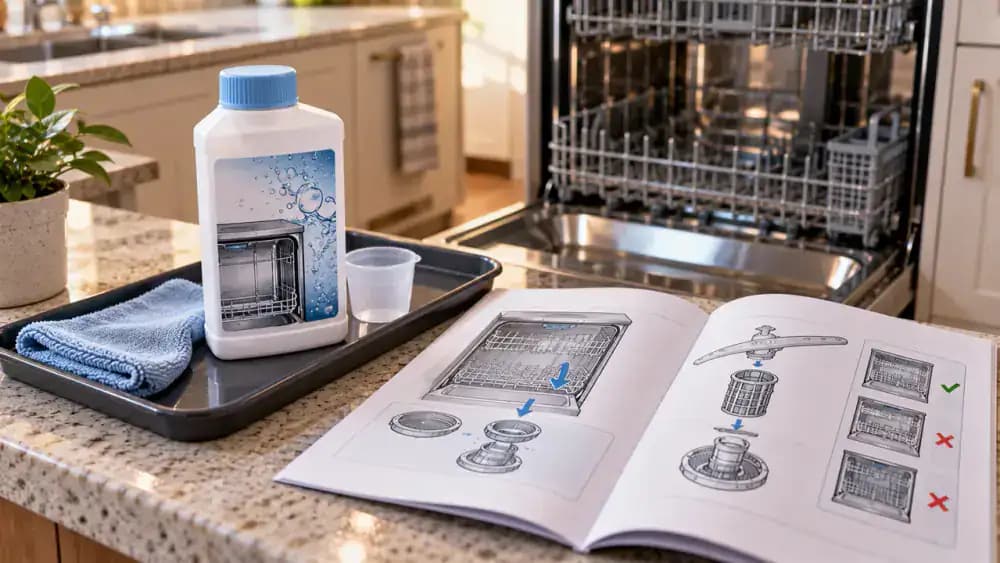
Place the Dishwasher Descaler According to Product Instructions
Check the approved descaler's label to confirm its required dosage and placement method. For products designed to sit upright in the lower rack, remove only the specified protective seal and position the container securely inside the empty dishwasher. Ensure it cannot tip over or obstruct the spray arm. Leave the detergent dispenser empty unless instructions explicitly require otherwise. Never add extra descaler or combine it with detergent, bleach, or other cleaners.
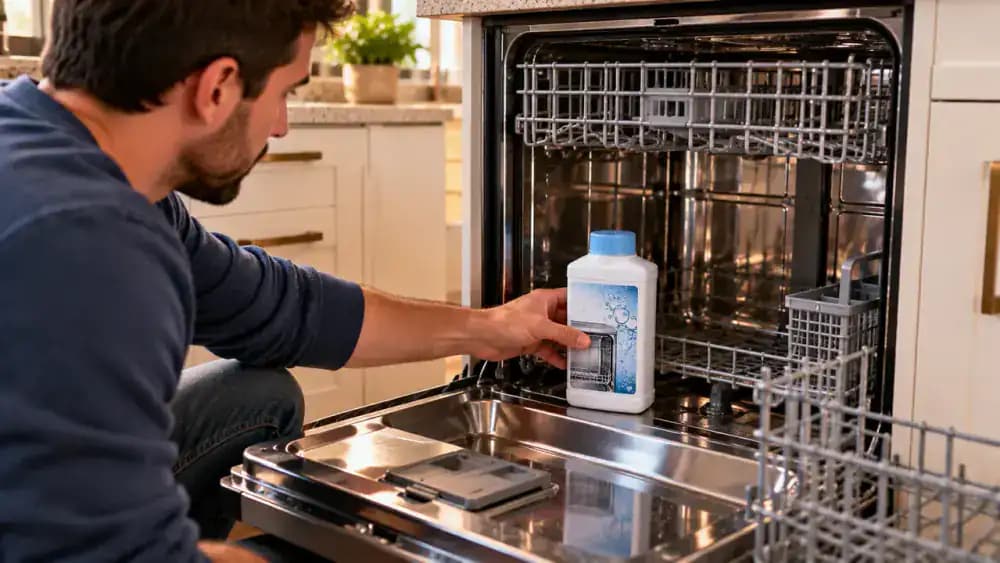
Start the Manufacturer-Recommended Dishwasher Cleaning Cycle
Close the dishwasher door and check your appliance manual and descaler instructions for the required cleaning program. On models with a dedicated Machine Care cycle, select that option only when both instructions approve it. Otherwise, choose the specified wash cycle and temperature without automatically selecting the hottest setting. Confirm the correct program appears on the control panel, then press Start. Run the dishwasher empty, without adding detergent, bleach, or other cleaners.
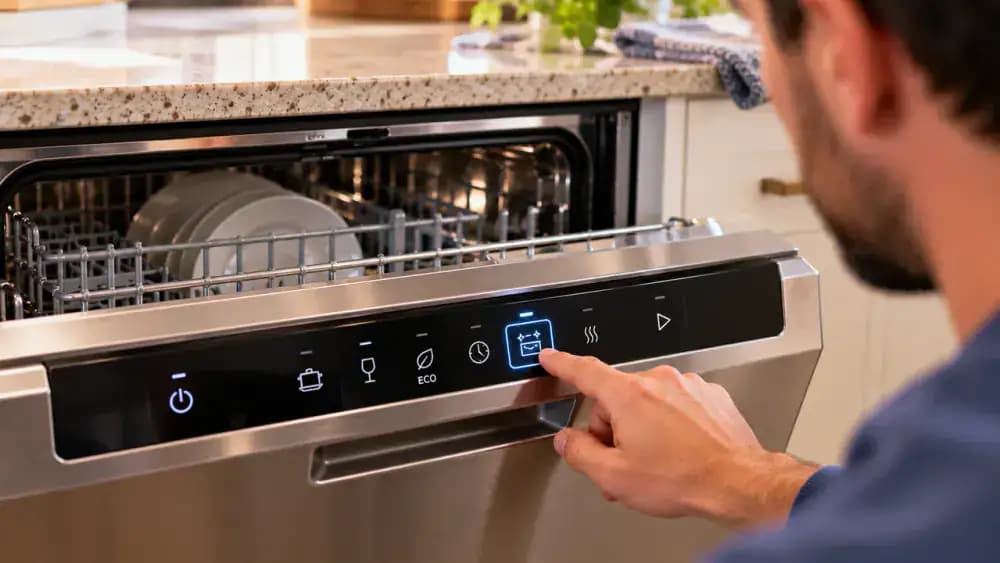
Allow the Dishwasher Maintenance Cycle to Finish
Leave the dishwasher door closed while the maintenance program completes its wash and rinse stages. Check the operating indicator occasionally and inspect the floor around the appliance for visible leaks without touching electrical components. Avoid opening the door, interrupting the cycle, or adding more cleaner. If an error message or unusual leak appears, follow the manufacturer's stopping instructions. Otherwise, wait until the display confirms the cycle has finished completely.

Open the Dishwasher Safely and Remove the Used Descaler
Once the cleaning cycle finishes, confirm the dishwasher has stopped before carefully opening the door a few inches. Stand to one side and keep your face away from escaping steam. Allow the interior and cleaner container to cool before opening the door fully. Wearing gloves if required, remove the used container and follow its disposal instructions. Check the product label for any additional rinse cycle required before washing dishes again.

Inspect Dishwasher Walls for Remaining Mineral Buildup
After the dishwasher has cooled and any required rinse is complete, illuminate the interior walls with an LED inspection light. Use a small, rounded inspection mirror to examine accessible corners and seams for lingering chalky deposits. Compare these areas with your earlier photographs, then mark any remaining residue on a simple diagram. Visual improvements do not guarantee complete mineral removal. Avoid immediately repeating the descaling cycle without checking manufacturer instructions.
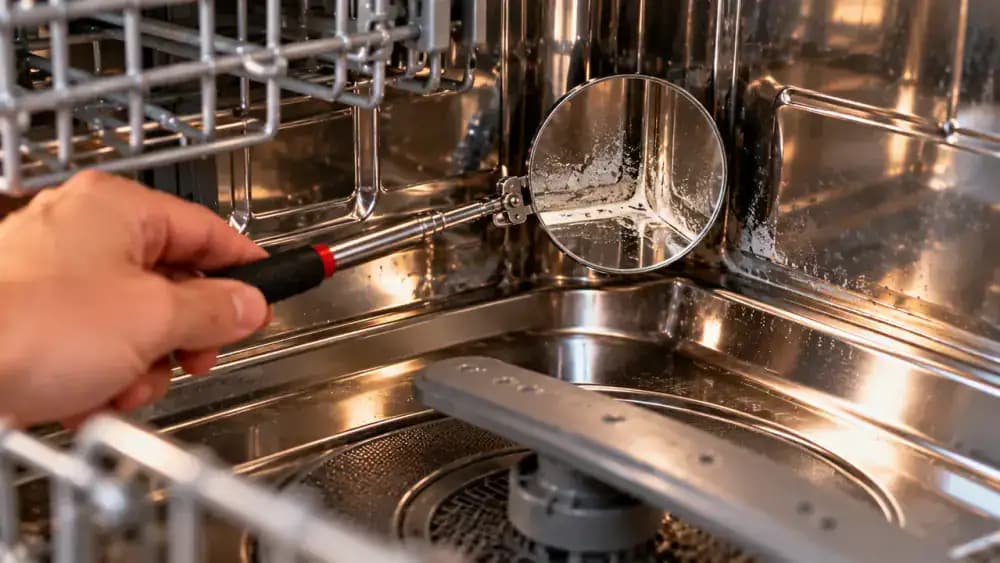
Examine Rack Joints and Spray Arm Openings for Remaining Deposits
With the dishwasher switched off and fully cooled, use a handheld magnifier to examine coated rack joints and spray arm openings without touching delicate surfaces. Look for remaining chalky deposits, chipped protective coatings, or visible obstructions around water outlets. Keep the magnifier outside the openings and never scrape or probe them. Record any problem areas on an inspection worksheet. Consult the manufacturer before attempting additional cleaning, repairs, or component removal.

Contact a Qualified Technician for Persistent Dishwasher Problems
If mineral deposits remain after an approved cleaning cycle, photograph the affected spray openings, rack coatings, or corroded areas. Review your dishwasher manual for permitted maintenance intervals and troubleshooting guidance before attempting another treatment. Use the manufacturer's support form to provide your model number, a clear description, and photographs of the problem. Persistent blockages, damaged components, or recurring drainage issues may require professional service rather than stronger cleaners or additional disassembly.
Test Your Household Water Hardness to Prevent Mineral Buildup
Fill a clean glass with cold tap water and place it on a stable surface. Read your water hardness test strip instructions, then dip the strip into the sample for the specified time. Allow the color to develop before comparing it with the manufacturer's chart. Record the hardness reading in grains per gallon or parts per million, noting the units carefully. Compare your result with your dishwasher manual's water hardness recommendations.

Adjust Your Dishwasher's Built-In Water Softener Settings
Check whether your dishwasher has a built-in water softener before changing any settings. Compare your recorded water hardness reading with the manufacturer's adjustment chart, then use the control panel to select and save the matching level. If your model includes a dishwasher salt reservoir, locate it using the manual. Refill only when instructed, using the specified dishwasher salt. Never substitute table salt or assume every dishwasher has this feature.

Measure Dishwasher Detergent Based on Water Hardness
Review your dishwasher detergent label and appliance manual alongside your recorded water hardness reading. Check the recommended dose for your water conditions, detergent concentration, and typical soil levels. Use the supplied measuring scoop to add the specified amount of powder to the main-wash detergent compartment, then close the dispenser lid securely. Avoid adding extra detergent, which can leave residue, and never combine descaler with detergent during a regular wash.
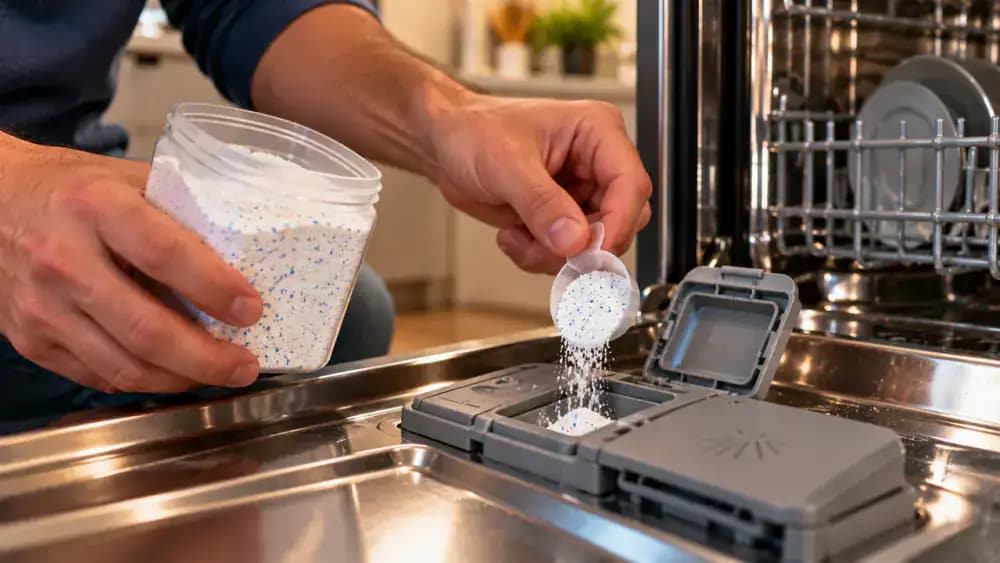
Refill the Rinse Aid Dispenser and Adjust Its Setting
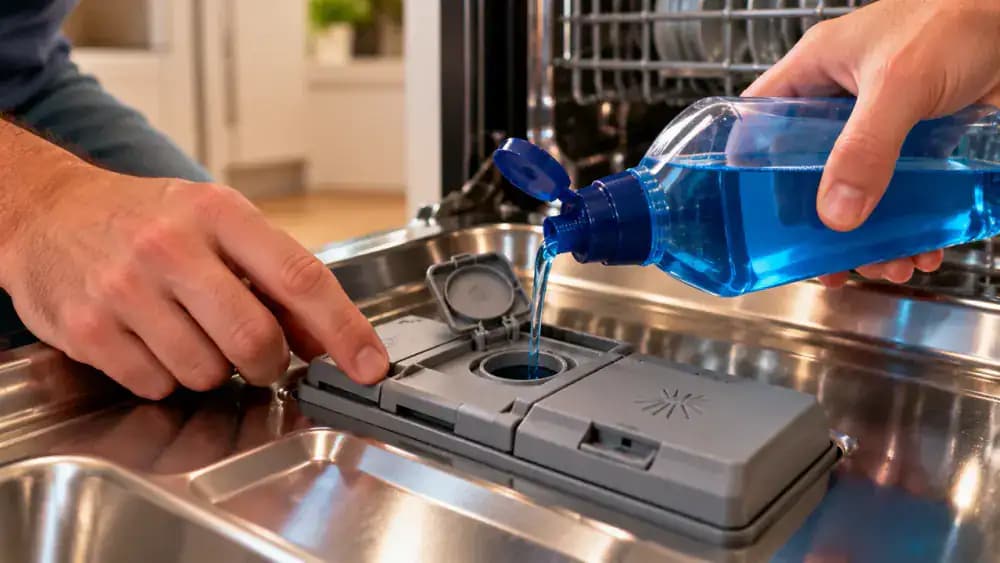
Open the dishwasher door and check the rinse aid level indicator. If refilling is needed, confirm the product is compatible with your appliance, then carefully fill the dedicated reservoir to its specified maximum level. Close the cap securely and wipe away any spills. Consult your manual before adjusting the rinse aid dial to its recommended starting position. Monitor water spots and streaks over subsequent washes, making adjustments only as directed.
Load Dishwasher Racks to Keep Spray Arms Unobstructed
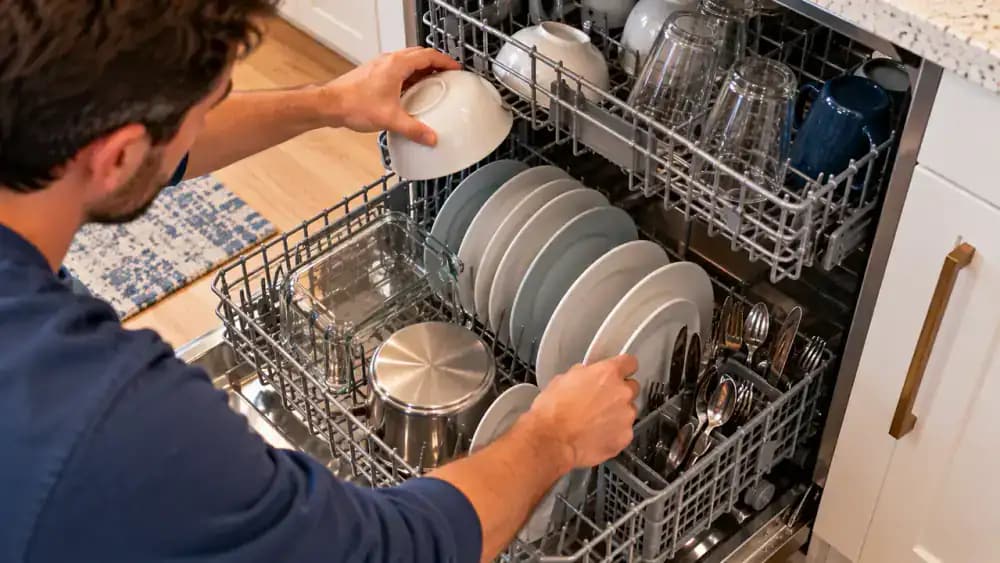
Arrange plates with space between them and position bowls at a downward angle so water can reach their surfaces and drain properly. Check that oversized items, such as cutting boards, do not block the spray arms or water outlets. With the dishwasher switched off and cool, gently rotate accessible spray arms to confirm they move freely. Follow your manufacturer's loading guidelines. Proper spacing improves water circulation but cannot eliminate hard water minerals.
Set a Regular Dishwasher Inspection Reminder
Check your dishwasher manual for the recommended inspection schedule, then mark a reminder on your household maintenance calendar. Create a checklist covering interior walls, rack edges, the filter area, spray arm openings, and protective coatings. With the dishwasher empty, switched off, and cool, visually inspect these areas for new deposits or damage. Record the date and location of any residue. Follow manufacturer guidance rather than automatically descaling every month.

Create a Reusable Dishwasher Maintenance Checklist
Gather your water hardness results, detergent instructions, rinse aid setting, and dishwasher manual. Record each detail on a reusable maintenance checklist, including measurement units and any applicable water softener settings. Add sections for filter inspections, rack coating condition, spray arm openings, and manufacturer-approved cleaning intervals. Leave unspecified maintenance frequencies blank rather than guessing. Place the completed checklist inside an accessible kitchen cabinet and update it whenever settings or water conditions change.

Complete Your Dishwasher Safety Check and Maintenance Review
Review your maintenance checklist to confirm the recorded water hardness, detergent dose, rinse aid setting, and approved cleaning schedule. Verify that removable components are securely reinstalled, no cleaning chemicals remain inside, and no visible damage needs attention. Store the dishwasher manual nearby and keep cleaning products closed and separated. Gently close the empty dishwasher door. Continue regular inspections, never mix cleaners, and seek professional guidance if stubborn deposits or damage persist.

If the inside of your dishwasher looks cloudy, the rack edges have developed a chalky white coating, or the spray arm openings appear clogged, hard water minerals could be responsible. Over time, dissolved minerals in your water can leave stubborn deposits on dishwasher surfaces and components. Regular wash cycles may not remove this buildup, and neglected deposits can interfere with water flow. However, not every white or cloudy residue is mineral scale. Detergent film, grease, and leftover food can look similar, so identifying the likely cause is an important first step.
Fortunately, removing hard water buildup doesn't have to involve aggressive scrubbing or harsh chemical combinations. With the right approach, you can inspect accessible areas, gently clean approved surfaces, and run a manufacturer-recommended maintenance cycle. This guide explains how to tackle mineral deposits without damaging protective coatings, spray arms, or surrounding surfaces. Always check your dishwasher's manual, use only appliance-approved cleaning products, and never mix acids, bleach, or other cleaners. You'll also learn practical ways to reduce future buildup through proper detergent dosing, rinse aid settings, and routine maintenance.
Where people go wrong
Mistaking Detergent Residue for Hard Water Scale. Not every cloudy film or white deposit inside your dishwasher comes from hard water. Detergent residue, grease, and food particles can look similar. Inspect the walls, rack edges, and spray openings before choosing a cleaning method. Appearance alone cannot always confirm the cause.
Using Unapproved Cleaners or Mixing Cleaning Chemicals. Combining vinegar, acidic descalers, bleach, or other cleaning products can create dangerous chemical reactions. Even products used separately may damage dishwasher components if they are not approved for your appliance. Always check the owner's manual, follow product labels, and protect nearby natural stone and sensitive metal trim.
Scraping Mineral Deposits With Sharp or Abrasive Tools. Stubborn mineral deposits can make aggressive scrubbing tempting, especially around spray arm openings and rack edges. However, knives, metal picks, and abrasive pads can scratch surfaces or damage protective coatings. Use a soft cloth and clean removable components only as the dishwasher manufacturer instructs.
Skipping Maintenance After Removing Visible Buildup. Cleaning visible deposits without addressing water hardness, detergent dosing, or rinse aid settings can allow mineral buildup to return. After an approved cleaning cycle, inspect the interior walls, racks, and spray openings. Follow your manufacturer's maintenance recommendations, and seek professional service if stubborn deposits or blockages persist.

Questions people ask
Hard water buildup often appears as chalky white deposits on dishwasher walls, rack edges, and around spray arm openings. However, detergent film, grease, and food residue can look similar. Check where the deposits appear and how they feel, but remember that appearance alone cannot reliably identify the cause.
Fixed it?
Get one guide like this every Thursday.