How to Prevent Grease Buildup on Kitchen Cabinets With a Simple Weekly Routine
Keep kitchen cabinets clean and free of sticky grease with a simple weekly routine. Learn where grease collects, how to safely wipe cabinet surfaces, and how to prevent stubborn buildup around your stove.

What you’ll need
Tap to tick things off before you start.
Spot the Greasy Film Before It Builds Up
Look closely at the cabinet door beside your stove, especially around the handle and upper edge. Touch the surface gently to check for tackiness, then examine it from an angle where natural light reveals a faint greasy sheen. Cooking with oil releases tiny airborne droplets that settle on nearby cabinets and attract dust. Identifying this early residue helps you focus your weekly cleaning on problem areas before stubborn buildup develops.

Build a Simple Weekly Cabinet Cleaning Habit
Start by checking the cabinet doors closest to your stove, where airborne cooking grease is most likely to settle. Gently wipe the flat surfaces with a soft microfiber cloth lightly dampened with a cleaner approved for your cabinet finish. Use smooth, controlled movements without soaking the wood or scrubbing aggressively. Add this quick task to a weekly cleaning checklist so grease never has time to accumulate into stubborn residue.

Inspect Grease Hotspots Around the Cooktop
Use a small LED flashlight to examine cabinets directly above and beside your cooktop. Shine the light at an angle across lower door edges, corners, cabinet undersides, and seams where doors meet their frames. Look for subtle shiny patches that may indicate grease residue. Pay extra attention to surfaces near the range hood, especially if you frequently fry foods. These hidden areas should receive priority during weekly cleaning.

Inspect Cabinet Handles, Knobs, and Decorative Grooves
Open a frequently used cabinet door and examine the handle, surrounding wood, and any recessed decorative grooves. Look closely for fingerprint smudges, faint greasy residue, and buildup around hardware mounting points. Lightly touch an inconspicuous area with a clean, dry fingertip to check for tackiness. Include these frequently touched surfaces in your weekly inspection, since grease mixed with everyday grime can accumulate in small spaces that are easily overlooked.

Prioritize Cabinet Cleaning Based on How You Cook
Walk around your cooktop and consider which burners you use most often, especially when frying or cooking with oil. Front burners may expose nearby side cabinets to more grease, while back burners can affect upper cabinets and surrounding trim. Sketch your kitchen layout on paper and circle the surfaces closest to your busiest cooking areas. Use this simple map to prioritize weekly cleaning without overlooking less obvious grease hotspots.

Identify Your Cabinet Material and Check Cleaning Instructions
Open a cabinet door and look for a manufacturer label inside the cabinet. Compare the information with your purchase paperwork or cabinet care manual to identify whether the surface is painted wood, laminate, veneer, or another factory finish. Read the manufacturer's approved cleaning instructions before selecting any product. If you cannot identify the finish, contact the manufacturer rather than assuming a general household cleaner is safe.

Select a Cabinet-Safe Cleaner and Soft Microfiber Cloths
Place two clean microfiber cloths and your chosen cabinet cleaner on the countertop. Compare the cleaner's label with the manufacturer's care instructions, checking surface compatibility and application directions. Select only a product approved for your specific cabinet finish, and set aside abrasive scrubbing pads. Keep one cloth for gentle cleaning and the other for drying, if recommended. Avoid harsh solvents, excessive moisture, and unapproved protective treatments.
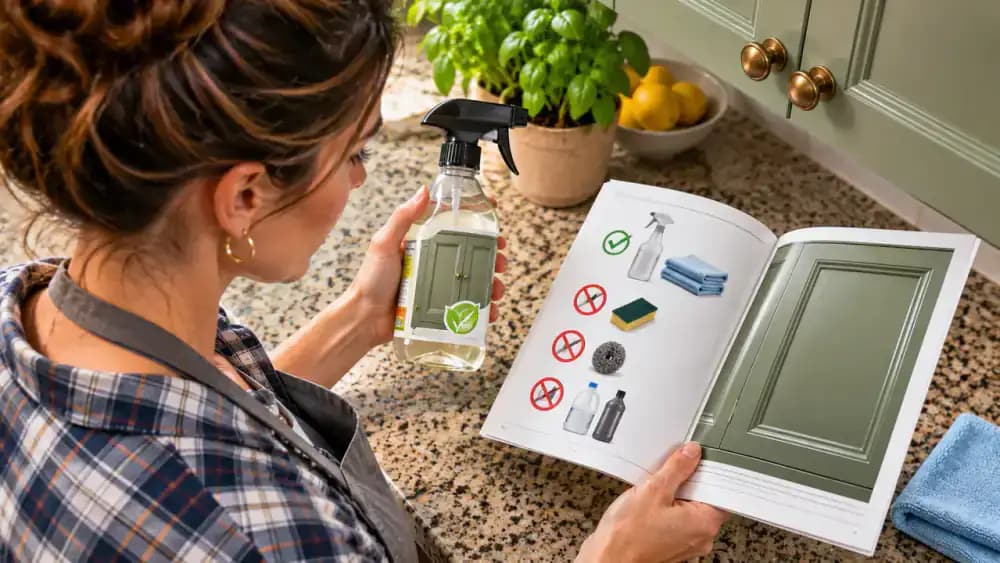
Test the Approved Cleaner on a Hidden Cabinet Edge
Open a cabinet door and choose a small, inconspicuous area along its inner edge, away from exposed wood, seams, and hardware. Apply a minimal amount of manufacturer-approved cleaner to a soft microfiber cloth, following the product directions. Gently wipe only the selected spot without soaking the surface. Allow it to dry for the recommended time, then inspect for discoloration, dullness, or finish damage before cleaning larger areas.

Remove Loose Dust With a Clean, Dry Microfiber Cloth
Take two clean, soft microfiber cloths from your cleaning supplies and check that neither contains trapped debris. Unfold the first cloth and gently wipe loose dust from cabinet frames and flat surfaces using light, controlled strokes. Work carefully around edges, seams, and hardware without applying excessive pressure. Keep the second cloth clean and dry for later use if your cabinet manufacturer's instructions recommend drying after cleaning.

Gently Wipe Cabinet Doors With an Approved Cleaner
Apply a small amount of manufacturer-approved cabinet cleaner to a clean microfiber cloth, following the product's directions. Make sure the cloth is lightly dampened, not dripping. Starting at the center of the cabinet door, wipe the flat surface using gentle, overlapping horizontal strokes. Maintain light, even pressure to avoid damaging the finish. Keep excess moisture away from seams, joints, and exposed edges, and never spray cleaner directly onto these areas.

Wipe Cabinet Hardware and Detailed Trim Without Soaking
Fold a soft microfiber cloth lightly dampened with a cleaner approved for both the cabinet finish and hardware. Gently wrap it around each handle, wiping the curved surfaces and accessible undersides where fingerprints and grease collect. Fold the cloth over one fingertip to follow decorative grooves and raised trim. Avoid pushing moisture into mounting holes, joints, or seams. Dry the hardware and surrounding surfaces if recommended by the manufacturer.

Dry Cabinet Edges, Corners, and Hardware
Check the cabinet door for remaining moisture, especially along lower edges, corners, and around hinges. If the manufacturer recommends drying, use a fresh, dry microfiber cloth to gently blot damp areas without aggressive rubbing. Fold the cloth to expose a dry section before making another light pass. Pay particular attention to vulnerable joints and exposed edges, where trapped moisture can damage certain cabinet materials over time. Inspect the surface before finishing.

Remove Fresh Grease Splashes Before They Become Sticky
After frying or sauteing, turn off the stove and wait until nearby cooking surfaces have cooled. Check the cabinet panels beside the range for fresh grease droplets. Gently wipe each splatter with a soft microfiber cloth lightly dampened with cleaner approved for your cabinet finish. Use minimal pressure and avoid seams or exposed edges. Removing grease promptly helps prevent it from attracting dust and developing into stubborn residue.

Check for Grease After Cooking and Avoid Aggressive Scrubbing
Once the stove has cooled, quickly inspect nearby cabinet fronts, drawers, and side panels for fresh cooking residue. Gently remove visible marks with a soft microfiber cloth and a cleaner approved for your cabinet finish. Check the treated area under good lighting. If older grease remains after gentle wiping, stop rather than scraping or increasing pressure. Consult the manufacturer's instructions for an approved deeper cleaning method before trying again.

Turn On the Range Hood Before Cooking With Oil
Before frying or sauteing, switch on your range hood and select a fan speed appropriate for your cooking activity. Keep the ventilation running while food cooks, following the hood manufacturer's instructions. As vapor rises from the skillet, the hood can help capture some airborne grease before it settles on nearby cabinet doors. Position cookware beneath the hood's intake area when practical, and continue weekly cabinet cleaning even with regular ventilation.

Clean or Replace Range Hood Grease Filters as Directed
Switch off your range hood and allow it to cool completely before checking the grease filters. Consult the appliance manual for removal instructions, then carefully release and lower the filter while supporting its weight. Wash reusable filters only as directed, or replace disposable filters according to the manufacturer's schedule. Allow washable filters to dry completely before reinstalling them securely. Never operate the hood without filters unless the manufacturer explicitly permits it.

Inspect Dry Cabinet Surfaces for Grease and Sticky Residue
Once your cabinets are completely dry, examine each door under bright, even lighting. View the surfaces from straight ahead and at a shallow angle to spot greasy streaks, fingerprints, or uneven patches. Gently touch an inconspicuous area with a clean, dry fingertip to check for remaining tackiness. Note exactly where residue persists, especially around handles and edges, before deciding whether additional manufacturer-approved cleaning is necessary.

Assess Stubborn Grease Before Attempting Deeper Cleaning
Examine cabinet corners, recessed panels, and decorative molding for persistent sticky patches or yellowish grease deposits. If routine wiping has not removed the residue, consult your cabinet manufacturer's instructions for approved deeper cleaning methods. Keep a soft microfiber cloth available, but avoid stronger chemicals, abrasive tools, or additional scrubbing pressure. If the recommended method is unclear, contact the manufacturer before treating stubborn buildup to avoid damaging the finish.

Check Manufacturer Guidelines Before Deep Cleaning
Locate the cabinet manufacturer's official care instructions and find the section covering stubborn grease removal. Review approved cleaning products, moisture restrictions, application methods, and recommended contact times. Write down the specific directions for your cabinet finish before proceeding. If deeper cleaning is permitted, test the approved method on a small, inconspicuous area first. When instructions are missing or unclear, contact manufacturer support instead of experimenting with stronger cleaners.
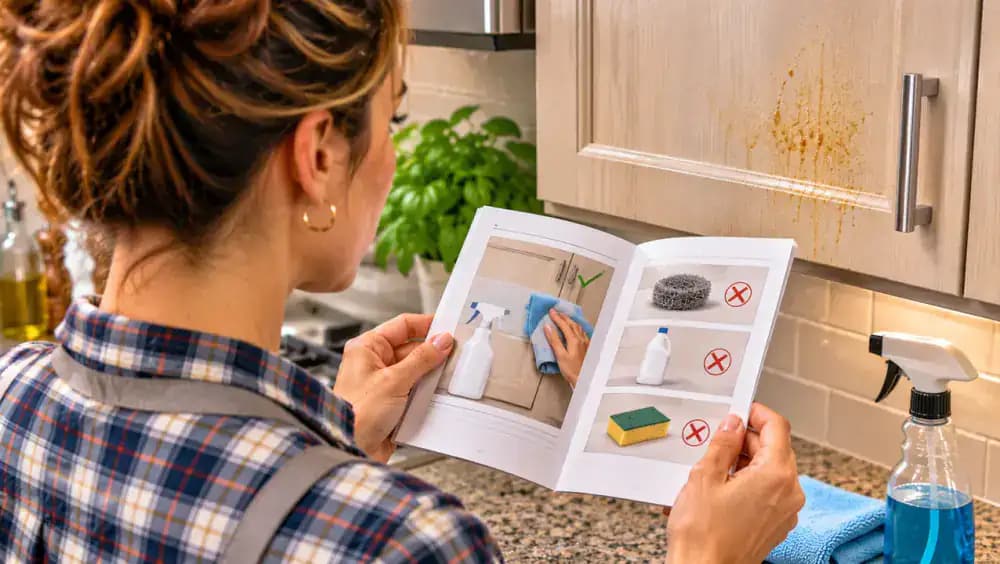
Remove Stubborn Grease With an Approved Deep Cleaning Method
After confirming the manufacturer's instructions and testing a hidden area, apply the specified amount of approved cleaner to a soft microfiber cloth. Gently treat only the stubborn grease patch, avoiding nearby seams and hardware. Follow the recommended contact time without increasing pressure or soaking the surface. Remove any remaining cleaner residue and dry as directed. Inspect the area afterward, and contact the manufacturer if stickiness persists despite proper cleaning.

Check the Cabinet Finish for Damage After Deep Cleaning
Wait until the cabinet surface is completely dry, then examine it under bright, even lighting from several angles. Look for remaining grease, uneven sheen, discoloration, or swelling near edges and joints. Gently check an inconspicuous spot for tackiness without rubbing. If you notice persistent residue or finish changes, photograph the affected area with your smartphone and record its location. Contact the cabinet manufacturer for guidance before attempting further cleaning.

Set a Recurring Weekly Reminder for Cabinet Cleaning
Open your household calendar and choose a consistent day for weekly cabinet maintenance, such as Saturday. Create a recurring reminder with three specific tasks: wipe stove-side cabinet doors, clean handles, and check nearby trim. Prioritize surfaces closest to your frequently used burners, where grease tends to accumulate. Keeping these tasks on a regular schedule helps you catch light residue early instead of waiting until cabinets become noticeably sticky.

Check for Fresh Cabinet Splashes After Cooking
After meals involving frying or splattering oil, turn off the stove and allow nearby surfaces to cool completely. Take a moment to inspect the cabinet doors closest to the range for fresh grease droplets. If you spot one, gently remove it with a clean microfiber cloth and a manufacturer-approved cleaning method. Dry the treated area if required. This quick habit prevents small splatters from becoming stubborn buildup between weekly cleanings.

Inspect Pantry Cabinets and Less-Used Areas Monthly
Once a month, examine cabinets farther from the stove, including pantry doors, accessible upper edges, and interior corners. Open each cabinet and look for loose dust, faint grease films, or developing stickiness. Gently remove dry dust with a clean microfiber cloth, then record which areas need attention. If certain cabinets remain clean, maintain their current schedule. Increase inspection frequency for surfaces that consistently collect residue, using only manufacturer-approved cleaning methods.

Adjust Your Cleaning Schedule to Match Grease Buildup
Review your cabinet maintenance chart and compare it with the grease patterns noticed during monthly inspections. Move frequently affected areas, such as stove-side doors and upper trim, into your weekly cleaning priorities. Keep distant pantry cabinets on a monthly inspection schedule if they remain clean. Check your range hood maintenance reminder when grease returns quickly. Adjust cleaning frequency based on actual conditions, always using methods approved for each cabinet finish.

Skip Cabinet Oils, Polishes, and Unapproved Protective Coatings
Before applying furniture oil, polish, or a protective coating, compare the product label with your cabinet manufacturer's finish-care instructions. If the manufacturer does not explicitly permit the treatment, leave it unopened and set it aside. Unapproved products may alter the cabinet's appearance or interfere with its existing finish. Instead, continue using a soft microfiber cloth and a compatible cleaner. Consistent maintenance is preferable to experimenting with unnecessary surface treatments.

Organize Cabinet Cleaning Supplies for Easy Weekly Access
Choose a secure utility cabinet away from food storage and out of children's reach. Place clean, folded microfiber cloths and your manufacturer-approved cabinet cleaner together in a stable storage bin. Keep the cleaner upright in its original labeled container with the cap tightly closed. Store cabinet care instructions in a separate dry compartment for easy reference. Having supplies organized makes weekly maintenance quicker and reduces the temptation to use unsuitable cleaning products.

Follow an After-Cooking, Weekly, and Monthly Cabinet Care Checklist
Keep your cabinet maintenance routine organized into three simple tasks. After greasy cooking, wait until the stove cools and check nearby doors for fresh splatters. Each week, gently wipe grease-prone surfaces with a soft microfiber cloth and manufacturer-approved cleaner, then dry as directed. Once a month, inspect less-used cabinets and review range hood maintenance. Keep the manufacturer's care instructions accessible whenever you encounter stubborn residue or an unfamiliar surface.

Inspect Cabinet Doors, Handles, and Edges One Last Time
Walk along the cabinets beside your cooled stove and examine the flat door panels, handles, and accessible edges under bright, even lighting. Open one door to check for overlooked grease, lingering moisture, or visible finish damage. Look for consistent surface appearance without assuming every mark is removable. If you notice persistent stickiness, discoloration, or swelling, stop and consult the manufacturer's care instructions rather than applying additional cleaner or scrubbing harder.

Keep Kitchen Cabinets Grease-Free With Consistent Care
Maintain your cabinets by checking for fresh splatters after greasy meals, wiping high-use surfaces weekly, and inspecting less-used areas monthly. Run your range hood during cooking and maintain its grease filters according to the appliance manual. Always use cleaners approved for your cabinet finish, and avoid unapproved oils or protective coatings. Keep your maintenance checklist accessible, and explore Kitchen Cleaning Fixes for more practical ways to care for your kitchen.

Kitchen cabinets can look perfectly clean until you touch the doors near your stove and discover a sticky, greasy film. Every time you fry, sauté, or cook with oil, tiny grease particles can travel through the air and settle on nearby surfaces. Over time, that invisible layer attracts dust and becomes increasingly difficult to remove. Cabinet doors above and beside the cooktop, handles, upper edges, and decorative trim are especially vulnerable. The good news is that preventing grease buildup is much easier than scrubbing away months of accumulated residue.
You don't need expensive cleaning products or hours of work to keep your kitchen cabinets looking their best. A simple weekly cleaning routine, combined with quick attention to fresh splatters and proper range hood use, can make a noticeable difference. The key is choosing cleaning methods approved for your cabinet's material and finish, using soft cloths, and avoiding harsh chemicals or excessive moisture. Here's how to identify problem areas, clean them safely, and establish a maintenance routine that keeps sticky grease under control.
Where people go wrong
Waiting Until Cabinets Feel Sticky Before Cleaning. Grease buildup happens gradually, so waiting until cabinet doors feel sticky makes cleaning unnecessarily difficult. Airborne cooking grease attracts dust and creates stubborn residue over time. Wipe high-risk surfaces weekly and check for fresh splatters after cooking surfaces have cooled to prevent accumulation.
Using Harsh Cleaners or Abrasive Scrubbing Pads. Strong chemicals, abrasive pads, and aggressive scrubbing can damage cabinet finishes while attempting to remove grease. Always identify your cabinet material, follow the manufacturer's cleaning instructions, and use a compatible cleaner with a soft microfiber cloth. Test the approved cleaning method on an inconspicuous area first.
Soaking Cabinet Doors and Ignoring Hidden Grease Spots. Using too much water can expose cabinet joints and edges to unnecessary moisture. Clean with a lightly dampened cloth rather than soaking surfaces, and dry as recommended. Pay particular attention to handles, upper door edges, nearby trim, and cabinets surrounding the cooktop, where grease often collects unnoticed.
Skipping Range Hood Use and Grease Filter Maintenance. Cleaning cabinets regularly becomes less effective when airborne cooking grease keeps settling on nearby surfaces. Use your range hood during greasy cooking and maintain its grease filters according to the appliance manual. Combine proper ventilation with weekly wiping and monthly inspections to keep buildup manageable.

Questions people ask
Wipe cabinets near the stove at least once a week, paying special attention to handles, upper door edges, and nearby trim. Check for fresh grease splatters after cooking and remove them once surfaces have cooled. Inspect cabinets monthly under good lighting to catch sticky residue before it becomes difficult to clean.
Fixed it?
Get one guide like this every Thursday.