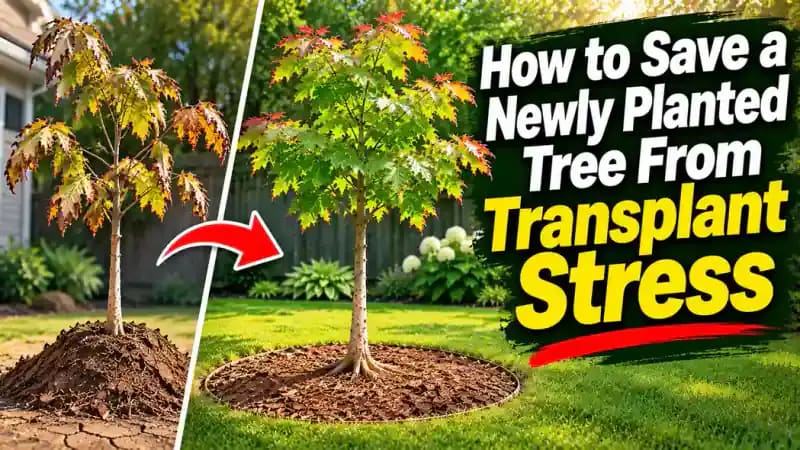
How to Save a Newly Planted Tree From Transplant Stress
Drooping leaves, yellow foliage, or stalled growth after planting? Learn how to check planting depth, soil moisture, and mulch to help a stressed young tree recover without making things worse.
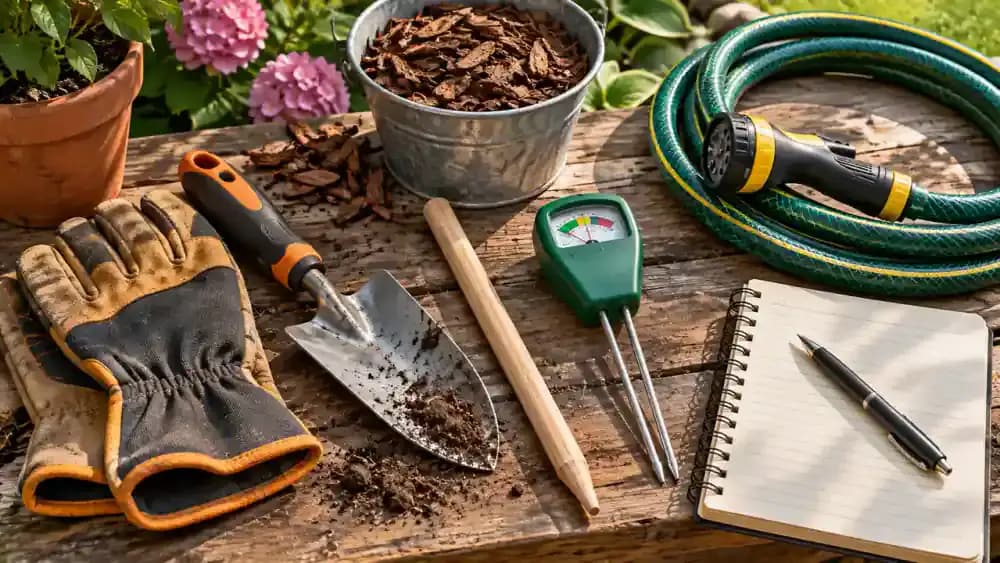
What you’ll need
Tap to tick things off before you start.
Look for Early Signs of Transplant Stress
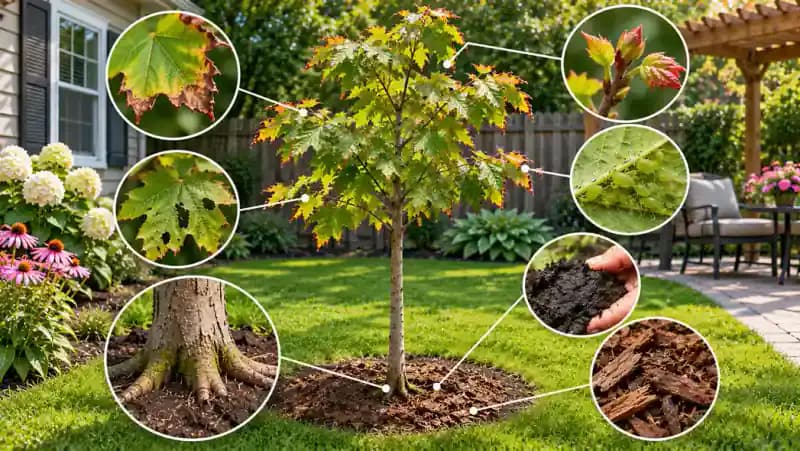
Start by examining the entire young tree, from its upper branches to the soil around the trunk. Look for drooping leaves, yellowing foliage, brown leaf edges, and branches with unusually sparse growth. Wearing gardening gloves, gently inspect a discolored leaf without pulling it off. Notice whether symptoms affect isolated branches or the whole canopy. These signs can indicate transplant stress, but don't assume the tree needs fertilizer, pruning, or additional water.

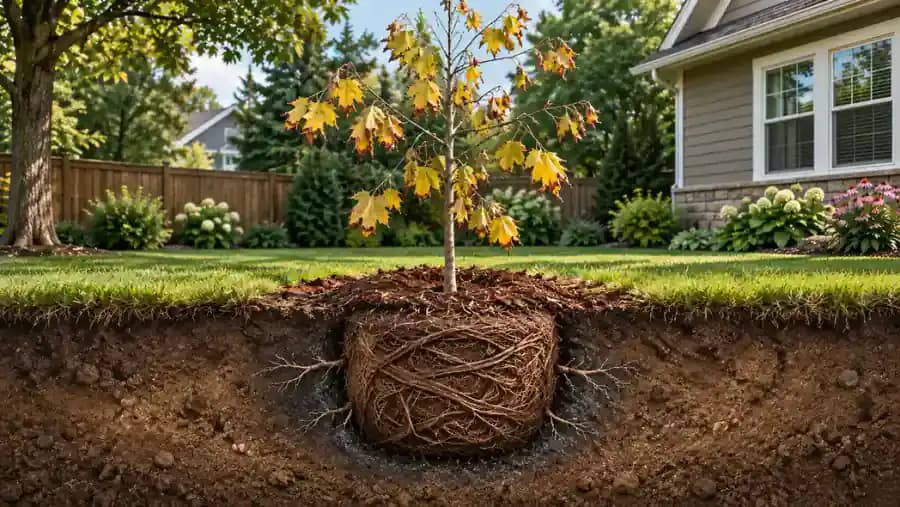
Understand How Disturbed Roots Affect Water Uptake
The underground cutaway shows the original root ball surrounded by native soil, with fine roots absorbing moisture and carrying water upward to the leaves. After planting, some absorbing roots may be damaged or lost, temporarily reducing the tree's ability to supply its canopy. Notice how limited water uptake can contribute to wilting and yellowing. Because the surrounding soil may hold moisture differently, check conditions near the original root ball before watering.
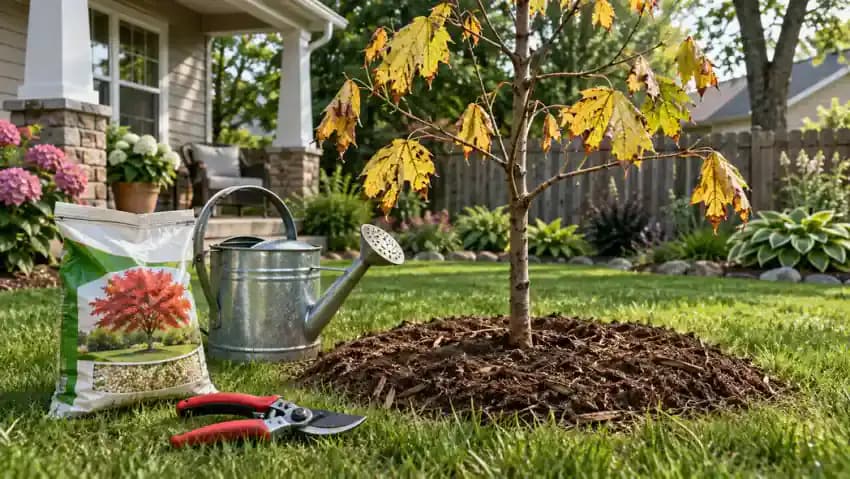
Check the Basics Before Trying Quick Fixes
Set aside the fertilizer, watering can, and pruning shears until you understand what your tree actually needs. As shown, use a simple checklist to inspect planting depth, soil moisture, and mulch placement before taking action. Fertilizer can stress vulnerable roots, excess water can limit oxygen in the soil, and heavy pruning removes valuable foliage. Keep your inspection at ground level, and avoid disturbing major roots or cutting substantial branches.
Prepare Your Tools and Set Up a Safe Work Area
Arrange gardening gloves, a hand trowel, a wooden dowel or soil moisture probe, a garden hose, and organic mulch on a clean work surface. Keep a notebook and pen nearby to record soil conditions and visible symptoms, starting with today's date. As shown, carry your supplies along a clear, level path to the young tree. Check that the ground is stable, remove nearby obstacles, and keep children and pets away.
Examine Leaf Damage and Compare Healthy Branches
Gently support an accessible lower branch with one gloved hand while examining individual leaves without pulling or cutting them. Look for curled edges, dry brown margins, irregular yellow patches, and unusually drooping foliage. Compare affected leaves with healthy green leaves on the same branch, then inspect several other branches. Note whether symptoms appear scattered or widespread across the canopy. Leaf damage can indicate water stress but does not confirm transplant shock.
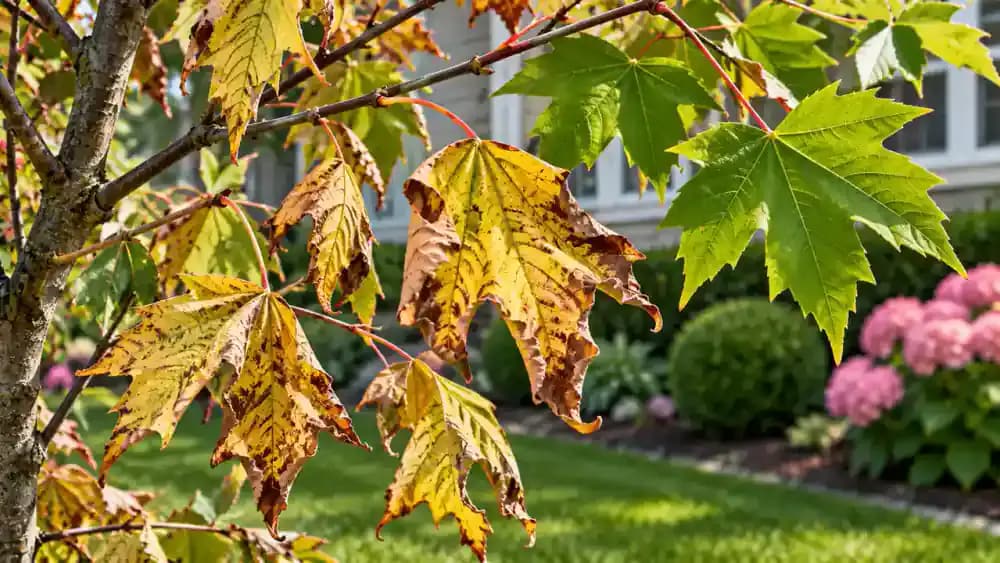
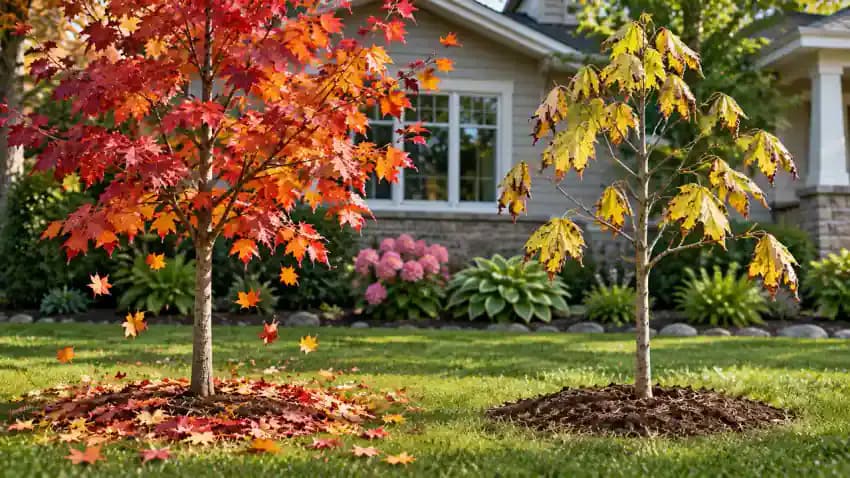
Compare Seasonal Leaf Changes With Signs of Stress
Compare the two maple trees shown: the fall tree has naturally changing red, orange, and yellow leaves, while the newly planted spring tree shows unexpected wilting and brown leaf edges. Check your planting date and record when symptoms first appeared. Look at nearby trees of the same species for similar seasonal changes. Fall leaf drop may be normal, but spring or summer damage deserves closer inspection before assuming transplant stress.
Map Leaf Damage Across the Entire Canopy
Stand several feet from your young tree on stable ground and examine the entire canopy. As shown, use a simple tree diagram divided into four sections to mark where leaves are drooping, yellowing, or scorched. Compare the upper, lower, left, and right branches, noting which areas receive stronger afternoon sunlight or wind exposure. Damage concentrated on one side may suggest environmental stress, while widespread symptoms warrant closer root-zone inspection.

Locate the Root Flare at the Base of the Trunk
Kneel beside the young tree and examine where its trunk meets the soil. Wearing gardening gloves, gently brush away loose surface mulch to reveal the root flare, where the trunk naturally widens toward the main roots. As shown, a small ruler can help you observe the transition near soil level. If the trunk disappears straight into the ground without widening, buried soil or mulch may be hiding the flare.
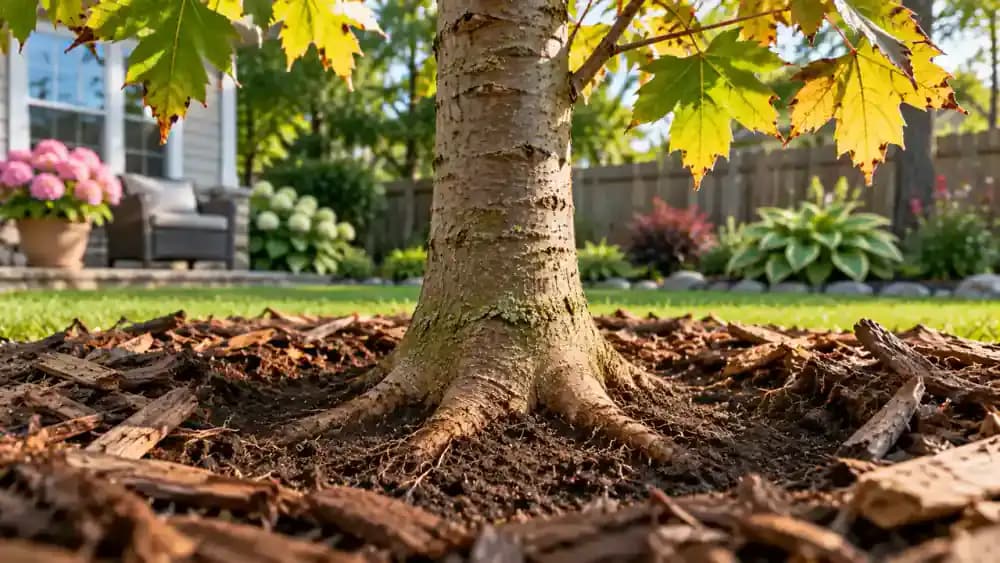
Clear Loose Mulch and Inspect Covered Trunk Bark
Kneel beside the trunk and gently pull loose mulch away from the bark with your gloved hand. Use a soft-bristled brush to remove only a thin layer of loose surface soil, as shown. Look for unusually damp or discolored bark and soil packed tightly against the trunk. Record anything suspicious in your notebook. If the root flare remains hidden, stop rather than digging deeper or disturbing major roots.
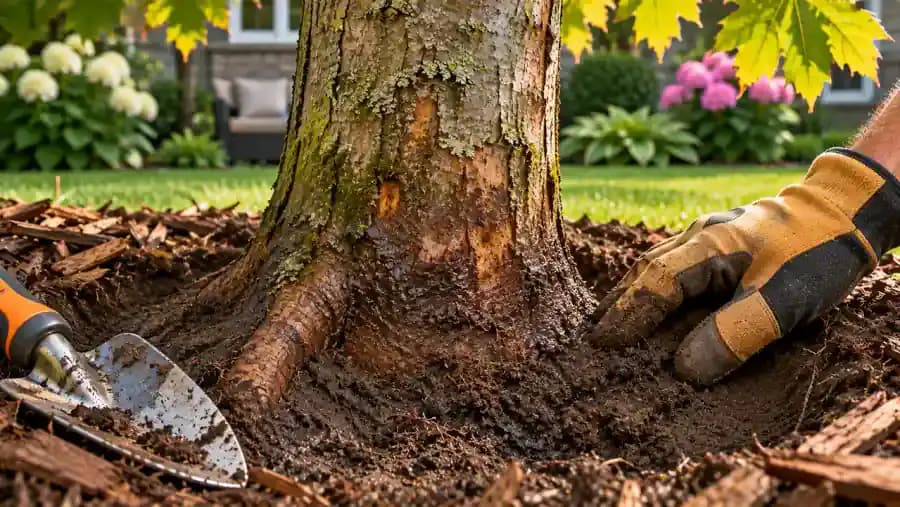
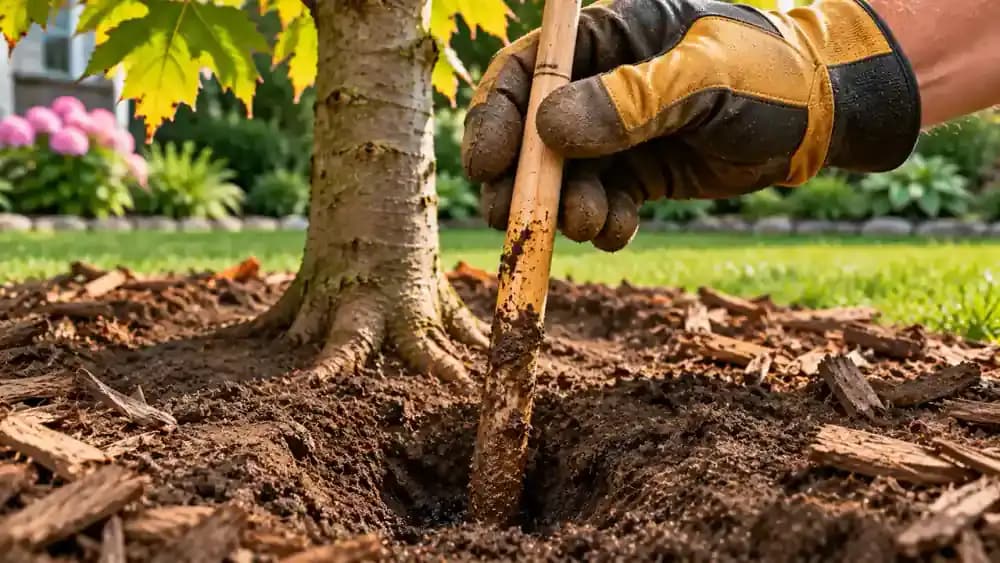
Test Soil Moisture Four Inches Below the Surface
Move loose mulch aside near the original root ball and gently insert a wooden dowel about 4 inches into the soil. Stop if you encounter resistance that could indicate a root. As shown, withdraw the dowel and examine its lower section for damp soil particles, even if the surface looks dry. Repeat at a second accessible location and record both observations. Avoid watering until you understand the moisture conditions below the surface.
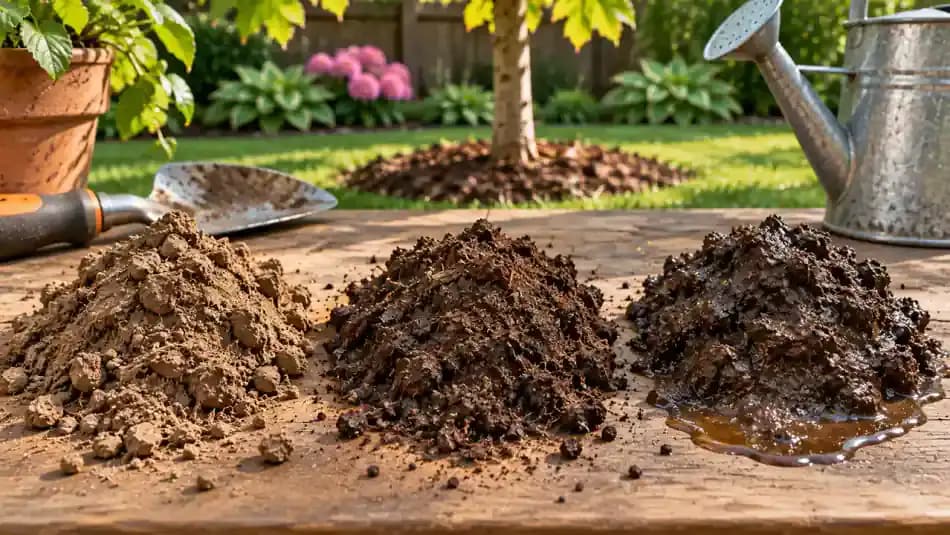
Compare Soil Texture to Identify Moisture Problems
Examine the three soil samples shown and compare how each responds to gentle pressure. Dry soil typically crumbles apart, while adequately moist soil feels cool and forms a loose clump. Waterlogged soil may feel muddy, sticky, or saturated. Remember that sandy soil breaks apart more easily than clay, even at similar moisture levels. Use these differences to interpret your root-zone checks and aim for consistent moisture without keeping the soil constantly wet.
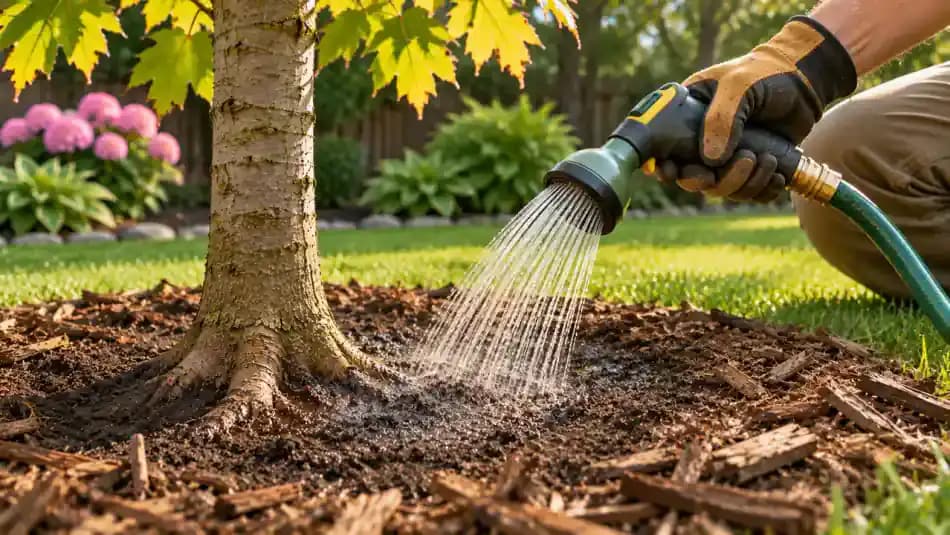
Water the Root Ball Gently Without Saturating the Soil
If your moisture checks confirm dry soil, adjust the garden hose to a gentle, low-pressure flow. Direct water onto the soil above the original root ball, several inches away from the trunk, as shown. Move the stream slowly around the planting area, allowing water to soak in without puddling or runoff. Turn off the hose and recheck moisture with a wooden dowel. Stop once the root zone is adequately moist.
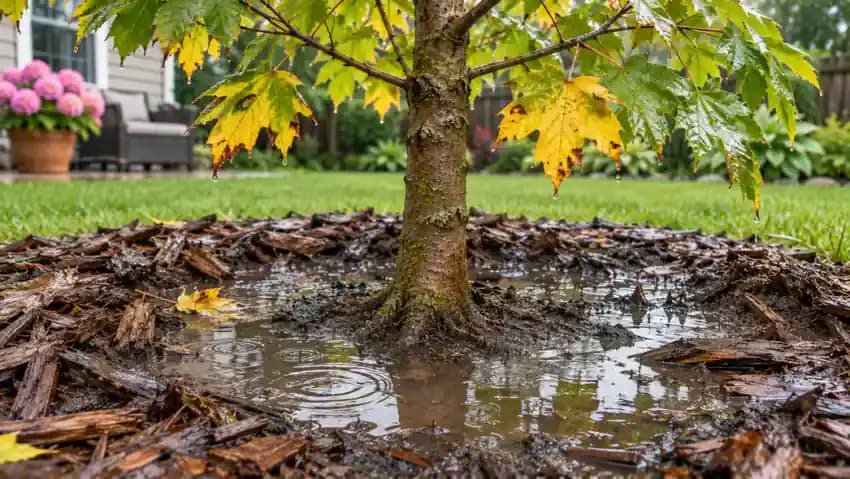
Spot Standing Water and Poor Drainage Around the Tree
After heavy rainfall, inspect the planting area from firm, level ground without stepping into saturated soil. Look for persistent puddles, muddy conditions, and yellowing leaves despite frequent watering. As shown, check the rain gauge, turn off unnecessary irrigation, and record where water collects and how long it remains. Excess moisture can limit oxygen around the roots. If soggy conditions persist, seek professional drainage advice rather than digging into the root zone.
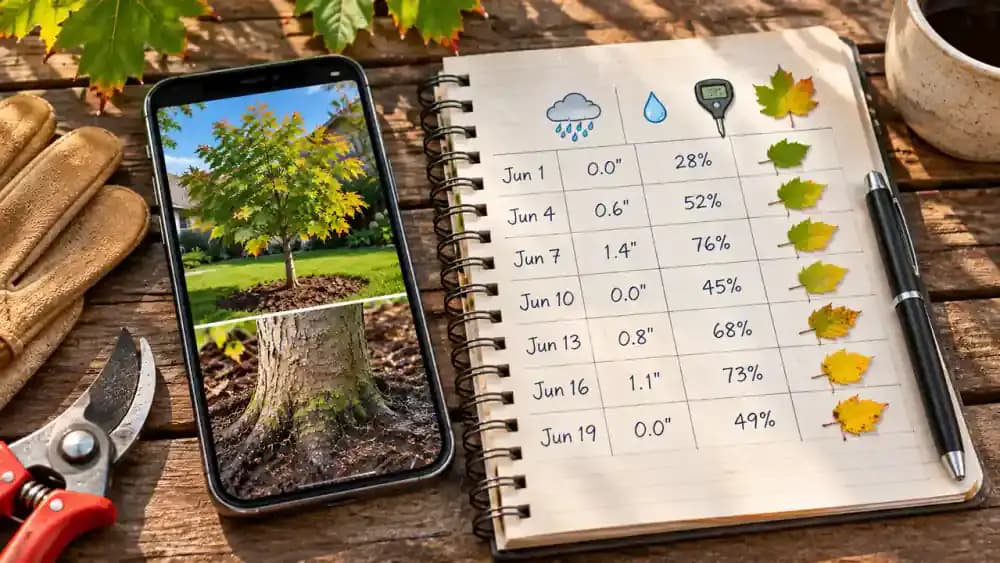
Build a Watering Routine Around Weather and Soil Moisture
Review the upcoming weather forecast and record recent rainfall before deciding when to water your tree. As shown, use a simple log to track the date, weather, soil moisture, and watering decisions. Hot, windy conditions can dry the root ball faster, while rainfall and cooler temperatures reduce water needs. Sandy soil generally drains faster than clay. Set reminders to check moisture regularly instead of automatically watering every day.

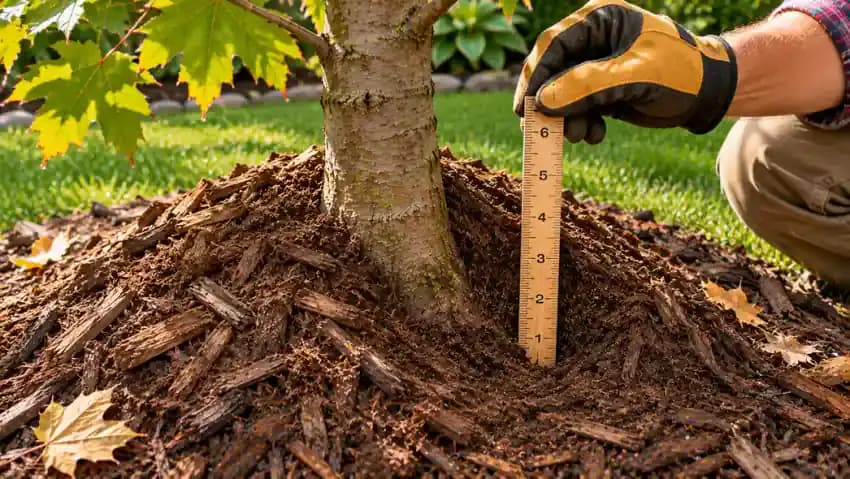
Measure Mulch Depth and Spot a Mulch Volcano
Examine the mulch around your young tree from above, looking for a cone-shaped mound piled against the trunk. As shown, insert a short ruler into the loose mulch without pushing into the soil. Check several locations, especially where mulch touches the bark. A layer measuring approximately 5 inches near the trunk is excessive. Note the depth and shape before making adjustments, and avoid disturbing the underlying roots.
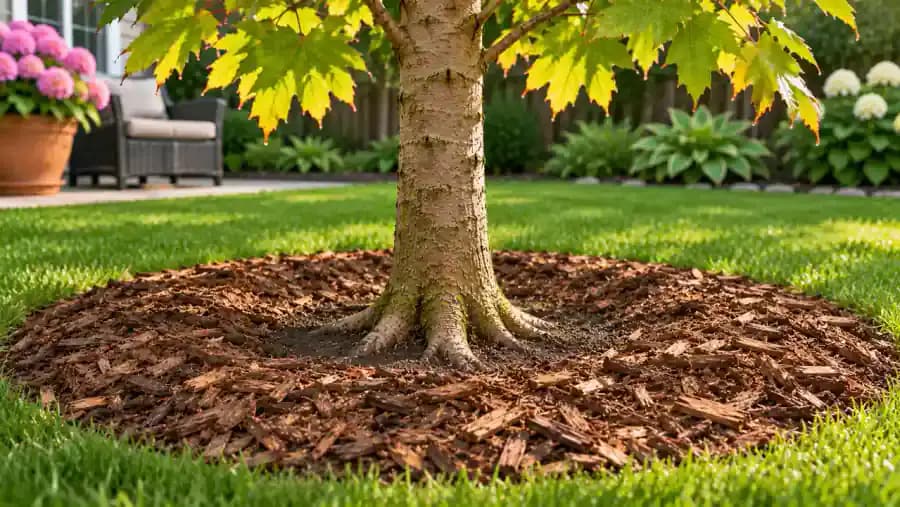
Spread Mulch into a Level Ring Around the Tree
Wearing gardening gloves, gently pull excess mulch away from the trunk and place it in a garden bucket. Spread the remaining material outward into a broad, even ring without scraping or disturbing roots. As shown, use a ruler to check that the finished layer is approximately 2 to 3 inches deep. Leave several inches of bare space around the trunk, keep the root flare visible, and remove any leftover mulch.
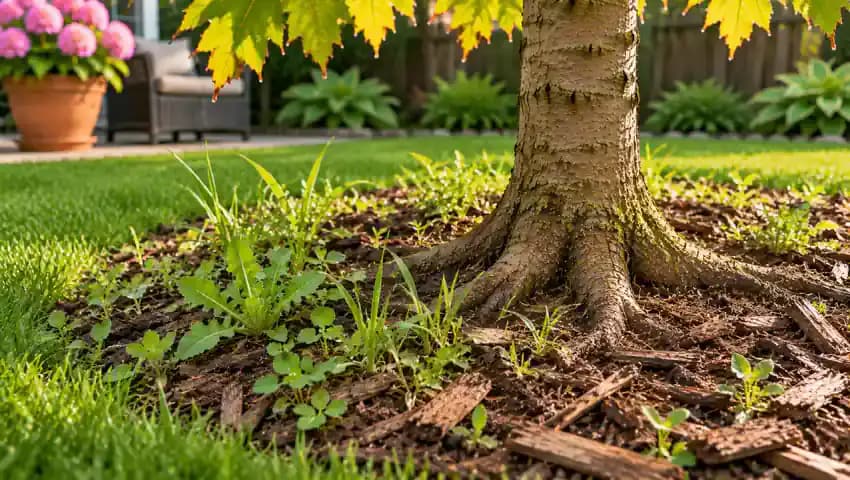
Remove Small Weeds Without Disturbing Tree Roots
Inspect the mulch ring for grass seedlings and small weeds growing near your young tree. Wearing gardening gloves, grasp each shallow-rooted weed near its base and pull gently, as shown. Remove only weeds that release easily, placing them in a collection container. Leave resistant plants alone rather than digging or tugging near tree roots. Keep surrounding turf outside the mulch ring, and avoid herbicides or string trimmers near the trunk.
Photograph Your Tree and Record Its Current Condition
Stand several feet from your young tree on level ground and photograph the entire canopy with your smartphone. As shown, mark your camera position so future pictures use a consistent viewpoint. Take separate close-ups of damaged leaves and the trunk base without disturbing the tree. In a notebook, record today's date, recent weather, soil moisture, leaf symptoms, and trunk condition. These baseline observations will help you identify changes during recovery.
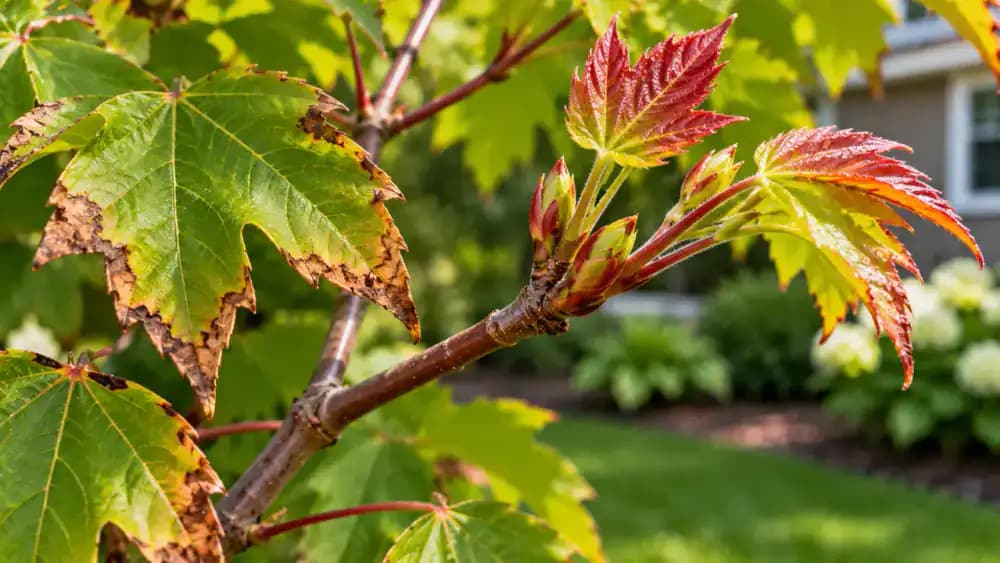
Watch for Healthy Buds and New Seasonal Growth
Examine an accessible lower branch without bending or removing any foliage. As shown, look closely for intact buds, gradual bud swelling, and emerging leaves when growing conditions are suitable. Compare these observations with your earlier photographs and notes at regular intervals. Existing brown leaf edges may remain damaged even as the tree stabilizes. Record promising changes, but remember that bud development alone does not guarantee recovery or confirm successful treatment.
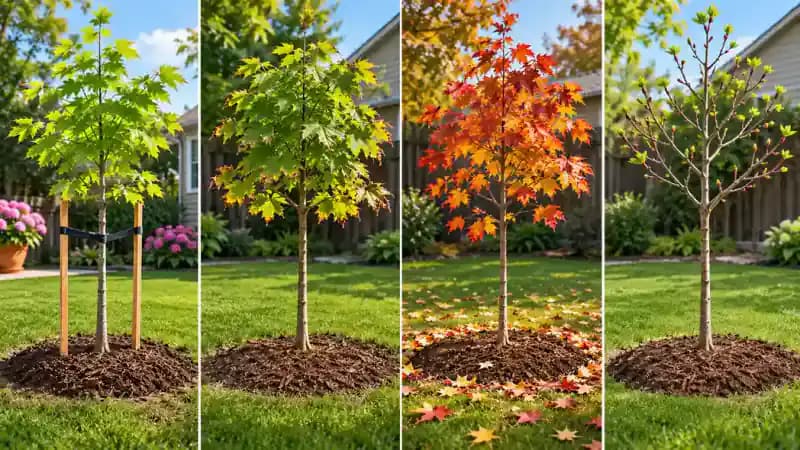
Allow a Full Growing Season for Gradual Recovery
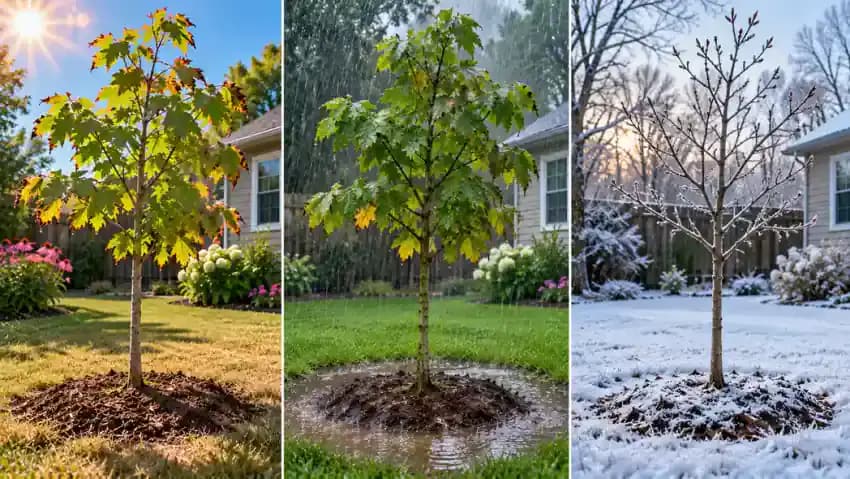
Compare the seasonal examples shown, from modest spring foliage through summer growth, fall leaf drop, and the following spring's buds. These illustrate possible development, not guaranteed recovery. A small transplanted tree may need an entire growing season to establish, while larger trees can take several years. Growth may remain limited as roots develop. Continue monitoring soil moisture and foliage, and remember that winter dormancy can temporarily hide signs of progress.
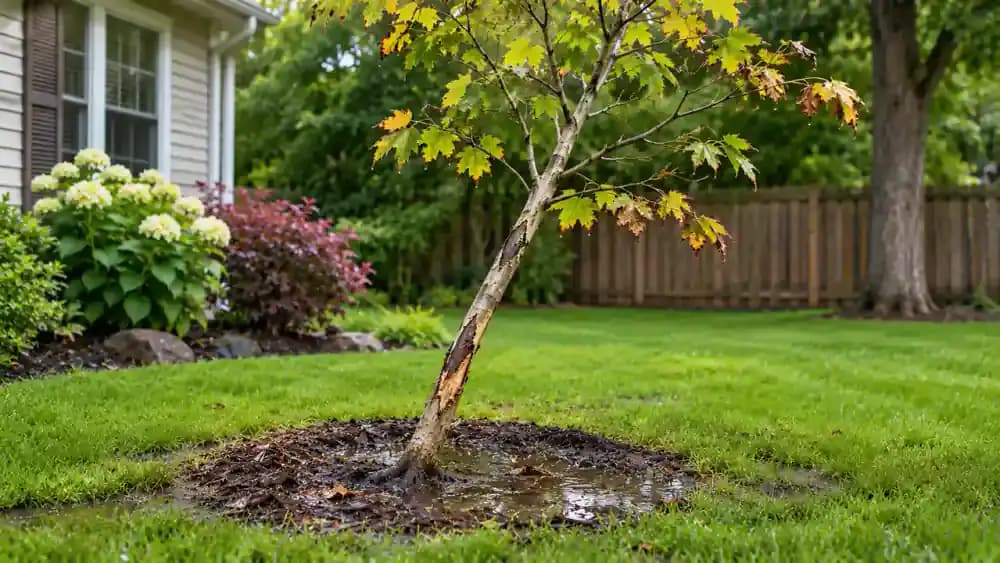
Know When to Call an ISA Certified Arborist
Stand at a safe distance and inspect the tree for rapidly spreading branch dieback, damaged or peeling trunk bark, and a developing lean. As shown, photograph visible warning signs without approaching unstable branches or touching the trunk. Record worsening canopy symptoms and soil that remains waterlogged after rainfall. Contact an ISA Certified Arborist for an assessment if these problems appear. Never attempt substantial pruning, major root excavation, or repairs to an unstable tree.
Organize Tree Care Records for Your Arborist
Gather your planting date, dated photographs, watering history, and notes about rainfall, drainage, and changing leaf symptoms. As shown, organize the photos chronologically on your laptop before discussing the tree with an ISA Certified Arborist. Ask for an assessment of planting depth, root health, and structural stability rather than requesting a specific treatment. Write down recommended next steps, and keep everyone away from a leaning or damaged tree until its safety is evaluated.

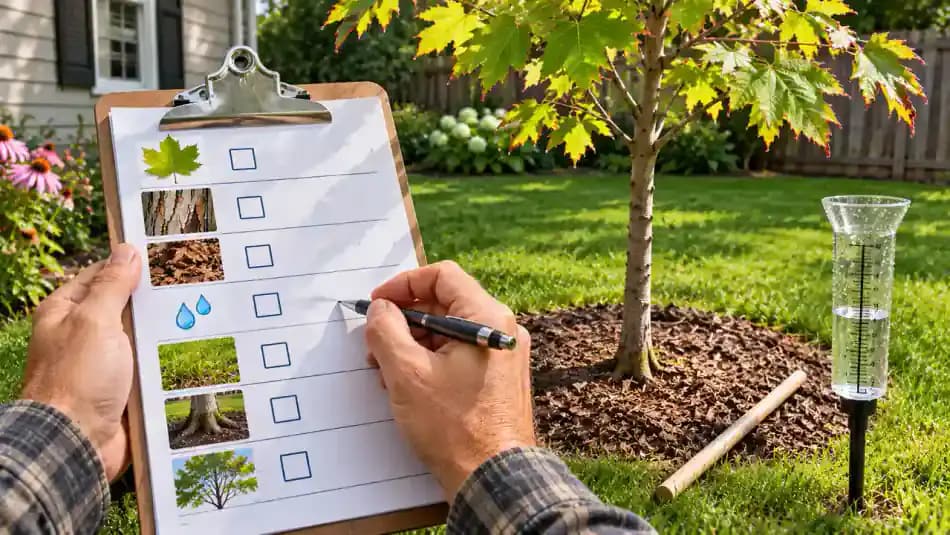
Follow a Weekly Checklist Without Overhandling Your Tree
For a young tree that is safe to approach, use a weekly checklist to track basic care. As shown, gently test root-zone moisture with a wooden dowel, stopping if you encounter roots. Confirm that mulch stays several inches from the trunk, and inspect accessible foliage for changes. Check your rain gauge, record recent rainfall, and note whether watering is necessary. Avoid unnecessary fertilizer, pruning, or repeated disturbance of developing roots.
Adjust Tree Care During Heat, Heavy Rain, and Freezing Weather
During hot, windy weather, check root-zone moisture more frequently with a wooden dowel, stopping if you encounter roots. After heavy rain, inspect for standing water from firm ground before watering again. In freezing conditions, leave frozen soil and roots undisturbed while checking that the mulch ring remains intact. As shown, each season requires different precautions. If storms leave your tree leaning or damaged, keep your distance and contact a qualified arborist.
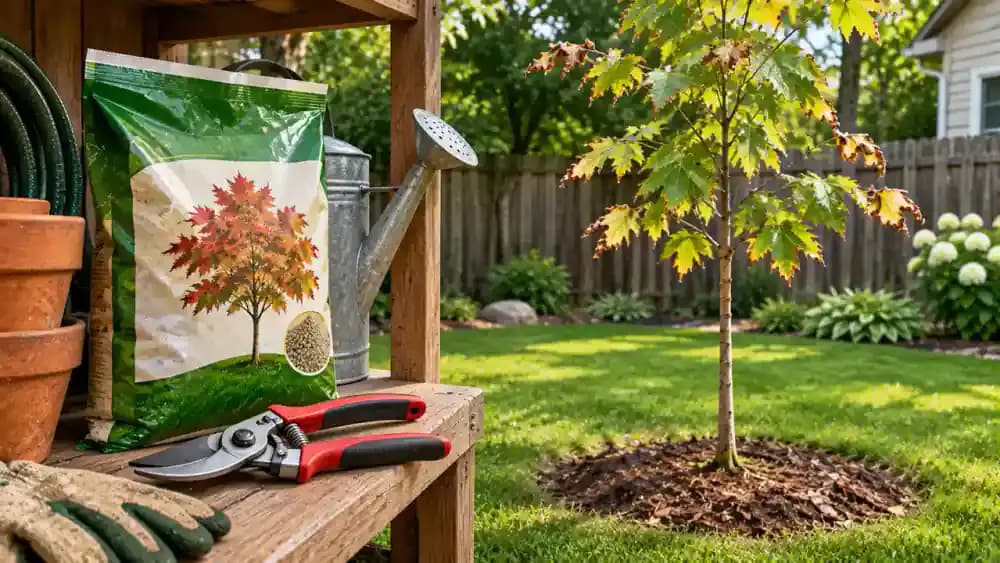
Put Away Fertilizer and Pruning Shears While the Tree Recovers
Leave fertilizer unopened and pruning shears stored away while you evaluate your stressed tree. As shown, healthy green leaves remain important because they produce energy through photosynthesis, even when nearby foliage is yellowing or scorched. Fertilizer cannot correct poor drainage, damaged roots, or improper planting depth. Continue monitoring moisture and seasonal growth instead. Consider fertilizer only after identifying a specific nutrient deficiency, and leave substantial pruning to qualified professionals.
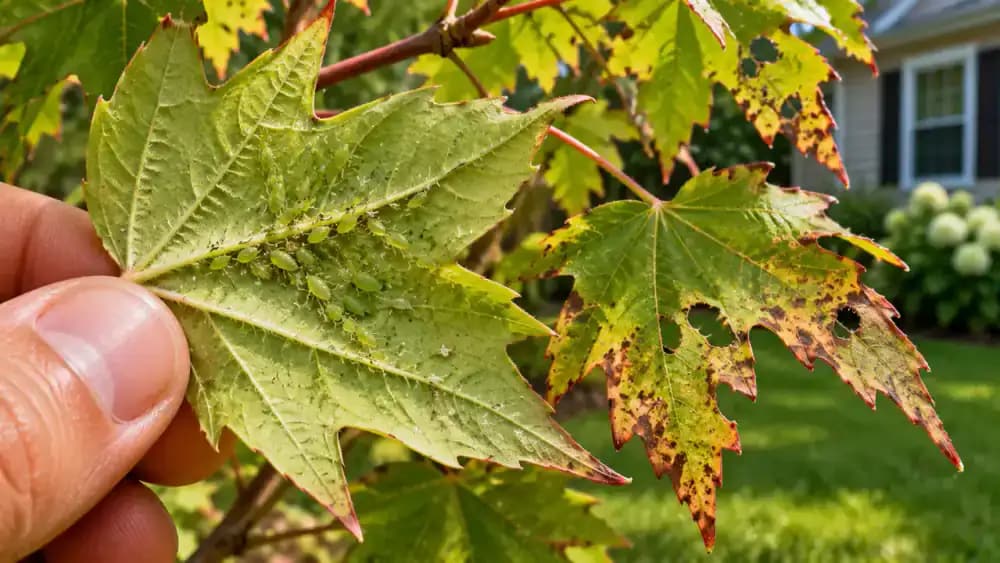
Inspect Leaves for Pests and Disease Symptoms
Use a handheld magnifying glass to examine accessible leaves, especially their undersides, without bending or removing them. As shown, look for insect clusters along leaf veins, unusual spots, webbing, and irregular chewing damage. Photograph suspicious areas and record which branches are affected. These symptoms may indicate problems unrelated to transplant stress, so avoid applying pesticides based on appearance alone. If damage spreads or remains unexplained, consult a qualified tree care professional.
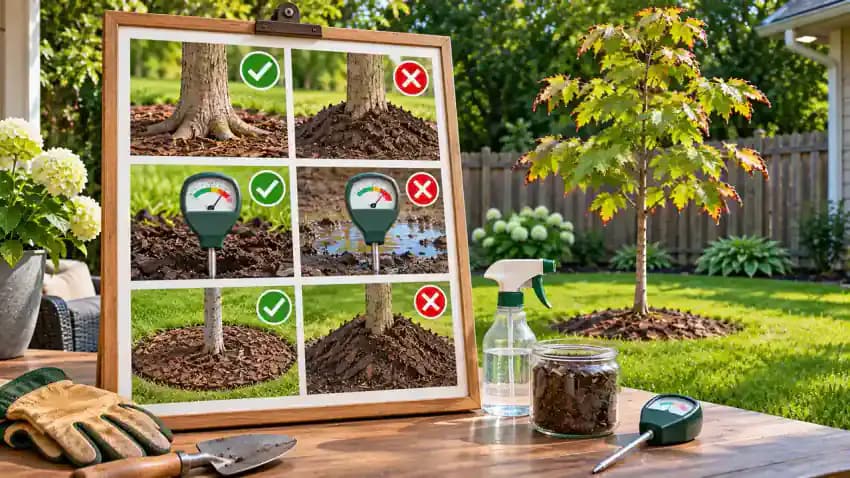
Use Your Inspection Results to Decide What Comes Next
Review your observations using the decision chart shown. Confirm whether the root flare is visible, soil moisture and drainage are appropriate, and mulch remains several inches from the trunk. Compare recent foliage photographs with your original records to identify changes. If conditions are stable and symptoms are not worsening, continue routine monitoring. If leaf damage spreads, drainage problems persist, or structural concerns develop, contact an ISA Certified Arborist instead of experimenting with treatments.
Complete Five Essential Checks for Your Stressed Tree
Use the five numbered checks shown around the young tree to guide future inspections. First, examine leaf symptoms and consider seasonal changes. Second, confirm that the root flare is visible near soil level. Third, test root-zone moisture before watering. Fourth, maintain a level mulch ring 2 to 3 inches deep, away from the trunk. Fifth, document changes and recognize warning signs requiring an ISA Certified Arborist. Avoid unnecessary treatments and root disturbance.
Keep People Clear of Hazardous Trees and Call an Arborist
If a young tree develops a noticeable lean, damaged branches, or worsening trunk damage, stop all maintenance and keep your distance. As shown, guide children and pets away from the area, restrict access when safe, and contact a qualified arborist from a protected location. Never climb, cut substantial limbs, disturb major roots, or attempt to straighten an unstable tree. Leave hazards involving overhead electrical lines to utility professionals.

Maintain Consistent Care While Your Young Tree Establishes
Review your tree care journal from a safe, level walkway and continue observing the young tree without unnecessary intervention. As shown, the root flare remains visible, with a broad, level mulch ring kept away from the trunk. Check soil moisture before watering, document seasonal changes, and avoid unnecessary fertilizer or pruning. Establishment may take months or longer, and recovery is not guaranteed. Contact an ISA Certified Arborist if concerning symptoms develop.

You planted a new tree expecting fresh growth and healthy leaves, but now its foliage is drooping, turning yellow, or falling off. Some branches may even look bare. These changes can be signs of transplant stress, a common problem when a tree struggles to adjust after its roots have been disturbed during planting. Your first instinct might be to add fertilizer, pour on more water, or cut back damaged branches. Unfortunately, those quick fixes can put an already stressed tree under even more pressure. The better approach is to identify what's causing the trouble before making changes.
The good news is that many newly planted trees can recover with proper care and patience. This guide walks you through five practical checks, including leaf symptoms, planting depth, root-zone moisture, mulch placement, and recovery progress. You'll learn how to spot common mistakes, make safe adjustments, and recognize when professional help is necessary. These checks are intended for small, accessible young trees and ground-level maintenance. Leave unstable trees, major root problems, substantial pruning, and electrical-line hazards to qualified professionals.
Where people go wrong
Overwatering a Tree That Already Has Wet Soil. Drooping leaves don't always mean a tree needs more water. Saturated soil can limit oxygen around the roots and make transplant stress worse. Before watering, check moisture several inches deep near the original root ball. Water slowly only when needed, accounting for rainfall, temperature, and soil drainage.
Piling Mulch Against the Trunk. A thick mound of mulch around the trunk can trap moisture against the bark and hide planting depth problems. Instead, spread organic mulch in a broad, level ring approximately 2 to 3 inches deep. Keep mulch several inches away from the trunk and leave the root flare visible.
Adding Fertilizer or Pruning Too Aggressively. Yellow leaves and bare branches can tempt you to fertilize immediately or cut away struggling growth. Both actions can add stress before the underlying problem is understood. Inspect the entire canopy, check soil conditions, and allow time for recovery. Leave substantial pruning and major root work to qualified professionals.
Ignoring Planting Depth and Warning Signs. A tree planted too deeply may have its root flare buried beneath soil or mulch. Gently clear loose surface material without disturbing major roots. Monitor foliage and photograph changes over time rather than expecting immediate recovery. Contact an ISA Certified Arborist if decline persists or buried trunk tissue needs assessment.

Questions people ask
Recovery depends on the tree's condition, growing season, soil moisture, and planting depth. Some trees show improvement during the current growing season, while others need additional seasonal growth cycles. Don't expect damaged leaves to become healthy again. Monitor new growth, photograph foliage periodically, and consult an ISA Certified Arborist if the tree continues declining.
Fixed it?
Get one guide like this every Thursday.