How to Remove Stains From a White Porcelain Kitchen Sink Without Scratching It
Coffee stains, yellow discoloration, and dark utensil marks can make a white porcelain sink look permanently dirty. Learn how to identify common stains, clean them gently, and protect the glossy finish without harsh scrubbing.

What you’ll need
Tap to tick things off before you start.
Why Your White Porcelain Sink Still Looks Stained
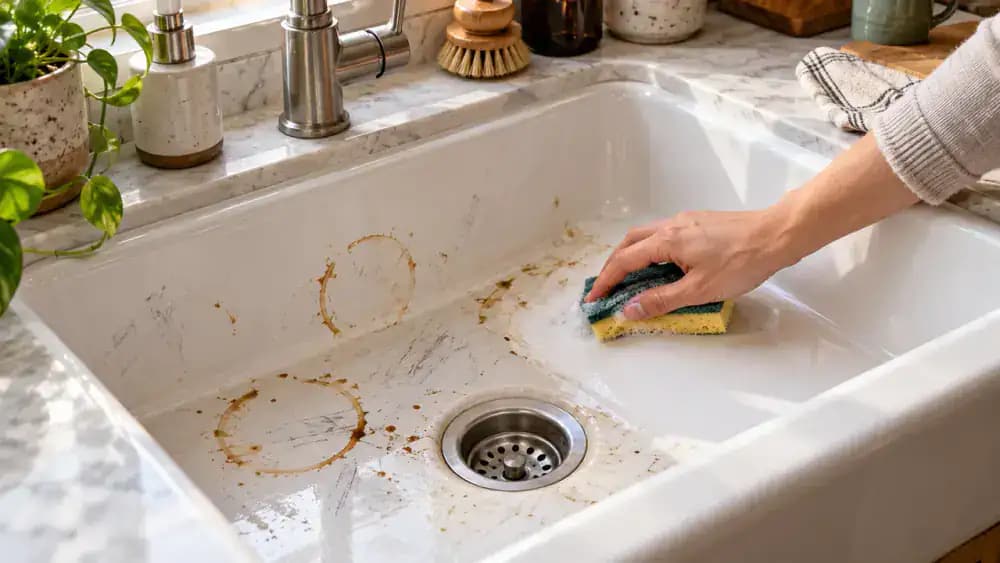
Examine the sink under natural daylight, paying attention to brown coffee rings near the drain, yellow discoloration across the basin, and gray streaks left by cookware. Gently wipe one stained area with a clean, dry microfiber cloth to see whether the marks lift easily. If discoloration remains, avoid scrubbing harder. Some marks are surface residue, while others may indicate damaged glaze. Identifying the difference helps you choose a safer cleaning approach.
Protect the Porcelain Glaze With Gentle Cleaning
Look closely at the sink's smooth, reflective surface while gently placing a soft microfiber cloth against the curved basin. The glossy glaze helps protect porcelain, but steel wool, gritty scouring sponges, and excessive pressure can scratch or dull it. Keep abrasive tools away from the sink and begin with mild cleaning methods. Before applying any cleaner, confirm the sink material and check the manufacturer's care instructions for approved products.

Identify the Stains Before Choosing a Cleaner
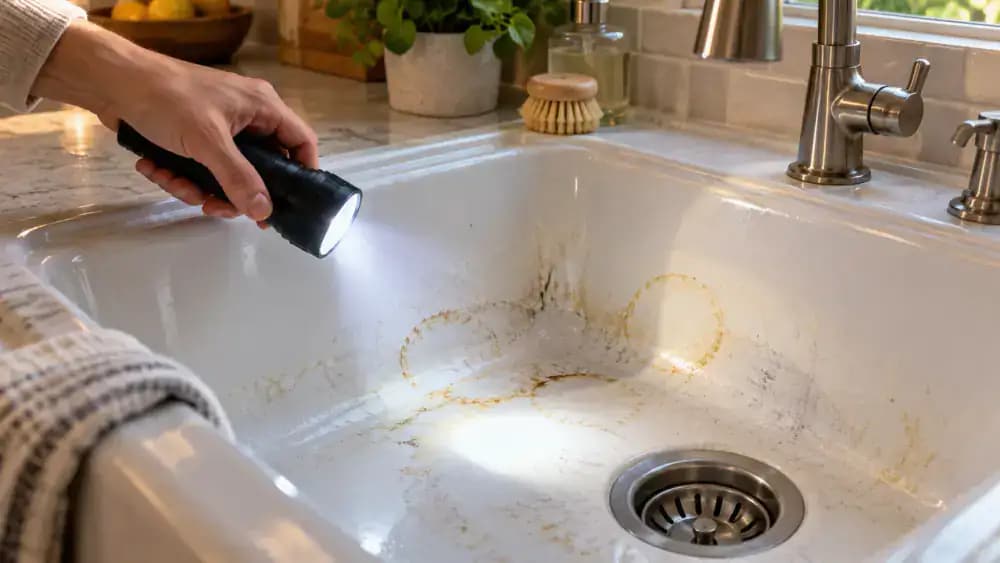
Shine a small flashlight across the sink to examine each discolored area more closely. Brown rings near the drain may come from coffee or tea, while pale yellow patches could be food residue. Thin gray streaks often result from metal cookware rubbing against porcelain. Check each mark from different angles, looking for scratches or chips. Identifying possible stain types helps you select appropriate treatments without unnecessary scrubbing or harsh chemicals.
Distinguish Mineral Deposits From Surface Damage
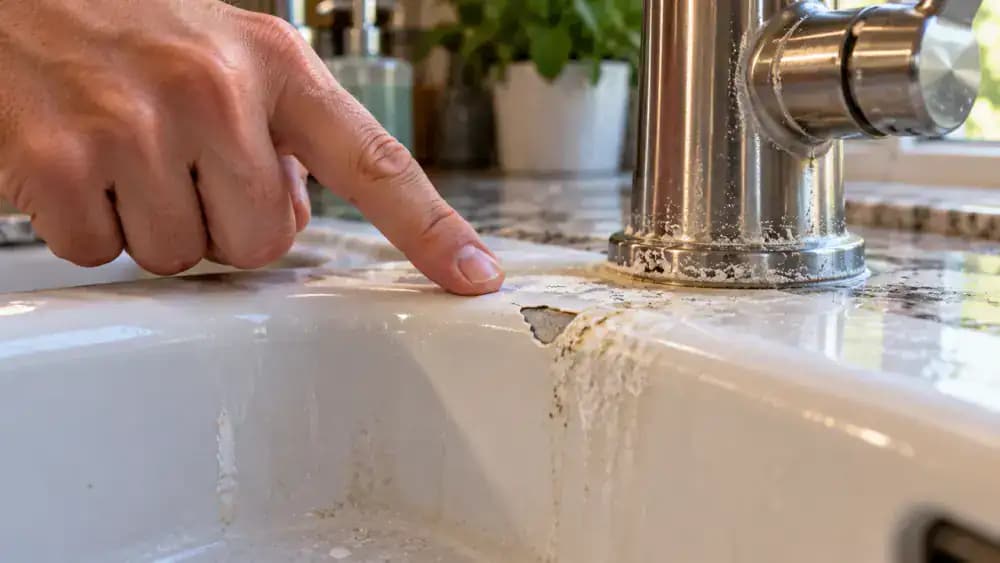
Inspect the area around the faucet and sink rim under good lighting. Chalky, matte buildup may indicate hard water minerals, while chips and scratches suggest damage to the porcelain glaze. Gently feel the edge of a suspected deposit with your fingertip, without scraping or applying pressure. Avoid touching sharp chipped edges. Check whether surrounding areas remain smooth and glossy, and remember that cleaning cannot restore physically damaged glaze.
Confirm Your Sink Material Before Cleaning
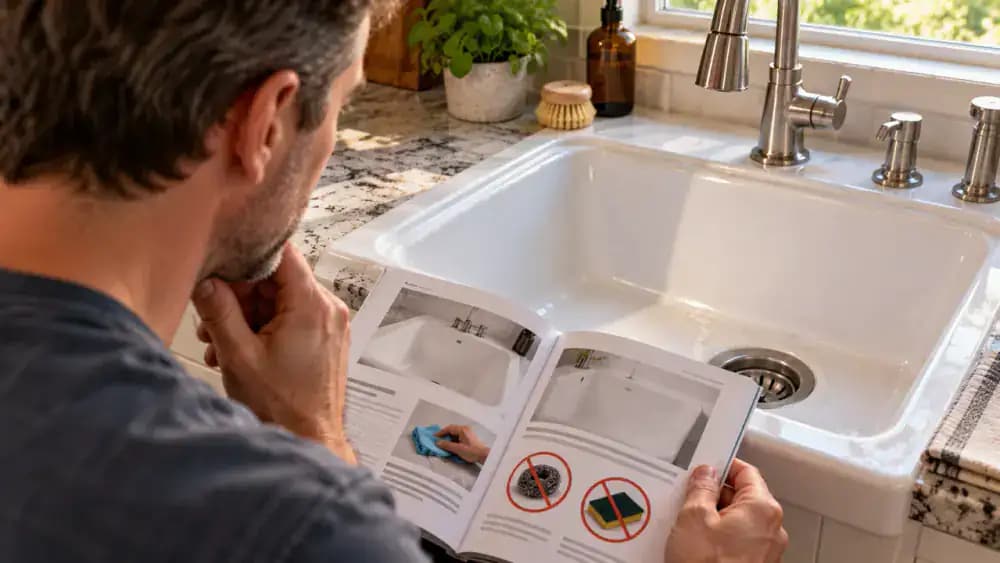
Check your sink's installation manual or manufacturer label to verify its material before applying any cleaning products. White sinks can be made from porcelain, fireclay, composite, or other materials with different care requirements. Review the manufacturer's recommended cleaners and restrictions, including warnings about abrasive products. If a label is accessible beneath the sink rim, inspect it without disassembling anything. Never assume a cleaner is safe simply because the sink looks like porcelain.
Gather the Right Supplies for Gentle Cleaning
Arrange your cleaning supplies on a clean, dry countertop beside the sink. Set out mild dish soap, a small container of warm water, a soft nonabrasive sponge, and two clean microfiber cloths. Keep a manufacturer-approved porcelain cleaner nearby for stubborn stains that remain after basic washing. Use one cloth for cleaning and the other for drying. Leave all cleaner bottles closed until needed, and never mix household cleaning chemicals.

Clear the Sink and Remove Loose Debris
Carefully lift dishes and utensils out of the basin and place them on a nearby dish rack. Remove any loose sink mats, accessories, and removable drain strainers. Use a folded paper towel to collect food scraps and crumbs, paying particular attention to corners and the drain opening. Dispose of debris in the trash rather than washing it down the drain. Removing loose particles helps prevent accidental scratches during cleaning.

Rinse the Porcelain Sink With Warm Water
Use a pull-down faucet sprayer or a gentle stream of comfortably warm water to rinse the entire porcelain basin. Start at the upper walls and guide the water down the curved sides toward the open drain. Pay attention to corners where dust and small particles may collect. Avoid boiling water or sudden temperature changes. This initial rinse removes loose residue and prepares the surface for gentle washing with mild dish soap.

Prepare a Mild Dish Soap Cleaning Solution
Pour approximately 2 cups of comfortably warm water into a clean glass bowl beside the sink. Add three drops of mild liquid dish soap, then stir gently with a clean silicone spoon until the soap disperses and small bubbles appear. Avoid adding other household cleaners or abrasive powders. This diluted solution helps loosen everyday grease and surface residue without harsh scrubbing, making it suitable for the initial cleaning of manufacturer-approved porcelain surfaces.
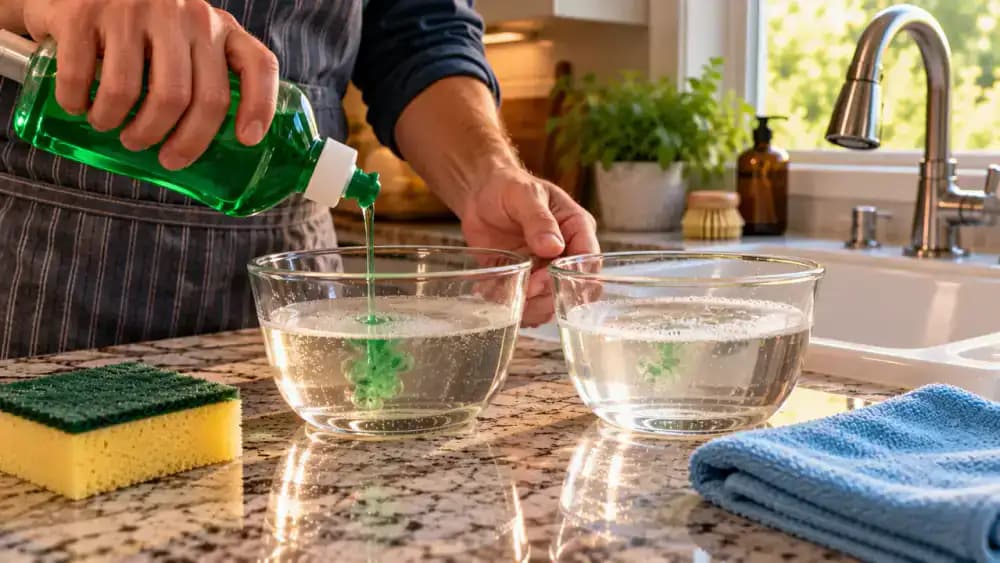
Gently Wash the Entire Porcelain Basin
Dip a clean, soft sponge into the prepared dish soap solution and squeeze out excess liquid over the bowl. Starting at the upper rim, wipe the porcelain with smooth, overlapping strokes, working down the sides toward the basin floor. Apply light pressure and keep the sponge damp throughout cleaning. Rinse the sponge if it collects debris, since trapped gritty particles could scratch the glaze. Leave stubborn stains for later spot treatment.

Clean Around the Drain and Tight Corners
Fold a clean microfiber cloth over your fingertip and lightly dampen it with the prepared dish soap solution. Gently wipe around the stainless steel drain rim, following its circular edge to loosen trapped grease and food residue. Move to the basin corners and carefully clean where the walls meet the floor. Use short, controlled movements without pressing hard. Avoid sharp tools or scraping, which could damage the porcelain glaze.

Rinse Away Soap and Check Remaining Stains
Direct a gentle stream of warm water across the porcelain walls, basin floor, and drain rim until all visible soap residue washes away. Pay special attention to corners where suds can collect. Turn off the faucet and use a fresh microfiber cloth to dry one section containing a coffee stain. Examine the dry surface under good lighting to identify remaining discoloration. Focus later treatments only on areas that still need attention.

Identify Stubborn Stains That Need Spot Treatment
Examine the dried porcelain for brown coffee or tea stains that remain after the initial wash. Note each stain's location, size, and boundaries before choosing a treatment. Place a small tape marker on the countertop beside the affected area, never directly on the porcelain. Compare the mark with a clean microfiber cloth for scale. Review the manufacturer's approved cleaning instructions and prepare to treat only the stained areas.
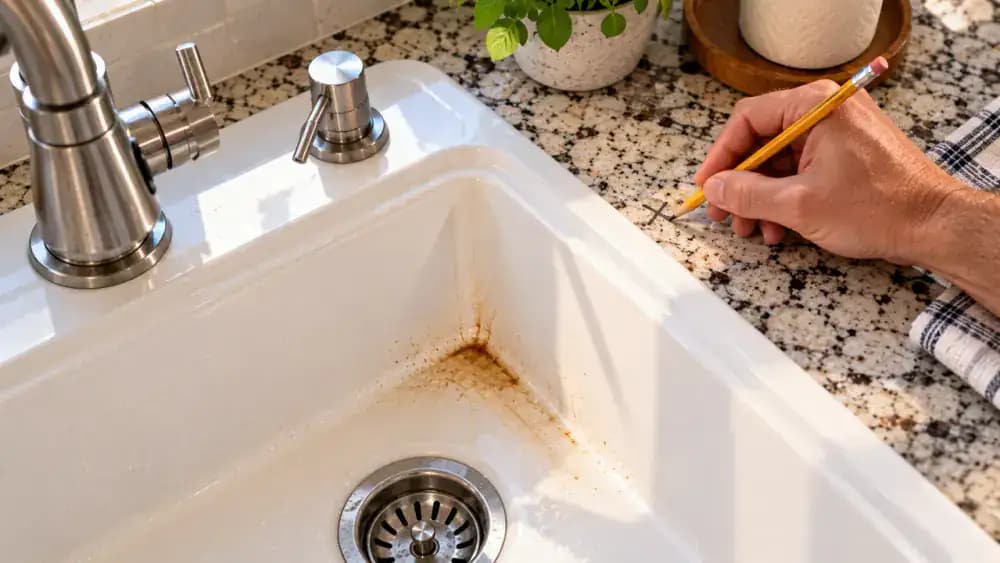
Test a Porcelain-Safe Cleaner Before Spot Treatment
Compare the cleaner's label with your sink manufacturer's care instructions to confirm compatibility with glazed porcelain. Read the application and rinsing directions carefully. Apply a small amount of approved cleaner to a soft microfiber cloth, then gently test an inconspicuous area near the rear corner. Rinse and dry as directed, checking for dullness or discoloration under consistent lighting. Stop if the finish changes, and never mix household cleaning chemicals.

Apply Porcelain-Safe Cleaner to Coffee and Tea Stains
After confirming the test area shows no visible damage, dispense a small amount of manufacturer-approved porcelain cleaner onto a fresh microfiber cloth. Gently spread the cleaner over the remaining coffee or tea stain using short, smooth strokes and minimal pressure. Keep the application within the discolored area rather than coating the entire basin. Follow the product's recommended contact time exactly, and never mix the cleaner with other household chemicals.
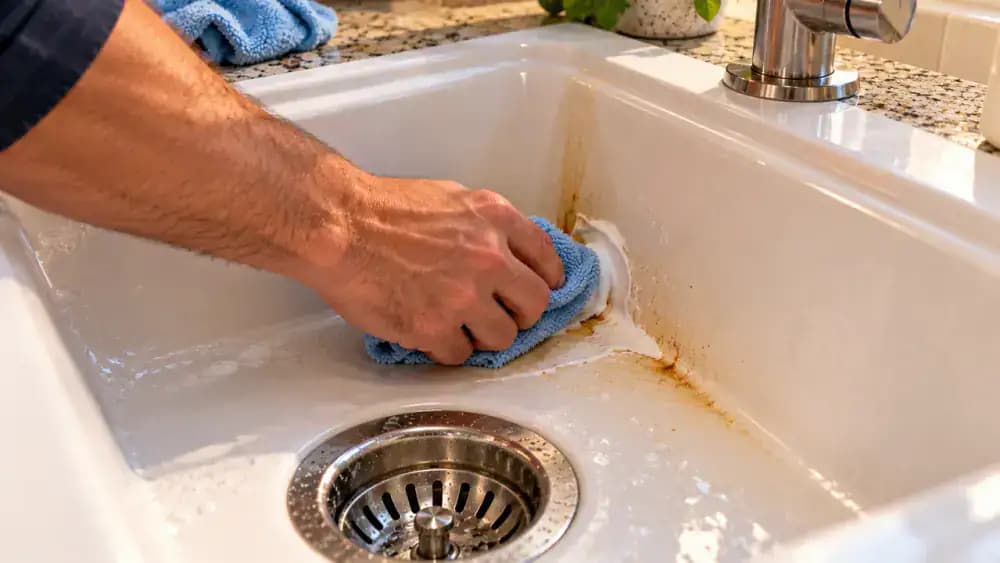
Gently Lift Coffee Stains Without Hard Scrubbing
Once the approved cleaner has remained on the stain for the recommended contact time, gently wipe the treated area with a clean, soft microfiber cloth. Use small, controlled strokes and minimal downward pressure, allowing the cleaner to loosen surface residue. Avoid rubbing repeatedly or pressing harder if brown discoloration remains. Lift the cloth and inspect the area under good lighting. Rinse thoroughly according to the product instructions before considering another treatment.
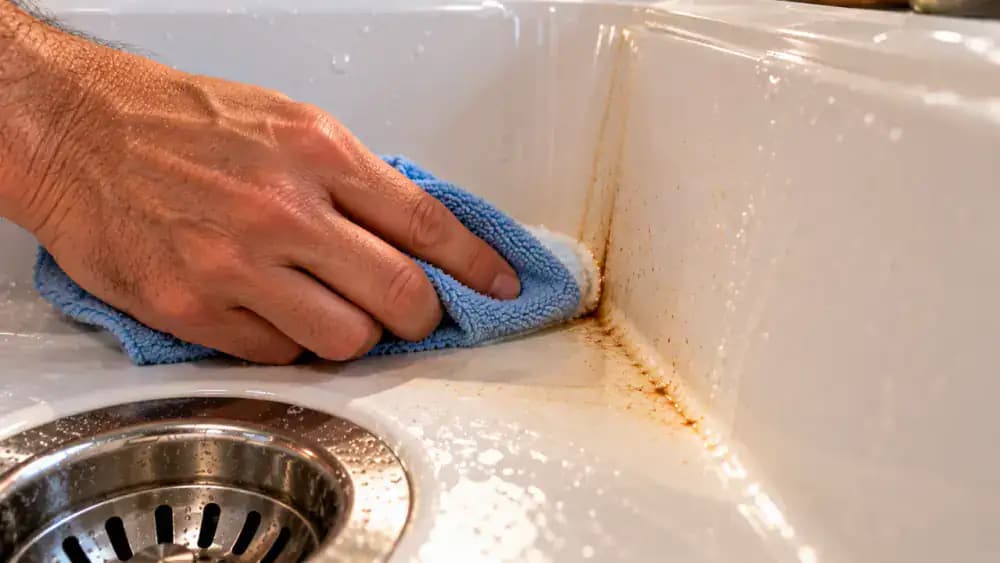
Rinse the Treated Stain and Inspect the Porcelain
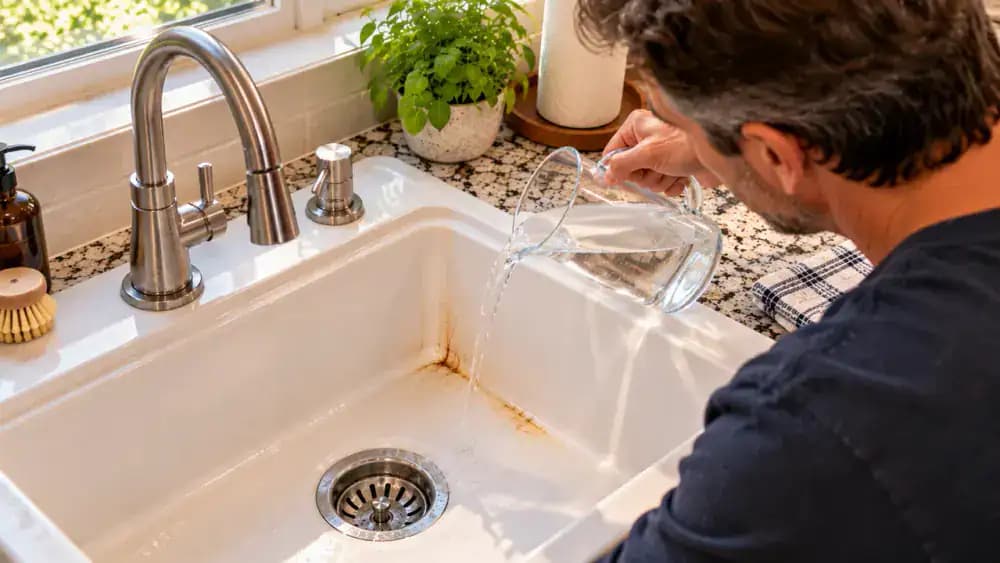
Pour clean, lukewarm water from a small pitcher over the treated coffee stain, allowing the water to carry cleaner residue toward the drain. Follow the product's rinsing instructions to remove all remaining cleaner. Gently dry the area with a fresh microfiber cloth using light dabbing movements. Examine the porcelain under consistent lighting, checking whether discoloration has faded and the surrounding glaze remains smooth and glossy. Avoid further scrubbing if damage appears.
Check Whether the Stain Needs Another Treatment
Examine the dried coffee stain under consistent lighting and compare its appearance with the surrounding porcelain. If discoloration has faded and the glaze remains smooth and glossy, check the approved cleaner's label to see whether another application is permitted. Keep the cleaner closed while reviewing the instructions. If the stain shows little improvement, stop rather than scrub harder. Persistent marks may indicate mineral buildup or damaged glaze requiring further assessment.

Identify Dark Metal Transfer Marks on Porcelain
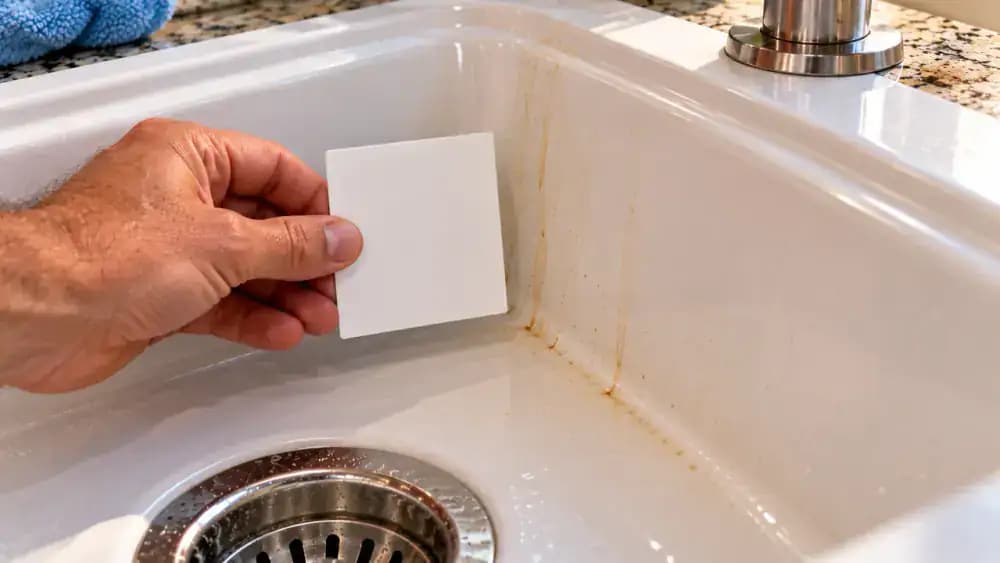
Examine the thin gray or black streaks where pots, pans, and utensils frequently contact the porcelain. Hold a clean white reference card near the marks without touching the glaze to make their shapes easier to see. Metal cookware can leave surface transfer marks that resemble scratches, but appearance alone cannot confirm the cause. Inspect the surrounding finish under good lighting, and avoid dragging metal objects across the sink.
Choose a Porcelain-Safe Cleaner for Dark Metal Marks
Review your sink manufacturer's recommendations for removing metal transfer marks, then compare them with the cleaner's label to confirm compatibility with glazed porcelain. Apply a small amount of approved cleaner to a fresh microfiber cloth and test an inconspicuous area first. Rinse and dry the test spot according to product directions, then inspect for dullness or discoloration. Avoid steel wool, abrasive powders, and mixing household cleaning chemicals.

Gently Remove Dark Metal Transfer Marks
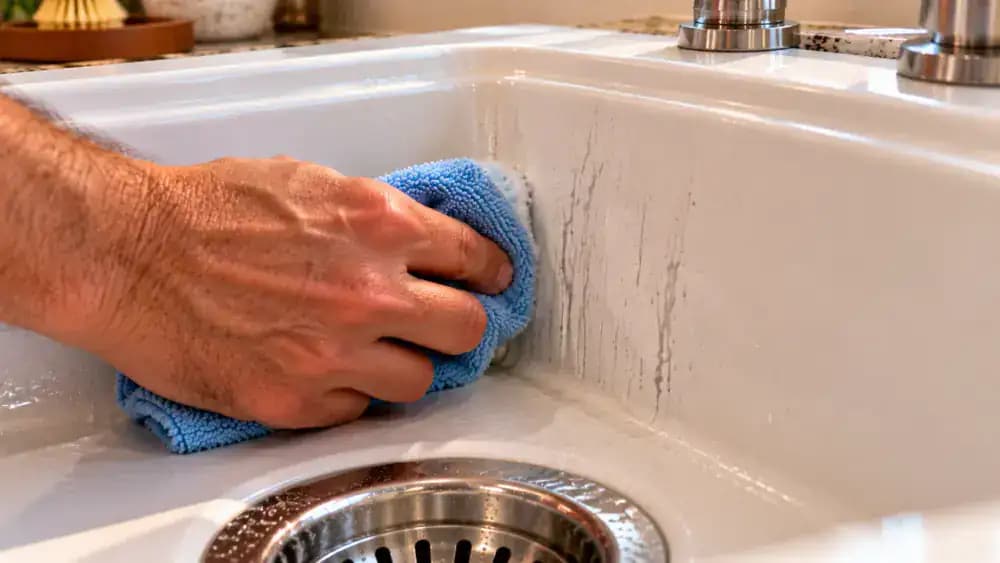
Apply a small amount of the previously tested, manufacturer-approved cleaner to a fresh microfiber cloth. Gently wipe one gray metal transfer mark at a time using short, controlled strokes and minimal pressure. Lift the cloth occasionally to inspect the porcelain for changes in gloss or texture. Never use steel wool, abrasive pads, or scraping tools. Stop immediately if the glaze appears dull or scratched, and prepare to rinse as directed.
Rinse Dark Marks and Stop Before Damaging the Glaze
Rinse the treated gray streaks thoroughly with a gentle stream of lukewarm water, following the cleaner's instructions to remove all residue. Pat the area dry with a fresh microfiber cloth, then inspect the porcelain under consistent lighting. If a faint gray line remains, avoid scrubbing harder or immediately switching products. Some marks may be scratches rather than removable metal transfer. Stop cleaning if further treatment could damage the glaze.

Give the Entire Porcelain Sink a Final Rinse
Use the pull-down faucet sprayer to rinse the entire porcelain sink with a gentle stream of lukewarm water. Start along the upper rim, then guide the water across both interior walls, curved corners, and basin floor toward the drain. Pay extra attention to previously treated coffee stains and gray marks where cleaner residue may remain. Continue rinsing until no visible residue remains, following product instructions before moving to the final inspection.

Dry the Porcelain Sink to Prevent Water Spots
Unfold a fresh, dry microfiber cloth and gently wipe the porcelain sink, starting at the upper rim and working down the interior walls toward the basin floor. Use broad, light strokes to absorb moisture without rubbing aggressively. Pay special attention to curved corners and the area surrounding the drain, where water often collects. Replace the cloth if it becomes saturated. A completely dry surface makes remaining stains easier to inspect.

Inspect the Dry Porcelain for Remaining Stains and Damage
Switch on bright, even lighting and carefully examine the completely dry porcelain sink. Look for lingering brown stains, gray streaks, chalky mineral deposits, and areas where the glaze appears dull, scratched, or chipped. Use a small inspection mirror to view curved surfaces from different angles without touching them. Compare suspicious marks with the surrounding glossy finish. If discoloration persists after gentle cleaning, consider professional evaluation rather than aggressive scrubbing or stronger chemicals.
Recognize When Stains May Be Permanent Glaze Damage
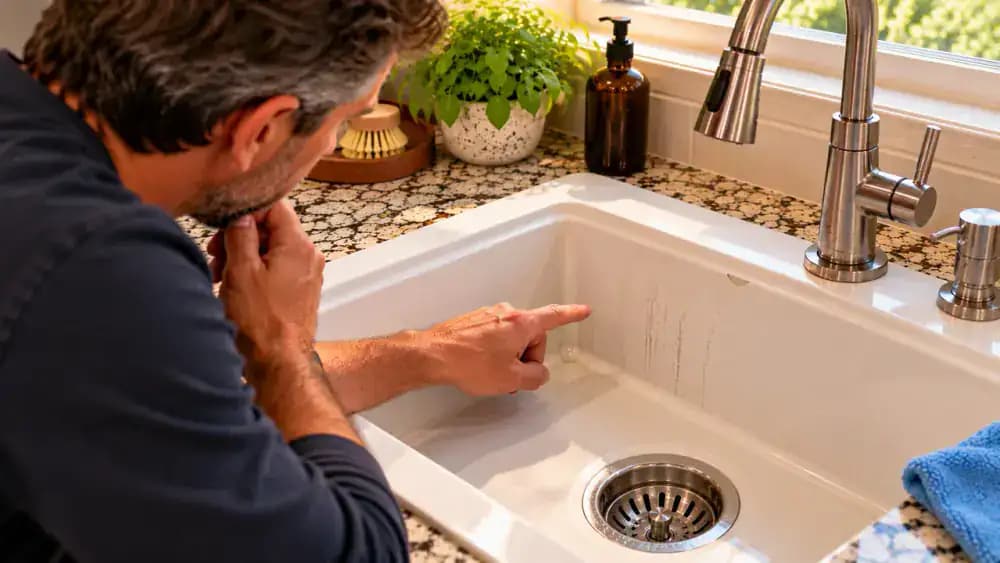
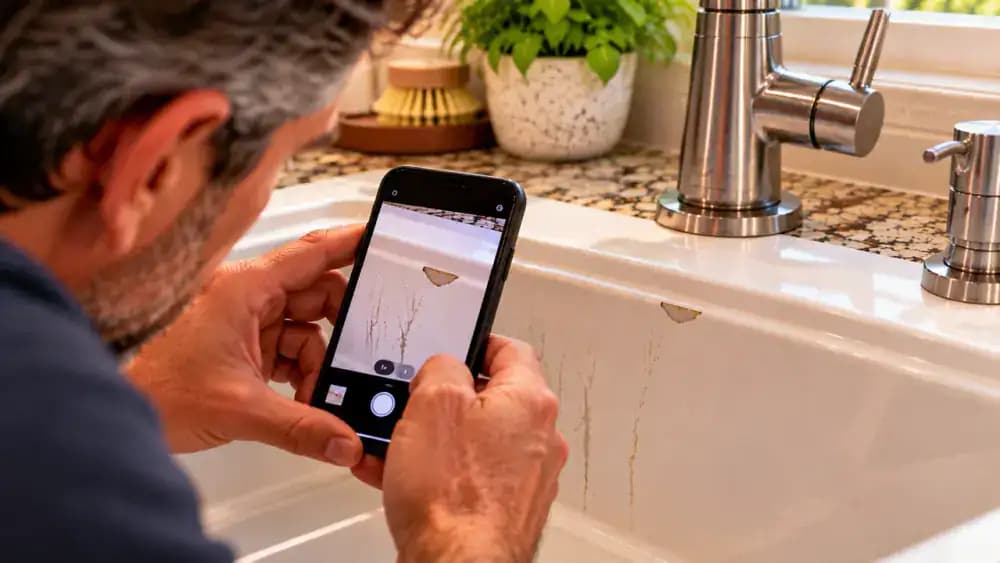
Compare the smooth brown discoloration with the chipped area along the porcelain sidewall under consistent lighting. A stain on glossy, intact porcelain may be removable, while an irregular chip, scratch, or dull patch can indicate surface damage. Hold a clean pointer above each mark without touching the glaze. Photograph suspicious damage for reference, then review the manufacturer's care guidance. Stop cleaning and consult a qualified repair professional if the finish appears compromised.
Prevent New Porcelain Sink Stains With Prompt Spill Cleanup
Rinse coffee, tea, tomato sauce, and other colorful food residue from the porcelain sink as soon as possible. Use a gentle stream of lukewarm water to wash spills toward the drain before they sit on the surface. For stubborn splashes, gently wipe with a soft microfiber cloth and mild dish soap, then rinse thoroughly. Dry the cleaned area with a separate cloth to reduce water spots and prevent residue buildup.

Build a Simple Weekly Porcelain Sink Cleaning Routine
Wash your porcelain sink about once a week, or more often when everyday residue builds up. Dip a soft, nonabrasive sponge into warm water mixed with mild dish soap, then gently wipe the basin using broad, overlapping strokes. Rinse thoroughly with clean, lukewarm water and dry with a fresh microfiber cloth. Keep metal cookware on a padded countertop mat rather than resting it against the porcelain glaze for extended periods.

Protect the Porcelain Glaze With Better Daily Habits
Carefully lift heavy pots and pans out of the sink instead of sliding them across the porcelain glaze. Place cookware on a padded countertop mat, and consider a properly fitted sink protector approved by the manufacturer. Keep the drain unobstructed and clean beneath the protector regularly. Store steel wool, gritty powders, and stiff scrubbers away from the sink. Use soft cleaning tools, and never mix household cleaning chemicals.

Keep Your White Porcelain Sink Clean Without Scratching
Maintain your porcelain sink by following a gentle cleaning routine. Identify stains, confirm the sink material, and wash with mild dish soap and a soft sponge. Use manufacturer-approved cleaners only when targeted treatment is necessary. Rinse thoroughly, then dry with a clean microfiber cloth before inspecting the glaze. Avoid abrasive scrubbers and never mix household cleaning chemicals. Prompt spill cleanup and regular maintenance help preserve the sink's glossy finish.

A white porcelain kitchen sink can make your kitchen look bright and clean, but coffee stains, yellow discoloration, and dark marks from pots and utensils can quickly spoil that appearance. Even after a thorough wipe-down, stubborn stains may remain around the drain, along the basin, or in frequently used areas. The temptation is to grab a rough scrubber and apply more pressure, but aggressive cleaning can scratch or dull the porcelain glaze, leaving the surface harder to maintain over time.
Fortunately, many common sink stains can be treated with a gentler approach. The key is knowing whether you're dealing with food residue, metal transfer, mineral buildup, or actual surface damage. This guide walks you through identifying stains, washing with mild dish soap, treating stubborn spots with a porcelain-compatible cleaner, and checking the finish without unnecessary scrubbing. Before starting, confirm your sink material and follow the manufacturer's care instructions. Avoid abrasive cleaning tools, and never mix household cleaning chemicals.
Where people go wrong
Scrubbing Stubborn Stains With Abrasive Pads. Using steel wool, rough scouring pads, or excessive pressure to remove coffee stains and dark marks can scratch or dull the porcelain glaze. Start with a soft sponge or microfiber cloth instead. If a stain resists gentle cleaning, stop scrubbing and reassess the surface.
Using Cleaners Without Checking Porcelain Compatibility. Applying a strong cleaner without confirming the sink material or reading the manufacturer's recommendations can damage the finish. Choose a porcelain-compatible product, follow its label directions, and test a small, inconspicuous area first. Never mix household cleaning chemicals, even when stubborn discoloration remains.
Treating Metal Marks and Damaged Glaze Like Ordinary Stains. Dark utensil marks, mineral deposits, and scratches can look similar but may require different treatment. Repeatedly scrubbing a mark that is actually damaged glaze will not repair the surface. Inspect the area carefully and use only manufacturer-approved treatments for suspected metal transfer.
Skipping the Final Rinse and Drying. Leaving cleaner residue or water on the sink after treatment makes it harder to judge whether discoloration remains. Rinse the entire basin thoroughly, including corners and the drain area, then dry with a clean microfiber cloth. Regular drying also helps limit visible mineral deposits.

Questions people ask
Start by confirming your sink is porcelain and checking the manufacturer's cleaning recommendations. Rinse the basin with warm water, then gently wipe it using diluted mild dish soap and a soft sponge or microfiber cloth. Rinse thoroughly before treating remaining stains with an approved porcelain cleaner.
Fixed it?
Get one guide like this every Thursday.